Xenserver Has Terminated the Upload of the Virtual Disk Unidesk Applayering
When yous recollect nearly optimizing your Digital Workspace, you'll probably think about several things. Ane of the almost time-consuming parts of managing and maintaining a Citrix Virtual Apps and Desktops – XenApp and XenDesktop – whether it'south a P rovisioning Southward ervices or Motorcar Cosmos Services on-premise Hybrid and/or Full Cloud environment – is definitely the application maintenance of the golden image.
Citrix showed a dainty instance how all the processes come together in the new Digital Workspace, at last year's Synergy . T aking advantage of new innovative solutions will optimize the maintenance process and save you a lot of fourth dimension ! In fact, yous'll have more fourth dimension left to do something more fun – for example, around innovation the end-user experience!
"Combining the strength of the App Layering production with the optimizations through Citrix Workspace Environment Management and the Citrix Optimizer tools put the ne w Digital Workspace on steroids " – Christiaan Brinkhoff
Using the layering technology combined with the Cloud , definitely simplifies the process effectually the Virtual Desktop. Therefore, you'll keep the prototype clean and create the possibilty to instantly add virtual applications without rebooting the machines. In kingdom of the netherlands, we call that a WIN – WIN for both! And go on in mind, App Layering is the technology, non the production.
However, the ELM server can now be build-up in Azure Infrastructure-As-a-Service through Remote (Azure) PowerShell , and the unlike OS/App/Platform layers volition be placed in the Azure storage account. The Function 365 User Layer are placed on the aforementioned separate SMB / UNC share as the elastic layers, therefore now for the user settings and folders. I'll talk more (in-dept) near the technology subsequently on in the commodity!
It'south for those several reasons, that I'd decided a blog on the App Layering production. Therefore, since it supports Microsoft Azure Resources Managing director and Office 365 (Outlook Caching) User layers, I couldn't wait whatsoever longer.
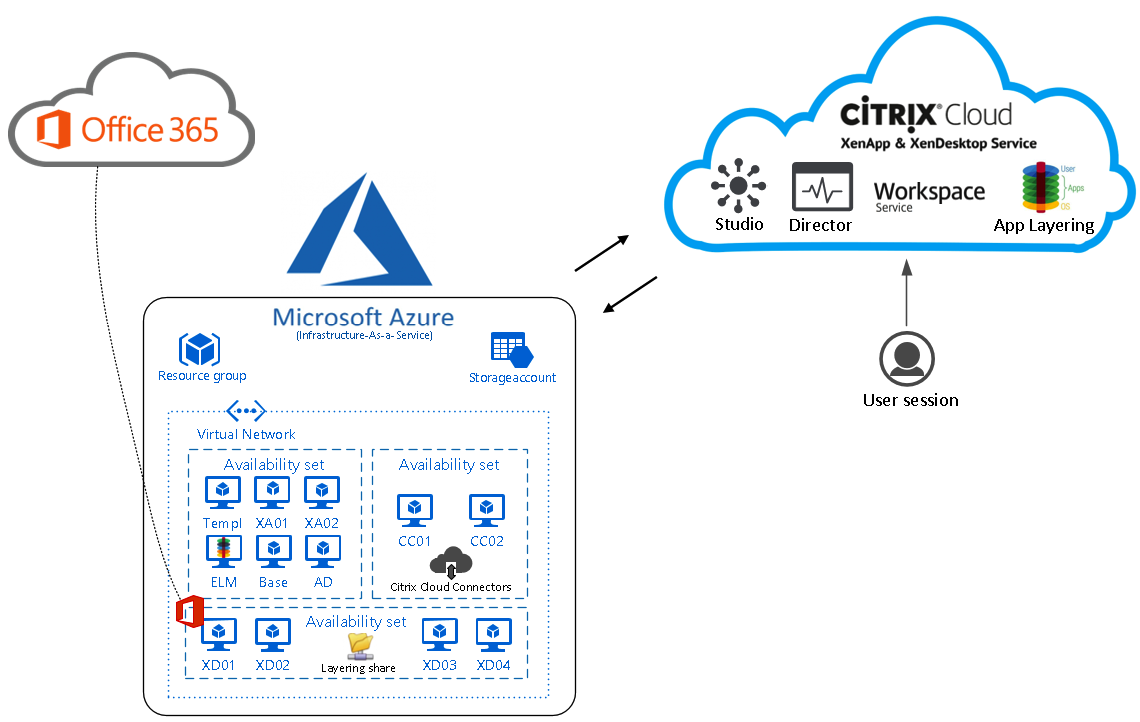
In this commodity – I'll walk you through on how you lot can install and configure the latest Citrix Cloud – Citrix App Layering 4.8 version with virtualized apps delivered to your XenApp and XenDesktop Service environment in Microsoft Azure.
I'll also go through the new Office365 User Caching Layering dissimilar configuration concepts. Hopefully y'all'll understand w hy App Layering is something yous'll need in your day-to-twenty-four hours work – to make life much easier as a Consultant in the Future Workspace!
Note: The User Layering feature is currently only supported for Windows 7 and Windows ten, such as XenDesktop and VMware Horizon VDIs!
Enjoy reading!
Table of Contents
Click on the title to go forwarded in the article:
- Register for a Citrix Cloud trial account
- How to become started with App Layering in Citrix Cloud
- Deploy the Cloud Connector(southward) inside Microsoft Azure
- Deploy the Appliance in Azure Infrastructure-Every bit-a-Service
- Connect to the Appliance in Azure from the Citrix Deject
- Change the ELM Portal Time out setting
- Configure a Directory Junction – Connect to Active Directory
- Add a SMB file share for Elastic and User Layering
- Create the Base – Bone Layer – Virtual Machine in Azure
- Extra: Citrix Optimizer Supplement for App Layering
- Create an Azure Connector configuration
- Create the Server 2016 OS layer
- Create an Azure ARM – RDSH platform layer
- Creating Application Layers – Adobe Reader
- Creating Application Layers – Microsoft Office Professional 2016
- Create the Server 2016 Paradigm Template
- Create the XenApp and XenDesktop Service Machine Itemize in Citrix Cloud
- Perform a (App Layering) Citrix Session
- Activate the Office365 (caching) User Layers for VDI
- Office 365 User Layering – background insights
- Actress: Create an Elastic Layer
- Extra: Enable Labs Features
Did y'all know?
- It at present also supports the Caching of Office 365 – Commutation Online mailboxes, through the new Office 365 User Layer feature for Windows 7 and 10 (64 bits) non-persistant VDIs?
- You tin use App Layering from within the Citrix Cloud also to manage on-premise workloads
- It as well supports VMware view Composer equally Provisioning method?
- A Hybrid connection, such as an Azure ExpressRoute, NetScaler SD-WAN or site-to-site connection betwixt your corporate and Azure networks is recommended for accessing the Direction Console on the appliance
- Using Premium Storage is strongly recommended for the ELM and Layering images to accelerate the speed
- App Layering is costless to use for Enterprise and Platinum customers for on-premise environments or Infrastructure-As-a-Service implementations?
- Information technology also supports XenServer, Microsoft Hyper-V, Nutanix and VMware vSphere hypervisors?
- The direct link to the Citrix Cloud App Layering service is https://layering.cloud.com
- Information technology can layer any application, there is no need for applications to be installed on the Os paradigm itself. This exceeds the number of supported virtualized applications when using App-V for example. Note: With the layering engineering, you've got no possibility for isolation / bubble apps, which you lot can provide with Microsoft App-V – Citrix App Layering merges the layers without isolation.
- Underlying applications should be layered showtime, so selected equally prerequisite layers when you go to create a layer for the subsequent application
- Citrix will deliver better support and performance when using applications similar Part 365 in the near time to come
- A file share server in Azure will perform significantly amend than an on-premise file share. Fifty-fifty though the Azure file share feature is not supported, you can use an existing network file share or create a new file share in the Azure surround.
- To deploy and configure the App Layering appliance, you will need the credentials for an account that has administrative access to your Azure subscription.
- App Layering is designed to work with Azure'due south new Resource Management (ARM) model. Information technology does non support Azure'due south Classic deployment model. All resources such as virtual network, file shares and Bone machines that App Layering will piece of work with must be created with Azure Resources Manager.
- The App Layering apparatus uses local storage for temporary files and finalized layers. The more layers you create, the more infinite you lot demand. However, if you run depression on space, you can expand the size of the current deejay, or add other disks to the appliance when needed.
- The file share connected to the apparatus is used for upgrades, Elastic Layers, and cross-platform publishing. This space is like shooting fish in a barrel to expand, if needed
What's new in App Layering 4.x
This release includes the following improvements.
- Windows 10 version 1709 support. Windows 10 version 1709 is at present supportedwhen Shop Apps are disabled. Use the script included in our Os Motorcar Tools package to turn off Shop Apps. Because Store Apps must be disabled, nosotros can only back up Windows ten editions where this is possible to do: Enterprise and Pedagogy, only non Professional person. If y'all have been using Store Apps on their 1607 setup, they will have to re-create their App and Platform layers from scratch after upgrading to 1709 and disabling Store Apps.
- Improved support for PVS on Hyper-Five and vSphere. This release includes stability improvements when using PVS to stream images on Hyper-Five or vSphere systems peformance. (UNI-61938, UNI-65218)
VDILIKEAPRO results on Application Layering
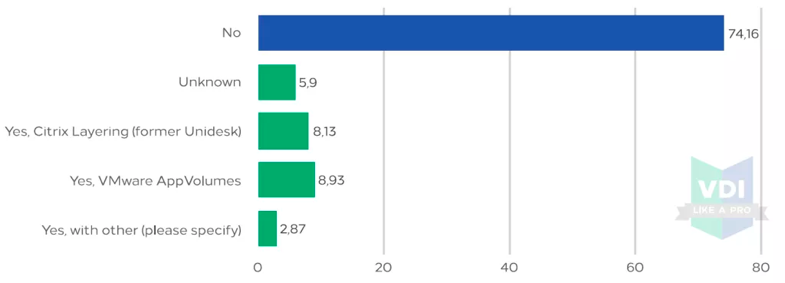
You'll will detect interesting results on application virtualization , i n the awesome VDILIKEAPRO Community survey of last year. I would like to share 3 results around awarding layering, which I found interesting, regarding this commodity.
Information technology's interesting to see that it'due south yet in the starting phase – discovery phase . Therefore, I think personally that people aren't aware of the solution even so – or just haven't got the knowledge effectually the Layering technology. I'll think that this modify in the virtually 1 or 2 years, which you likewise tin see in the survey results of question number iii. Hope that this article will solve this a chip…
Interested in the consummate survey? Download it for free here.
"Do yous currently use an awarding layering solution in VDI/SBC?"
"How are Windows Os and applications installed, updated and managed?"
"Nosotros are pleased to see that IT Admins are steering clear from making manual changes to their Master images. This labor intensive and error decumbent way of working can seriously impact the performance and uptime of your environs, while enough of alternatives already exist that can automate these tasks."

"What are your virtually important Workspace/EUC initiatives for 2017/2018? (Multiple option)"
Quite interesting numbers if you ask me. I surely look that this number will grow even further in 2018 – 2019. I see App Layering as i of the essentials parts of the new Digital Workspace – or also chosen Workspace 2020 – 2022 . Migrating to the Cloud doesn't mean elevator ing -and-elevator ing on-premise workloads to the Cloud. It likewise includes optimization – taking total advantage of all the new services that the Cloud can deliver – with the main goal to optimize processes. That's where the turn a profit can be reached on long term!

So, what it Citrix App Layering?
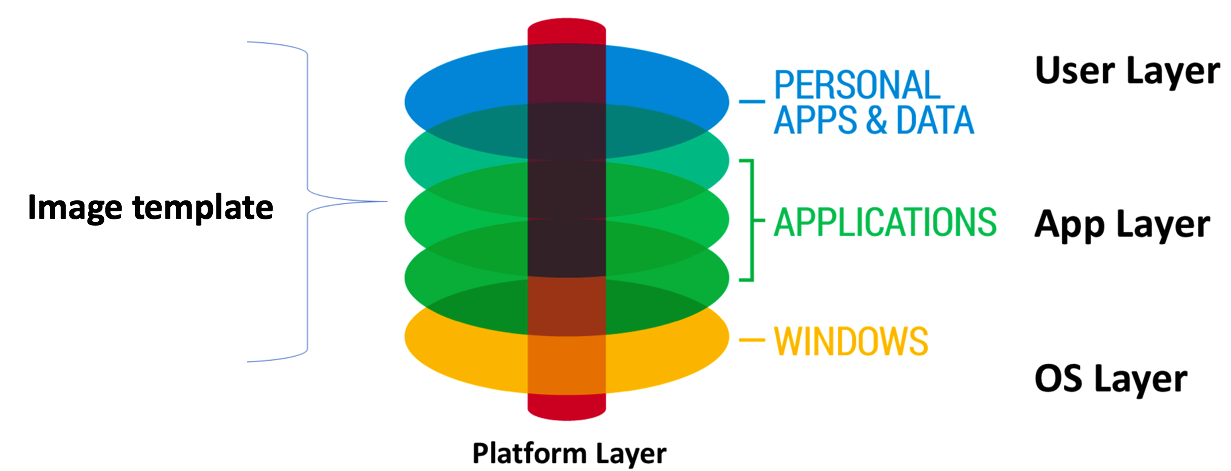
Citrix App Layering puts the applications separate from the OS and splits it into three principal layers. Each layer is stored as a virtual disk. The base (Bone) layer contains the Os. The App layer is where the awarding files and registry keys are stored. An at terminal, t he User layer where the user data, including profiles, resides. Continue reading to learn more almost the technology…
The Layered images agree the following 4 layers:
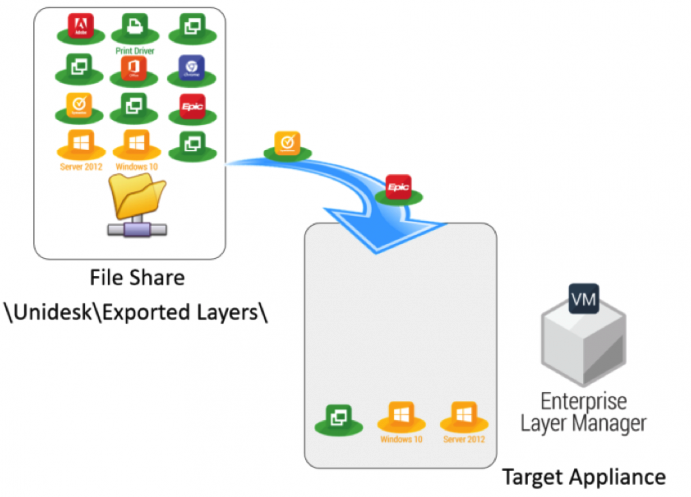
 Enterprise Layering Manager
The Enterprise Layer Manager or (short name) ELM, is a virtual appliance that coordinates communication in the App Layering environment and manages copies of your layers and Image Templates. Based on CentOS, the ELM hosts the App Layering Direction Console.
This machine will be created in Microsoft Azure Infrastructure-every bit-a-Service and centrally managed from the Citrix Cloud through the Citrix Deject Connectors.
Note : It's also possible to managed directly through the Private IP Address of the ELM server in Azure without using the Citrix Cloud.
Image templates
With image templates, (or also known as layered images) you have mu ltiple images, like for example, Windows 2016 , XenApp, Office 2016 Professional person and Adobe Reader, which you can join in one template image. Just see it equally a "golden" deejay . The XenApp and XenDesktop gilt MCS / PVS images tin be make clean subsequently all, so no application needs to be installed in the images (the left-overs from App-V). You tin use the layered images for the cosmos of the Machine Catalog, by applying the Machine Creation Service imaging technology from inside the Citrix Cloud.
Notation : Application Layers are limited and are a dependency per Operating System. It might piece of work, therefore it is not possible through the ELM console to apply apps between different Operating Systems.
Platform Layers
Citrix Awarding Layering uses a Platform Connector, which y'all can use to communicate with different hypervisors and dissimilar provisioning mechanisms in gild to put the advisable drivers in the epitome and copy this to the target platform. It makes it as well possible to hands and efficiently move apps between on-premise and the Cloud and vice versa!
OS Layers
The Os layer is the Operating Organisation image (gilded image), the fundament. Which is used as default starting point for your image template. Prepare for example, a Windows Server 2016 image with updating the OS and install the VDA and Workspace Environment Agent software. From that betoken – App Layers volition exist created, then the Bone Layer volition stay clean.
App Layers
An application layer contains the registry and filesystem information for 1 or more applications. An application layer tin contains single or multiple applications within it. It could also simply be a file or registry changes with no awarding installed.
User Layers
T his layer will exist user specific and incorporate changes fabricated to the user environment. These changes include everything from user profile changes to user installed applications. This is a new feature which tin include the user profile in non-persistent scenarios, such as on Pooled VDIs or XenApp read-only disk deployments. The files will be mounted to a VHD file, which as well holds the Local Outlook folder, what makes it possible to cache and Roam the Office 365 – Exchange Online OST file to a User Layer! More about that at the stop of this article!
Rubberband Layers
Elastic layers are layers (images) that get active when users log in. This ways the layers are accessed based on admission rights, like being a member of a domain grouping for example. The layers are accessible from a simple n etwork share and tin instantly be added to Desktop environment – Epitome Template Layer.
Note : For more than in-dept data about the dissimilar components and concepts , please cheque the new comprehensive Application Layering whitepaper of Citrix!
Annals for a Citrix Cloud trial account
Assuming that you already accept an Azure tenant / subscription, you only need to register for a Citrix Cloud account. If you already take 1, delight skip these steps . .
When u offset want to build an PoC or test surround get-go, just to get more confident with Azure or Awarding Layering, Citrix likewise provides the possibility to effort the software from inside the Citrix Cloud for 30 days. Yous tin can extend this subsequently with a "purchased" version of you are satisfied with the product for your business…
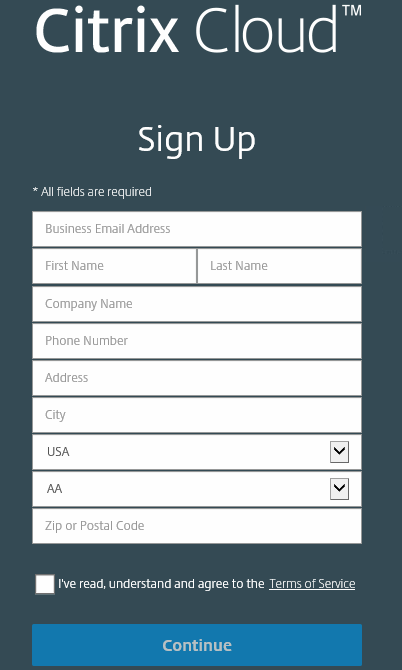
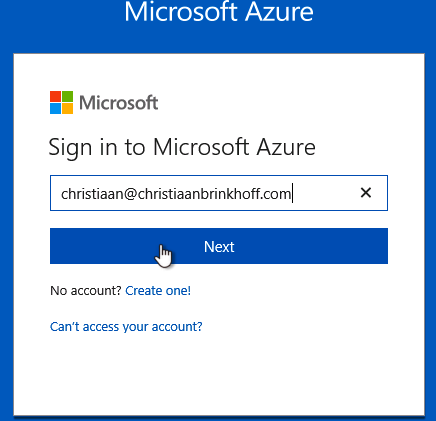
To get started, you first need to create a Citrix Deject account, this can be doing through the following url:https://onboarding.cloud.com/
Enter in all the information – and ostend your e-mail accost
When the business relationship is activated, please go to http://citrix.cloud.com and log in with your credentials
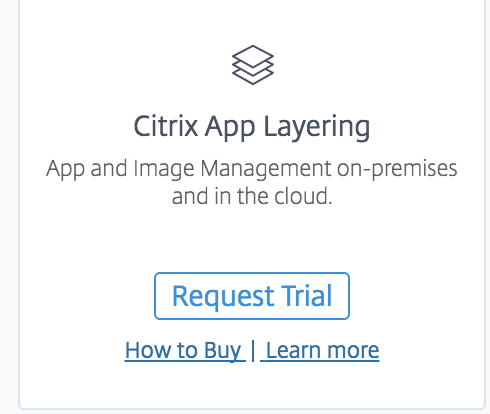
Asking the – Citrix App Layering – service in dashboard landing screen.
Click on – Request Trial
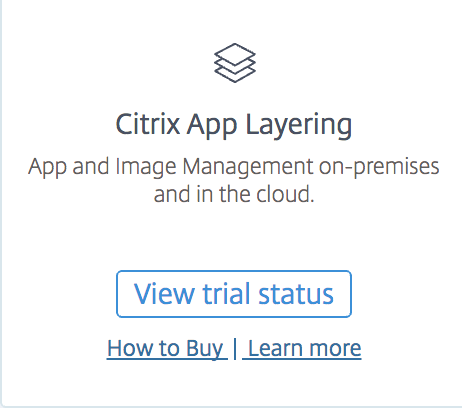
Click on view trial status
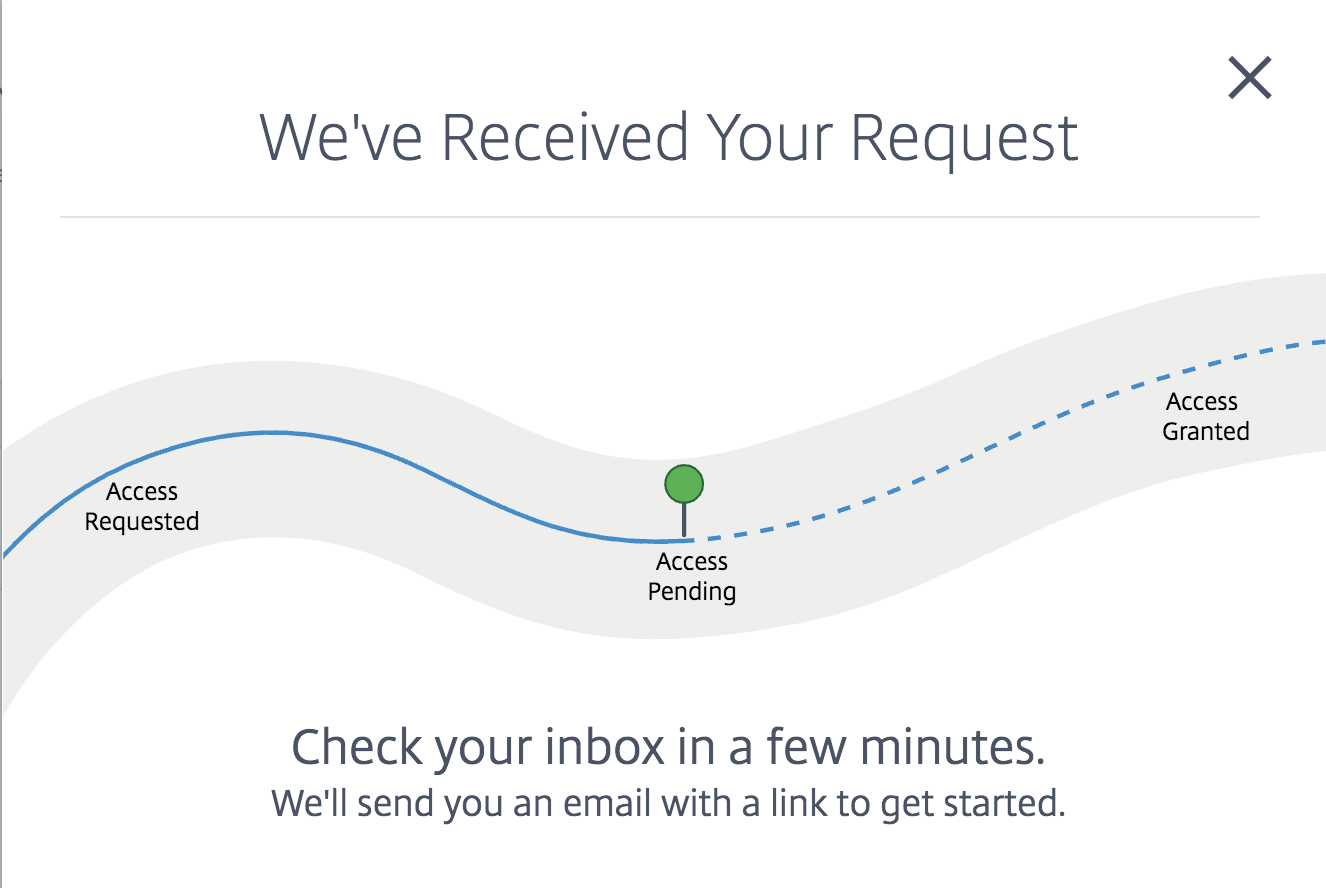
You'll will receive an email when the trial is approved and ready to configure
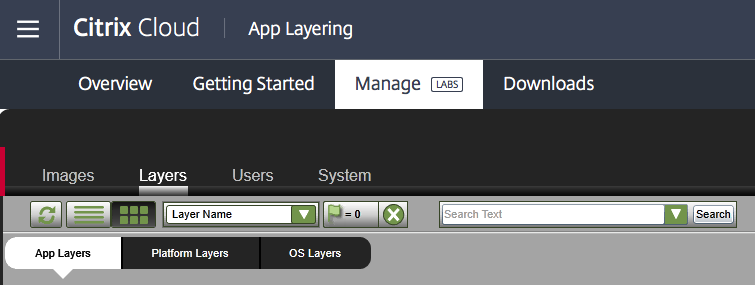
How to become started with App Layering in Citrix Cloud
Go to https://layering.cloud.com
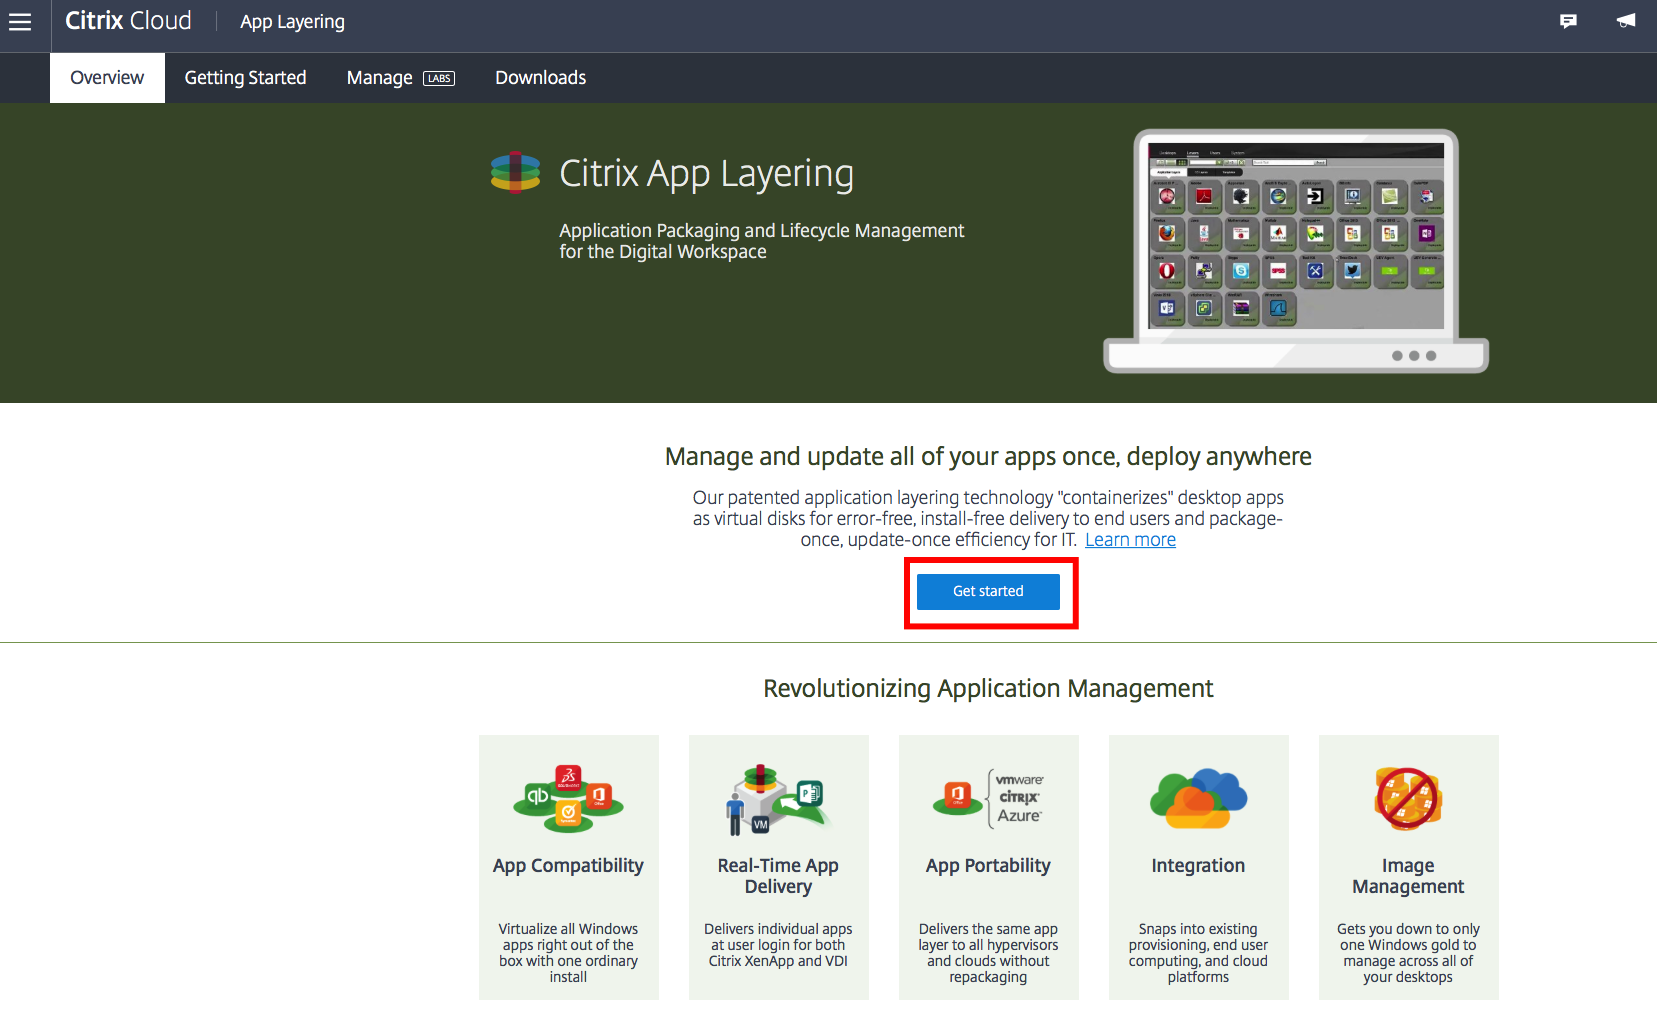
Click on Manage in the Citrix Cloud portal

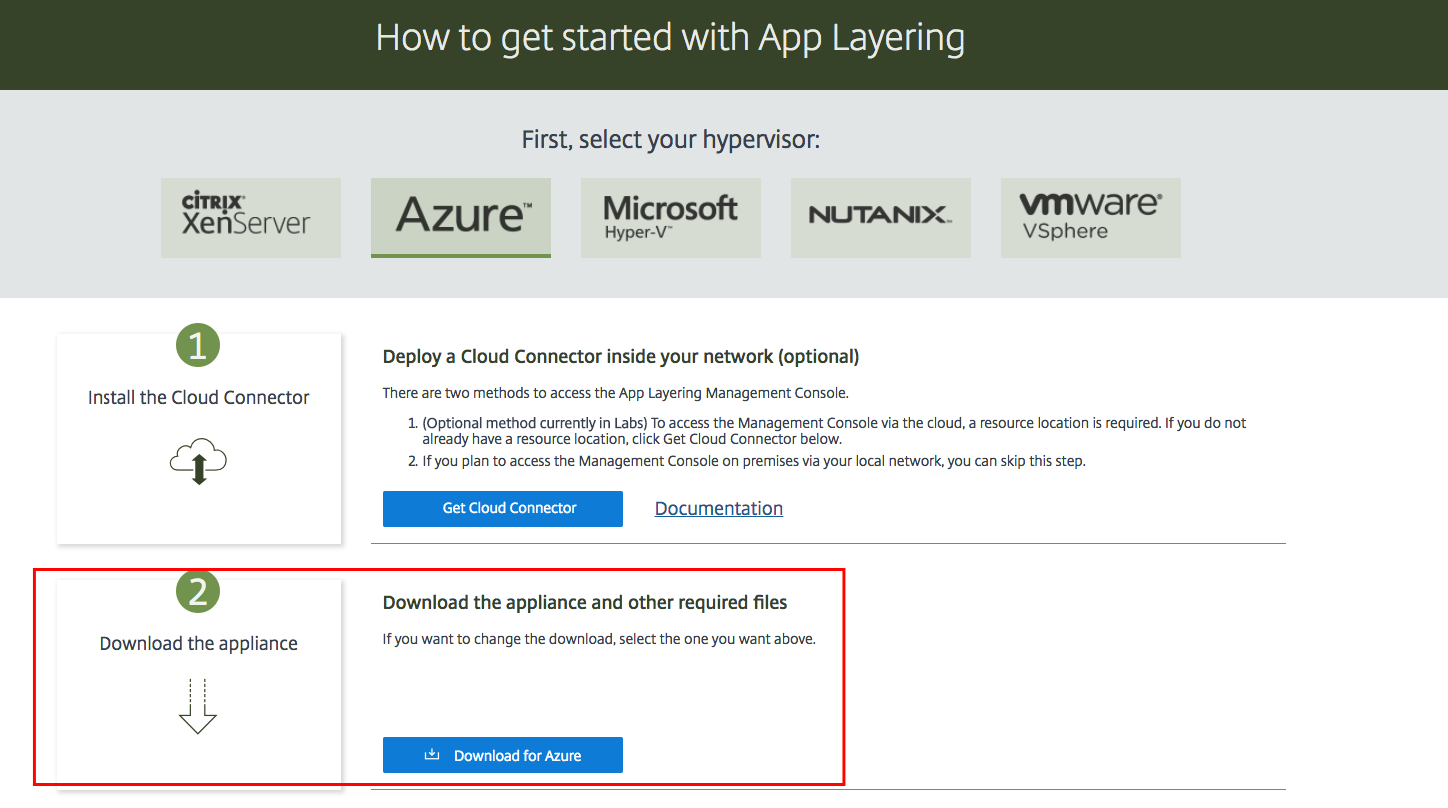
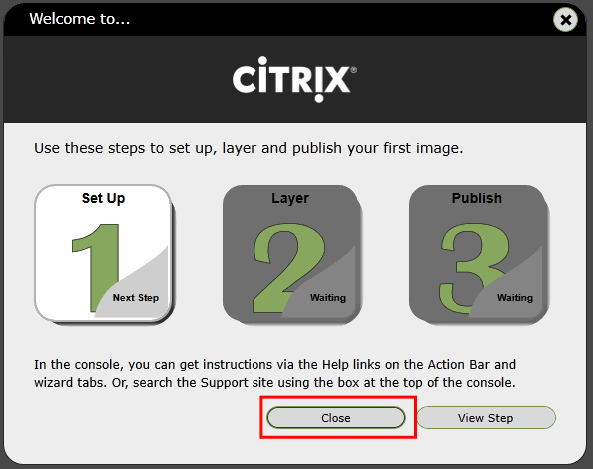
Click on Get Started
Click on Azure

Start with Step one – Deploy a Cloud Connector inside your network (Azure)
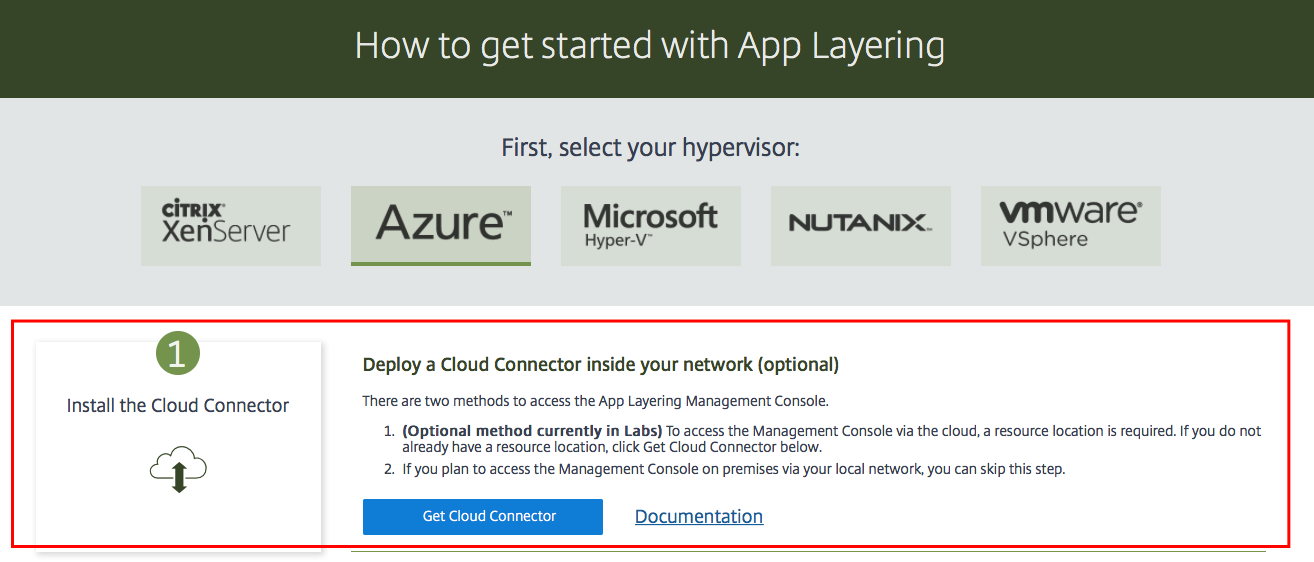
Deploy the Cloud Connector(s) inside Microsoft Azure
Before we start with the installation of the Citrix Cloud Connectors, we need to deploy 1 or 2 (recommended) basic VM's in Microsoft Azure.
Annotation: I assume that u already accept an Azure account and take a Virtual Network, storage account and (optional) a resource grouping. This is required for all the upcoming steps in Microsoft Azure!
Simply logon into your Azure account and deploy a Windows Server 2016 machine from the marketplace. Follow the next steps…
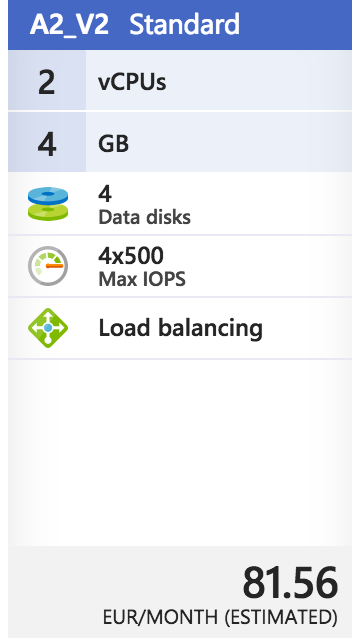
Notation : There is no need for SSD premium storage for this type of machine. Merely to save out costs, make use of a Basic Resource size, such as A2_v2.
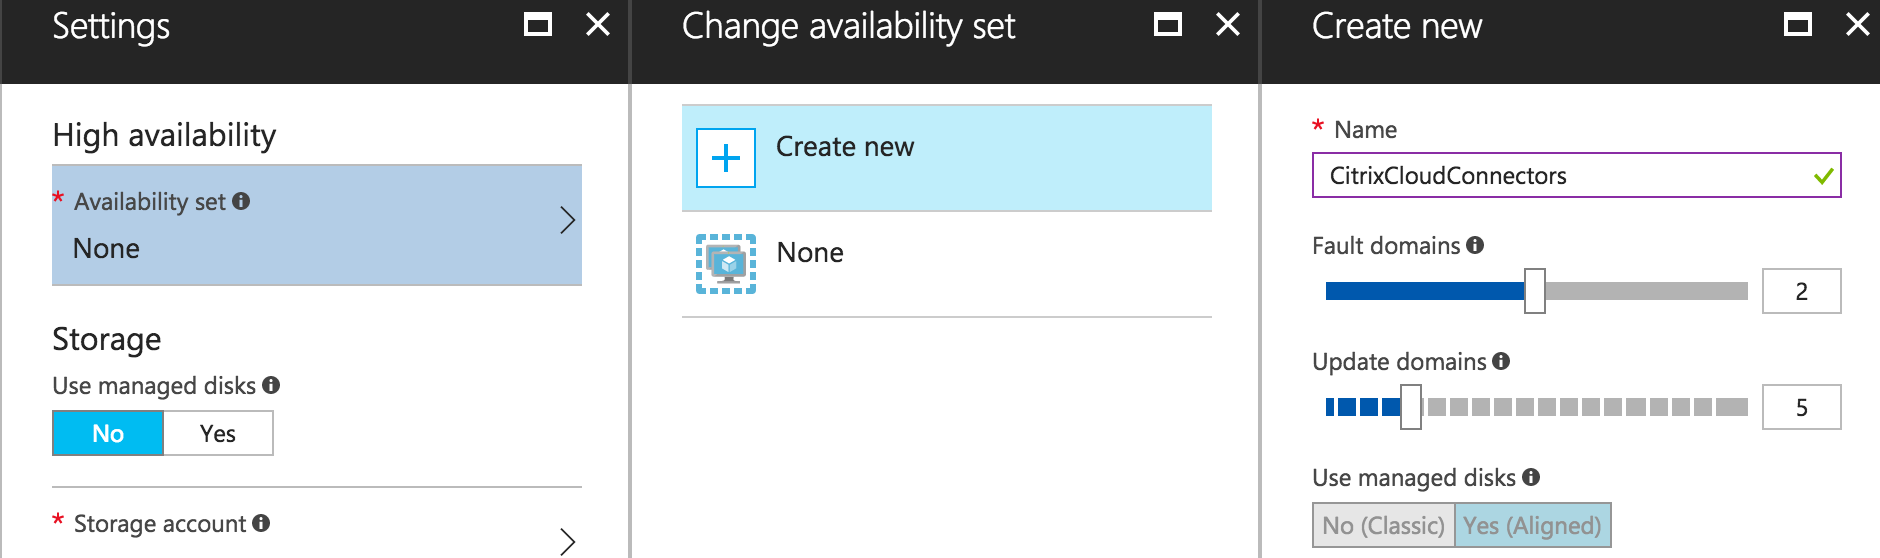
Note : Brand sure to place (when u install 2) the Citrix Cloud servers in the same Availability Gear up. Finish the deployment in Azure, join the Citrix Cloud Servers to the domain and
go to the next step
Note : Make sure to disable IE Enhanced Security Configuration earlier y'all start the cwconnector.exe installation

Switch back to the Citrix Deject and click on + Connector to download the Citrix Cloud Connector(s).
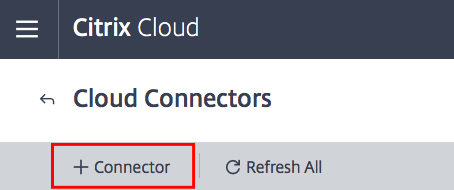
Click on download and save the file (cwcconnector.exe) somewhere on the Citrix Cloud servers in Azure, the installation needs (of course) to be run from within that car.
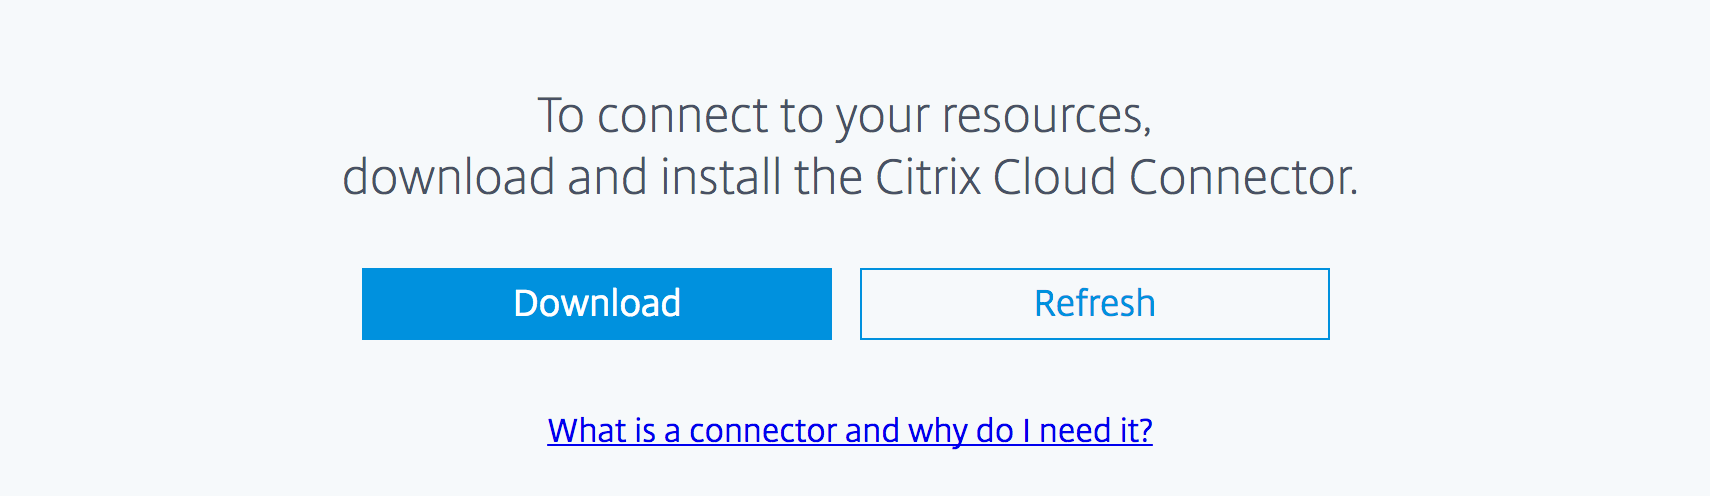
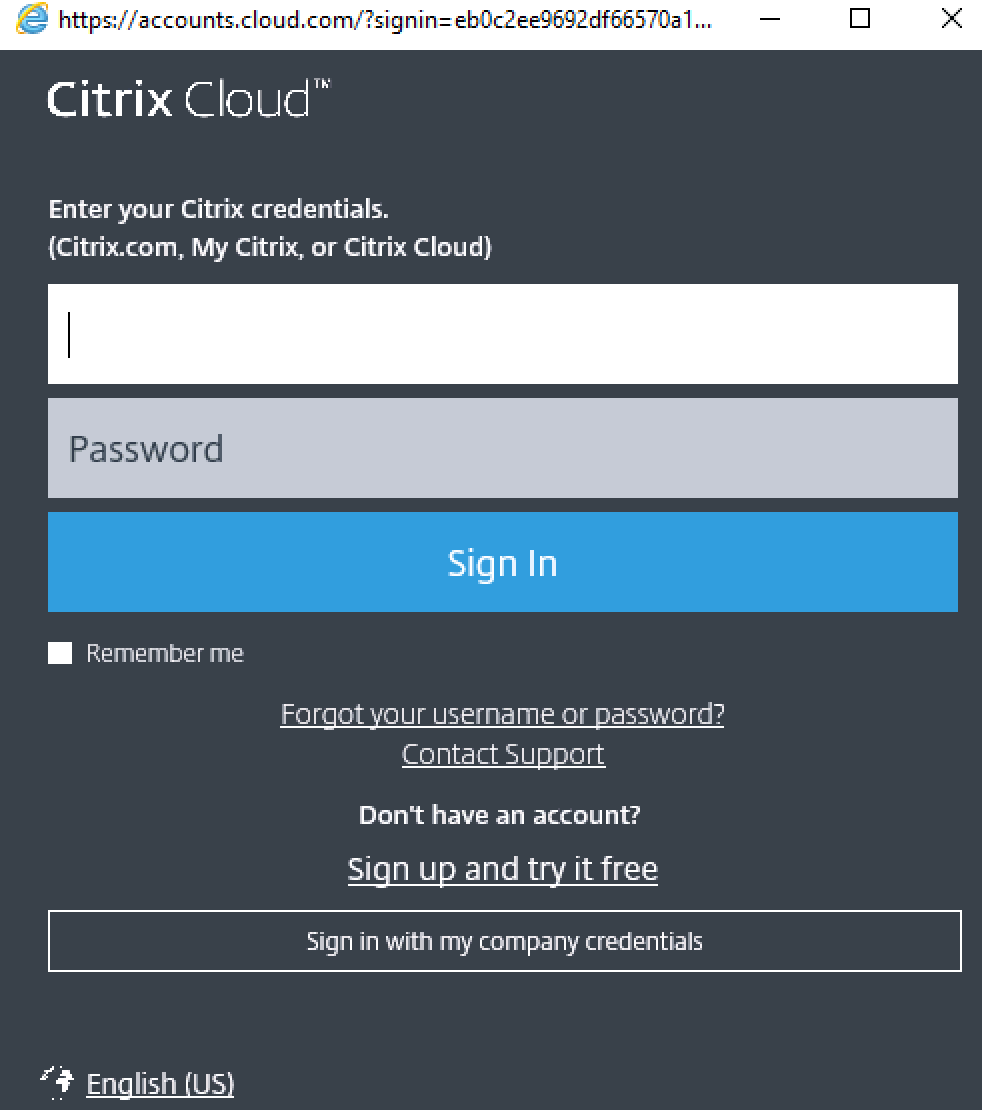
Install the Citrix Cloud Connector software on the Servers in Azure, first sign in with your Citrix Deject Account.
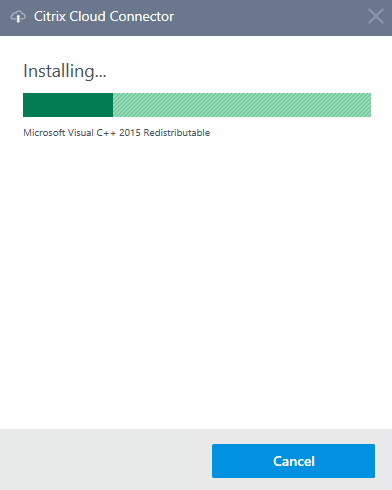
The installation process volition start directly afterwards…
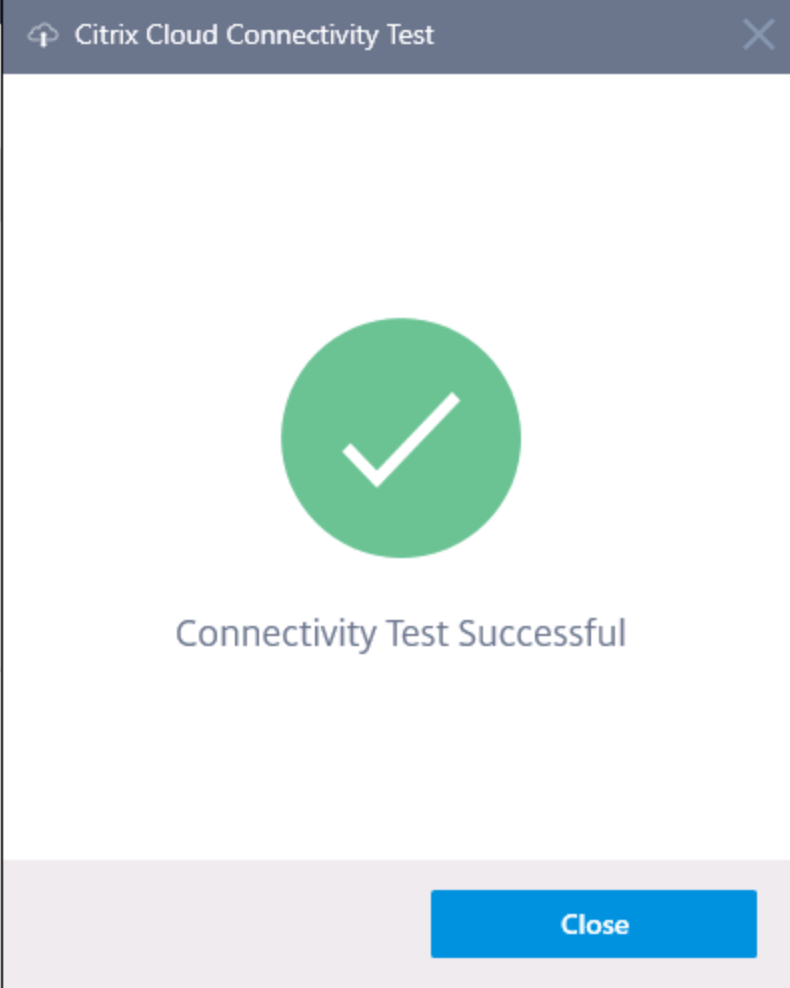
Testing the Connectedness…
Note : Troubles with the connection? Delight check out this troubleshoot commodity.

Connection successfully verified, click on Shut
Click on refresh All
![]()
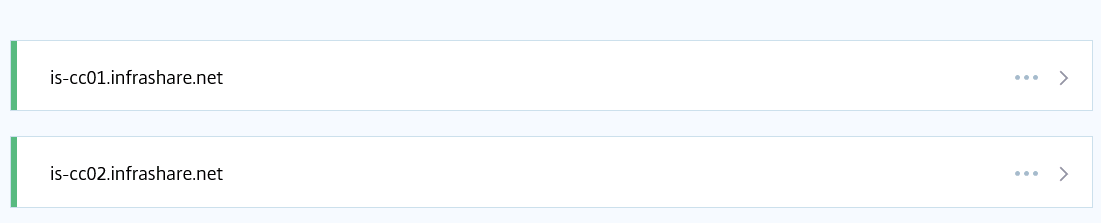
The new resources location must now be added to the list. Perform the same steps for the other Cloud Connectors. … 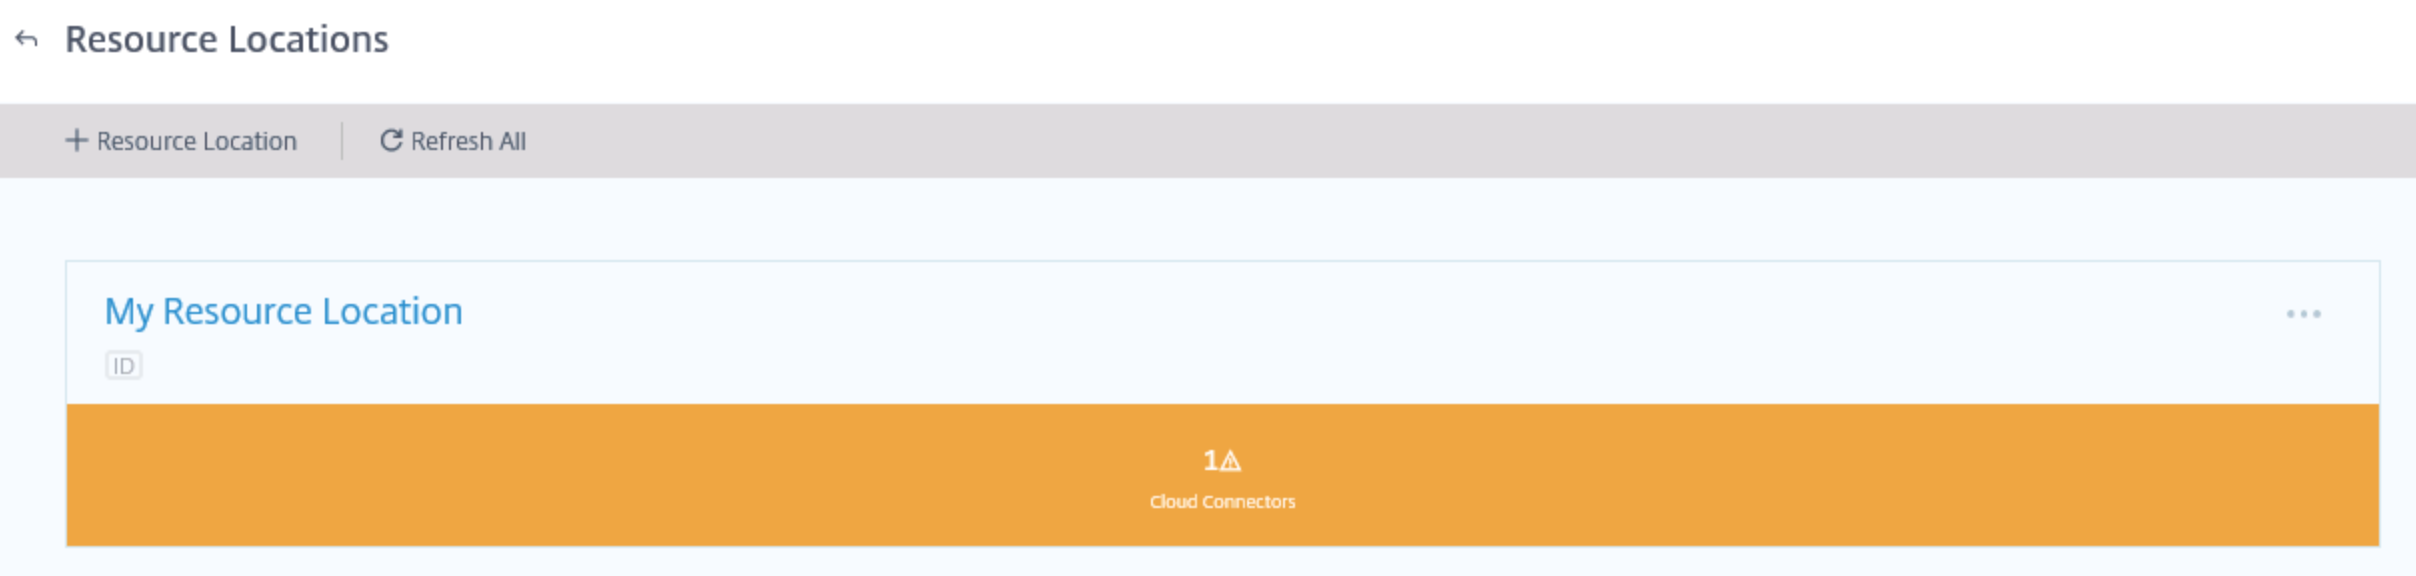
Note: The yellow / orange mark is active because in that location is only ane Citrix Cloud Connector active. When you install another Citrix Cloud server in Azure, the warning will disappear. And recall: place them in the same Availability Set!
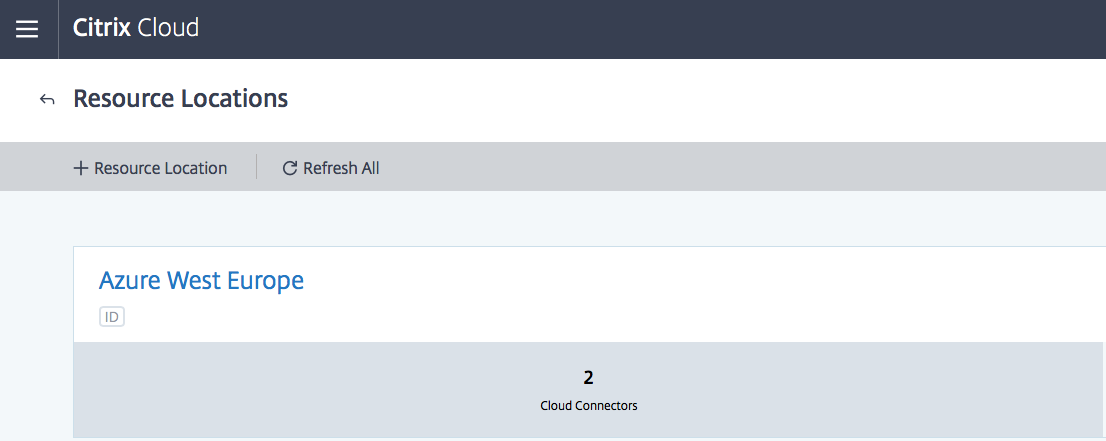
At present open up the Hamburger card – click on Resource Locations
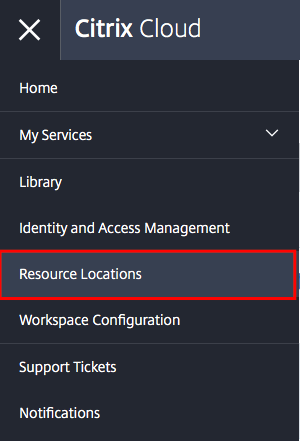
Rename the resource location to Azure – DC location .

Save the new Resource Location proper name and check if it'southward changed in the card.
Deploy the ELM Appliance in Azure IaaS
Switch back to the – Getting Started – carte in Citrix Cloud
Download the Appliance for Microsoft Azure
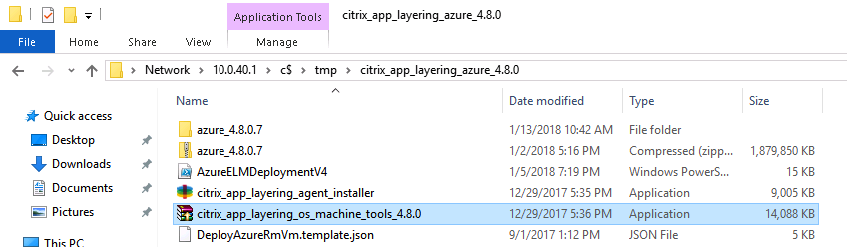
Extract the download bundle , named; citrix_app_layering_azure_4.8.x.nix and the Azure_4.eight.x zip file to a folder on your local drive, C:\tmp for case.
![]() …
…
Open an Azure Powershell prompt from that specific motorcar.
Run the Import-Module AzureRM cmdlet
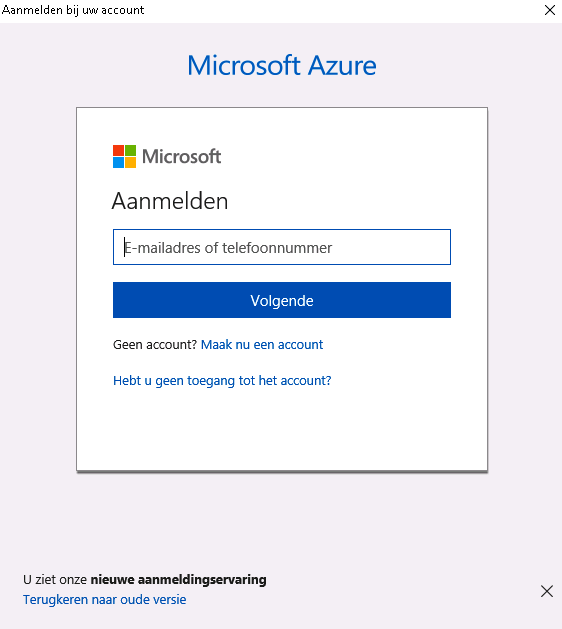
Perform the pre-login command to your Azure tenant surroundings. Enter your Global / Full Ambassador business relationship
Login-AzureRmAccount
Notation: Download the Microsoft Azure PowerShell v3 cmdlets here.
Execute the AzureELMDeploymentV4.ps1 script and enter in a Deployment Proper name , such equally you lot're Companyname.
Notation : The maximum number of character is xv and use an (unique) organization AppLayering deployment name, such as CBrinkhoff . This is required for the creation of the diagnostic storage business relationship afterward on. The storage account uses the deployment name as prefix – which'll demand to have a unique DNS entry in Azure storage blob.

Note : The script copies the VHD to the Azure location of your choice, and attaches the repository deejay. It so boots the appliance. If the script fails, check the values to brand certain that the values are right for your environment. …
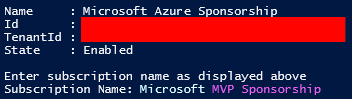
Requite in the Subscription proper noun, where to deploy the ELM Appliance into .
Enter the Resources Grouping name , or the name of the existing one that you want to deploy the ELM Appliance in.
![]()
Enter in the Azure Storage Account name to identify the VHD file in. I recommend Premium Storage account for functioning acceleration.
![]()
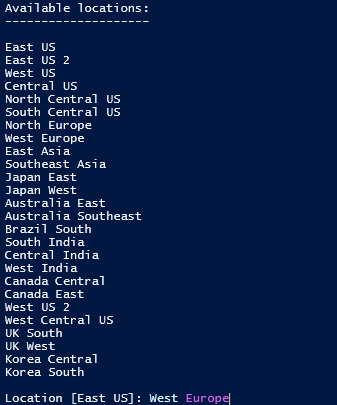
Select a Datacenter Location
Give in the Azure Virtual Network name
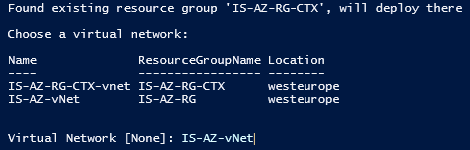
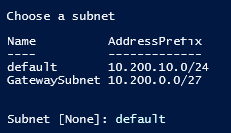
Choose a subnet
Now we have the option to assign a Static IP Address to the ELM Appliance. I recommend yous doing this.

Select the SKU size of the Appliance .
I'll choose the default – Standard DS3 v2 machine. This is a Premium machine with SSD Storage

![]()
Give in a username to access the ELM Management portal.
Press enter to use the default suggested CitrixAdmin.
![]()
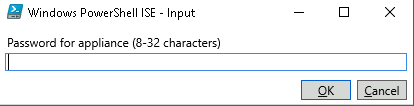
Give in the countersign
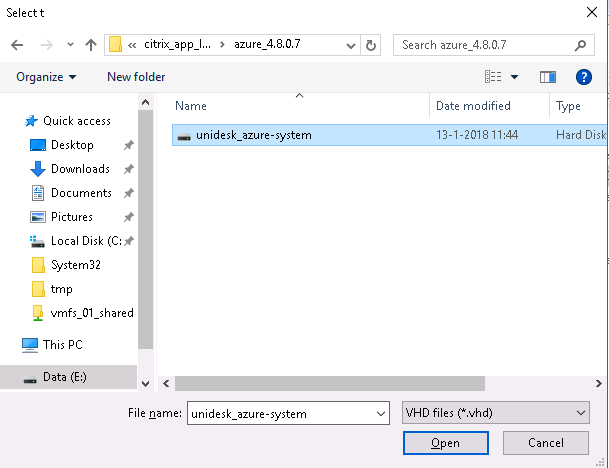
Now we need to select the ELM VHD file from the ZIP folder, to perform the upload procedure to Azure IaaS and to start the machine creation process.
Browse to the location and open the Azure_4.8.x folder and select the VHD file.
The ELM Virtual Car is at present being created in Azure…
(And for the sharp people – yes, I have a pretty fast (cobweb) internet connectedness at abode J . Please wait for ten – xxx minutes, depending on your internet upload speed)

The ELM Machine is now beingness created in Azure IaaS, based on the JSON template file.

The ELM machine is now deployed and running in Azure!
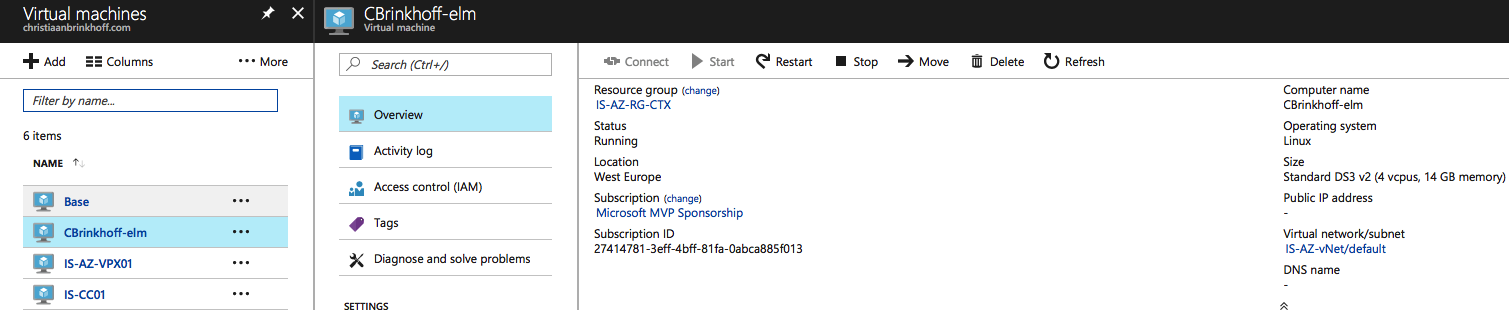
Connect to the ELM Appliance in Azure through the Citrix Cloud
When the deployment is washed – switch dorsum to the Citrix Cloud, under Pace iv – Click the Log into Apparatus push button.
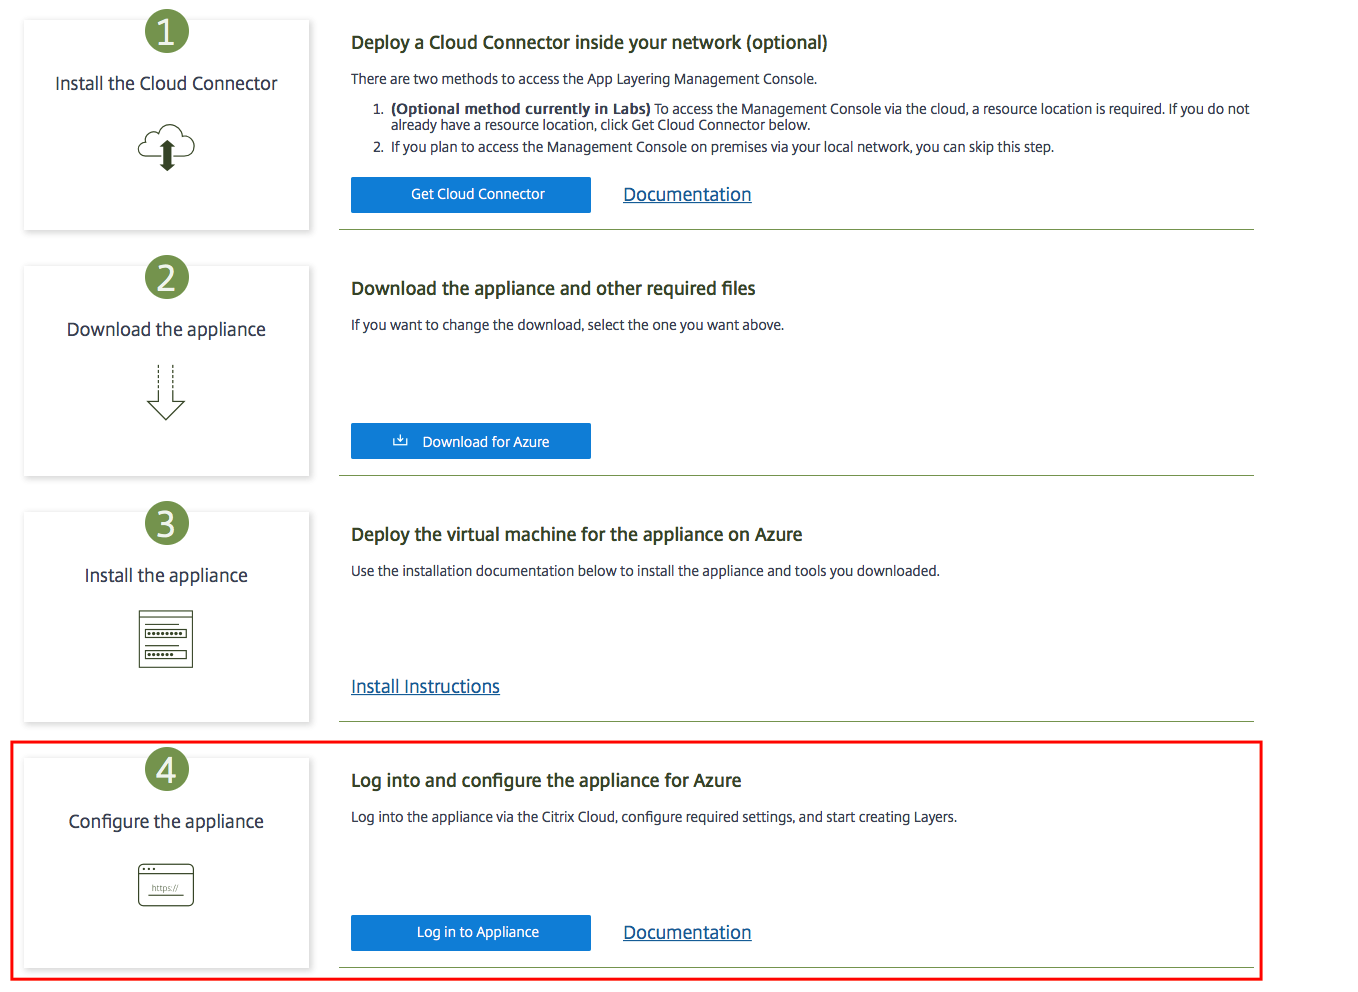
Enter in the Resource Location Name (Citrix Cloud Connectors) and give in the Static (or dynamic) IP of the ELM Apparatus in Azure.
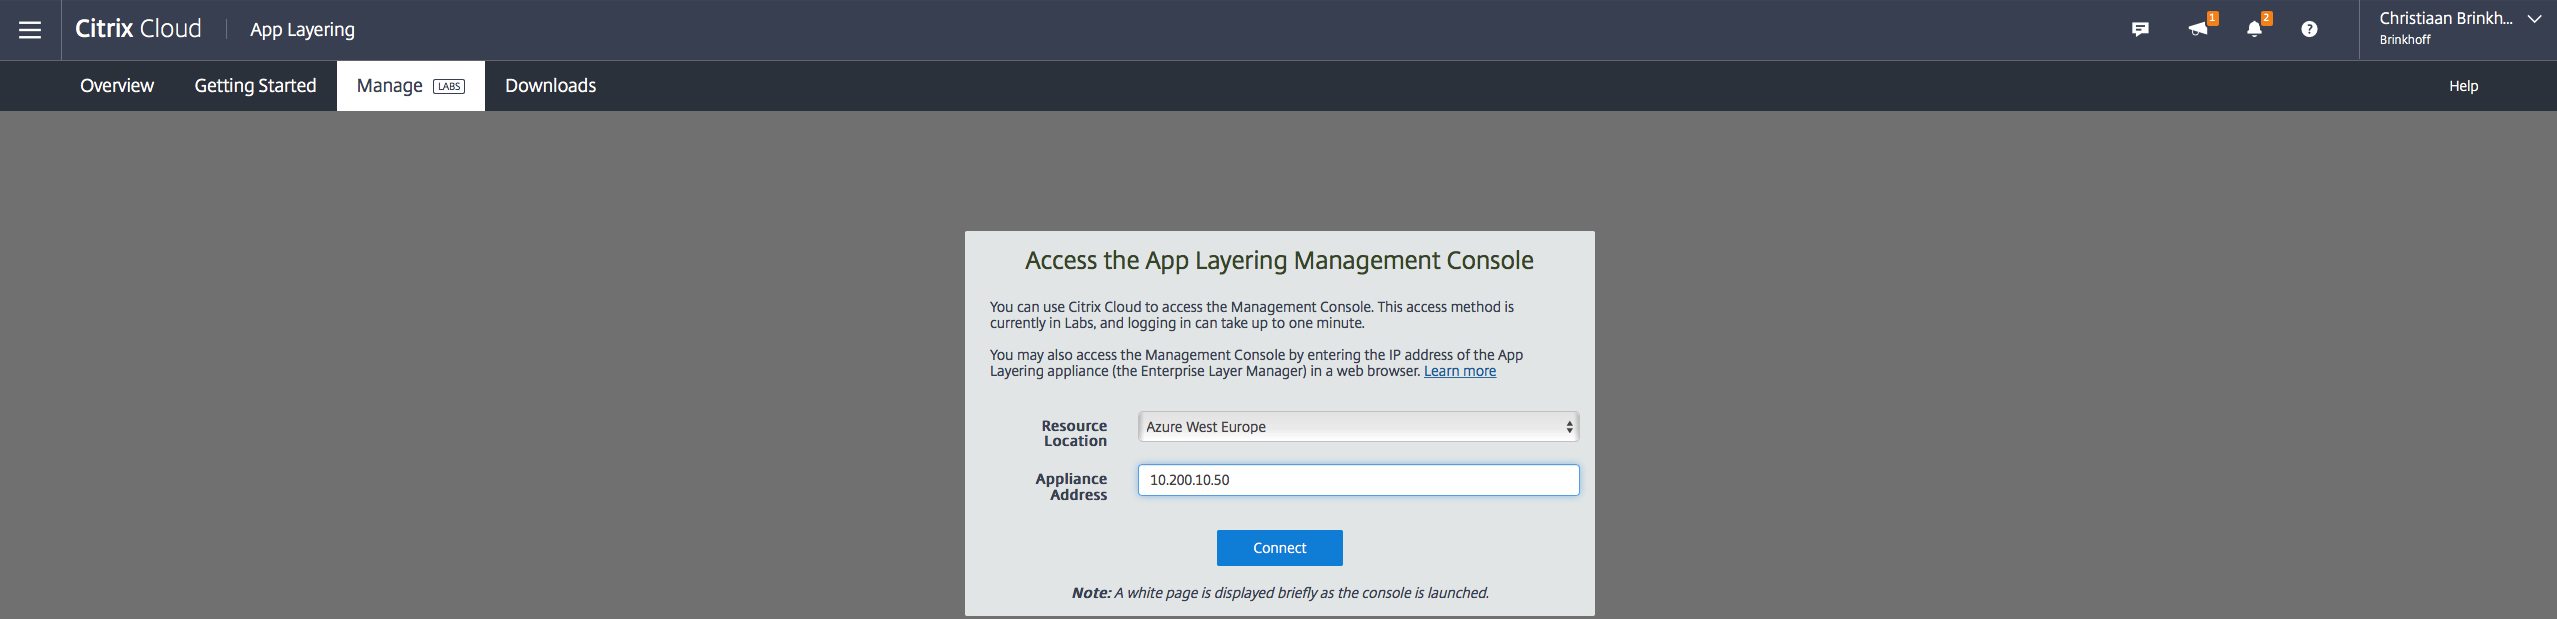
The App Layering Direction Console will now go through the Citrix Cloud Connectors to setup the connectedness to the ELM Virtual Machine in Azure.
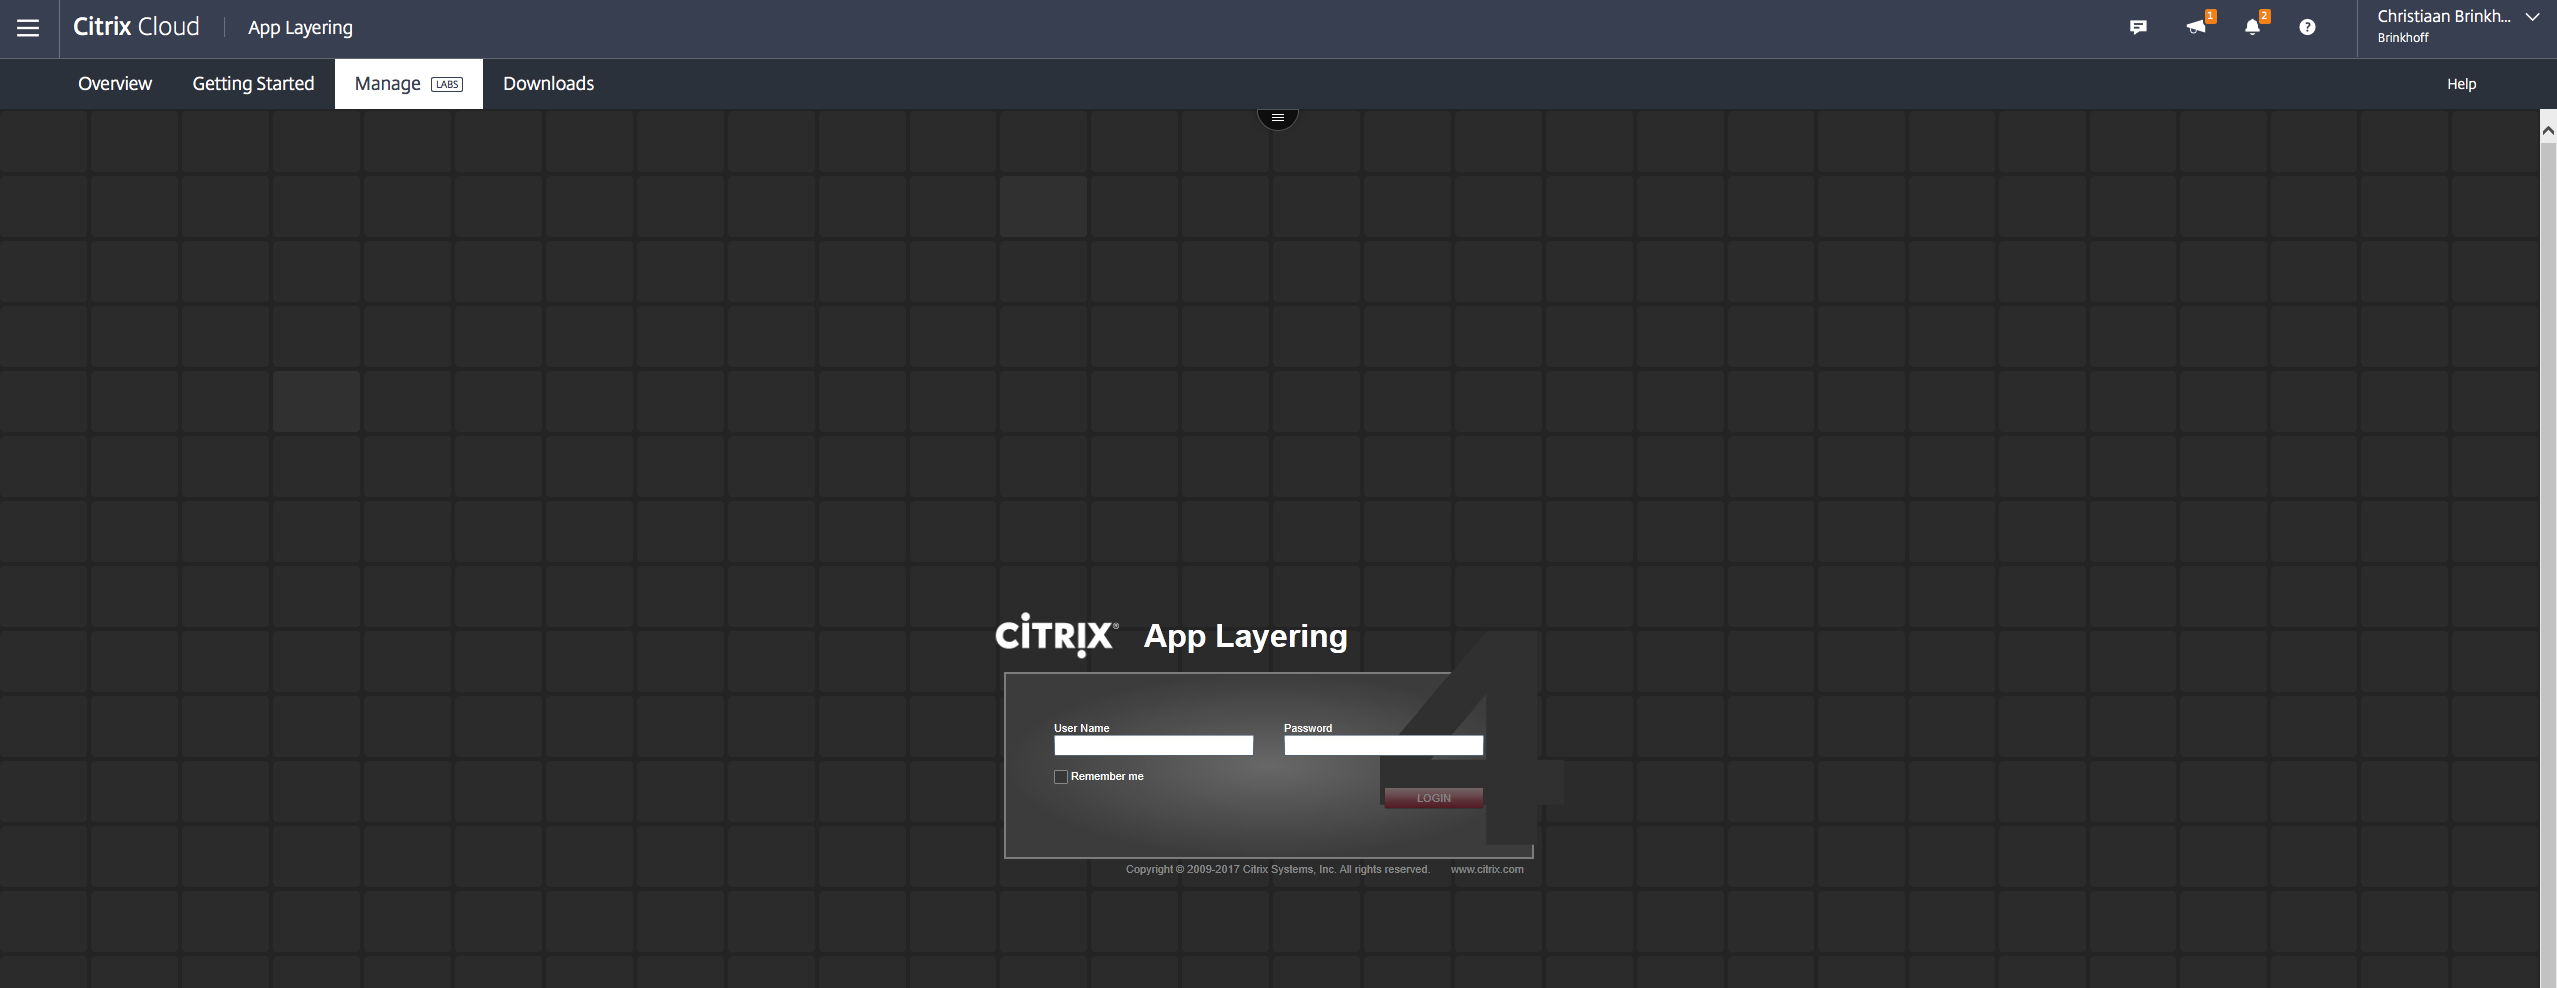
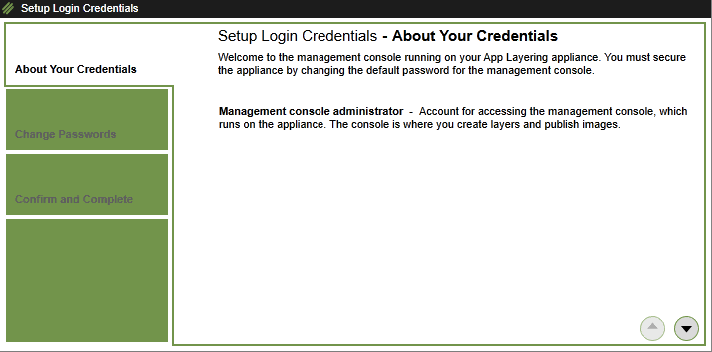
If you encounter the post-obit screen, and so we're ready to rock and start with the fun role.
Enter in the following administrator credentials
username: ambassador password: Unidesk1
Issues with the authentication? Please check this article.
Take the license terms
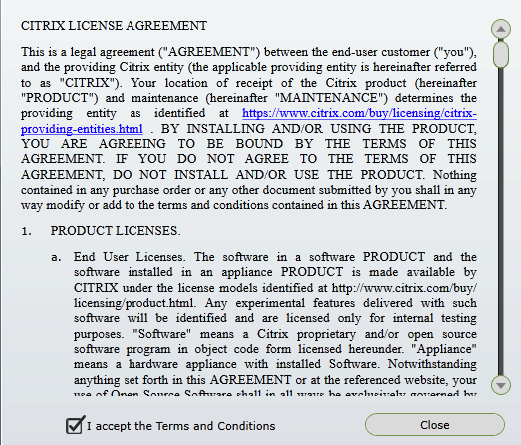
Click on the arrow
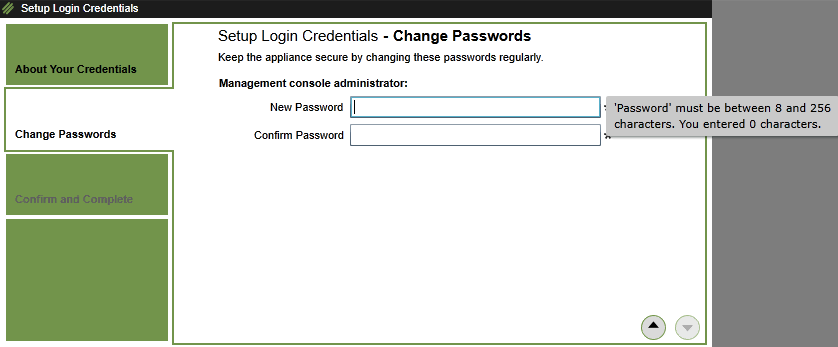
Click on – Change Credentials

Enter in a new password
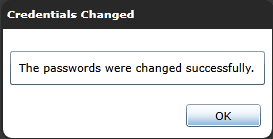
The passwords were changed …
Change the ELM Portal Time out setting
This default setting tin can be very annoying – the timeout is standard on 15 minutes. Sometimes you'll need more fourth dimension to terminate the configuration of something – and without changing this setting, you'll have to starting time over again.
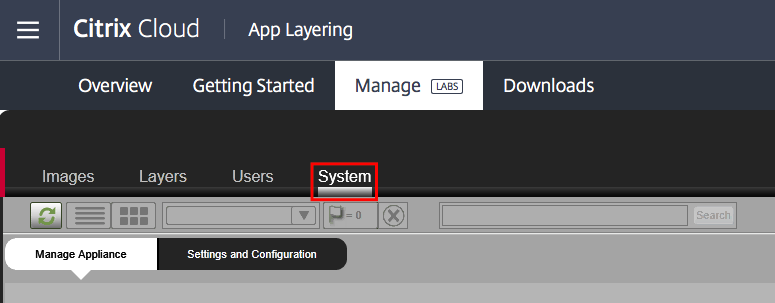
Open the System tab – click on Settings and Configuration
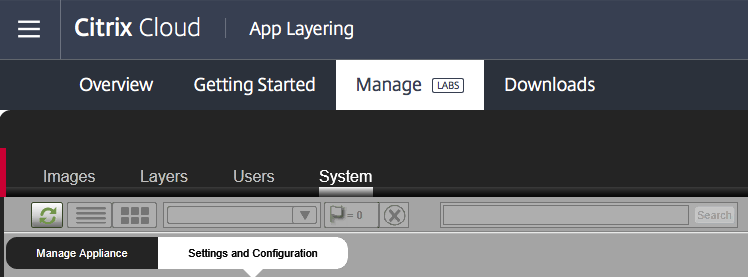
Click on Edit

Change information technology to the value you lot want – I'll pick 60 minutes. Click on Save
Annotation: You need logoff and dorsum on to actuate the setting

Configure a Directory Junction – Connect to Agile Directory
A Directory Junction is a connection to your Active Directory domain. It is a read-only connection that is used to read users and groups. The users and groups are used for things such assigning users as Administrators in the panel and also assigning users and groups to Elastic Layers.
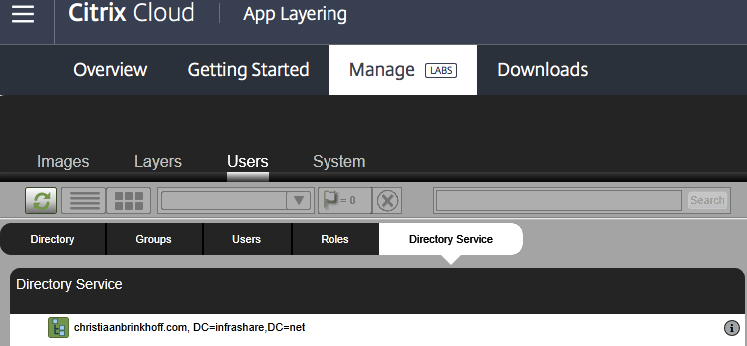
Click on Users -> Directory Service
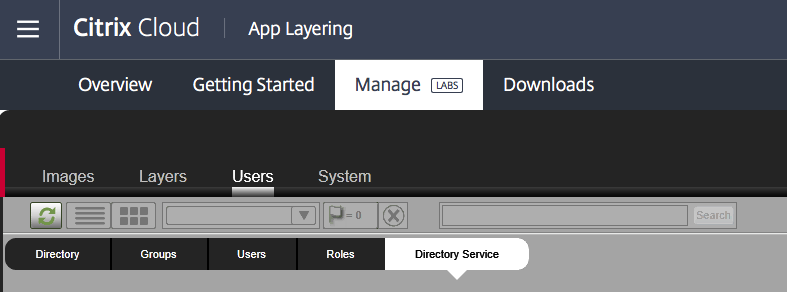
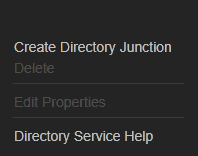
Click on – Create Directory Junction – in the correct carte
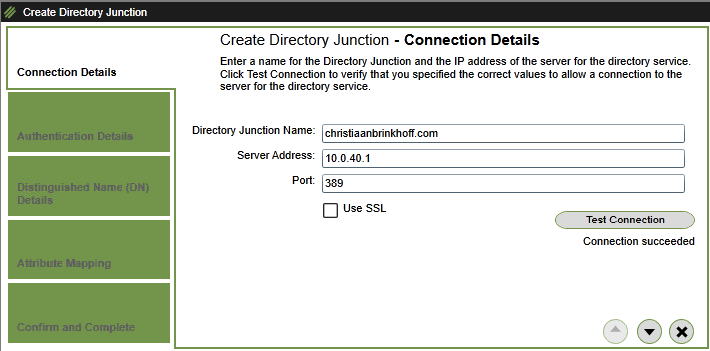
Give in a random name, Enter in the IP of the Active Directory server and select the protocol. Click on Examination Connection to cheque the connection
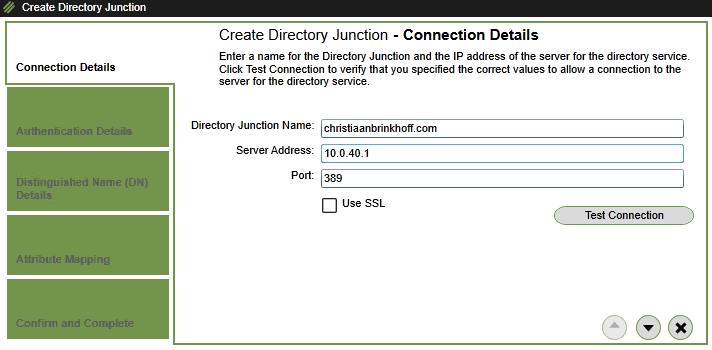
When the connectedness is succeeded – Click on the down arrow
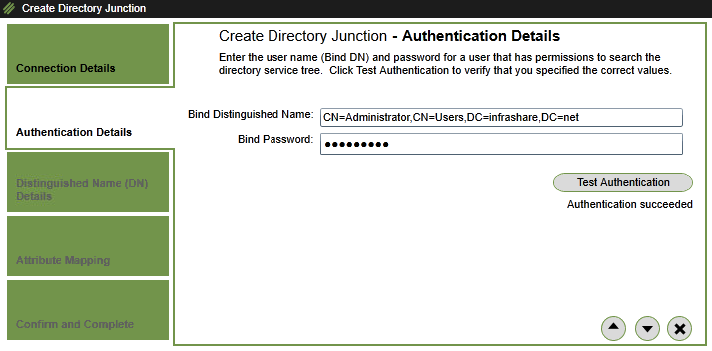
Enter the DN name of the Advertisement service business relationship and password . Click on the arrow to continue
TIP : Use the HTML Receiver Clipboard to inject the copy/paste


Click on Test Authentication. Click on the arrow if it says succeeded.
Select a base to query your groups and users. Click on test and click on the pointer

Nosotros have enough on the default attributes. Click on the Arrow

Click on Create Directory Junction

The Agile Directory domain is now listed in the Directory Service
We now tin can create layers based on Active Directory Objects!
Click on the Directory tab
Select a user or grouping

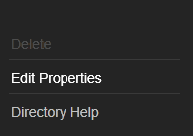
Click on Edit Properties
Assign the Administrator Role (or something else) . Click on the Arrow
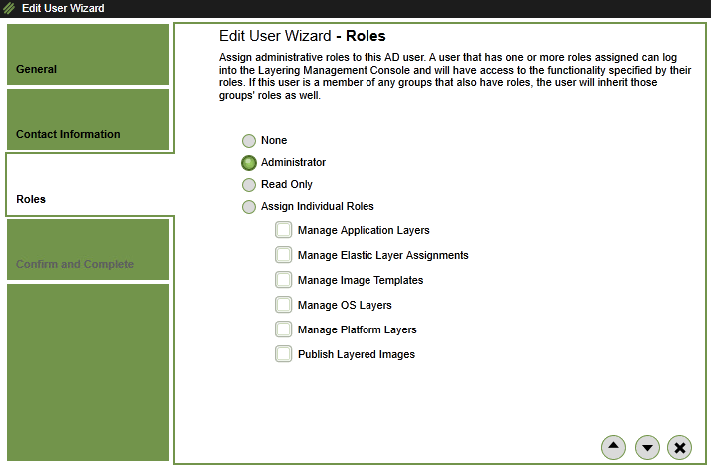
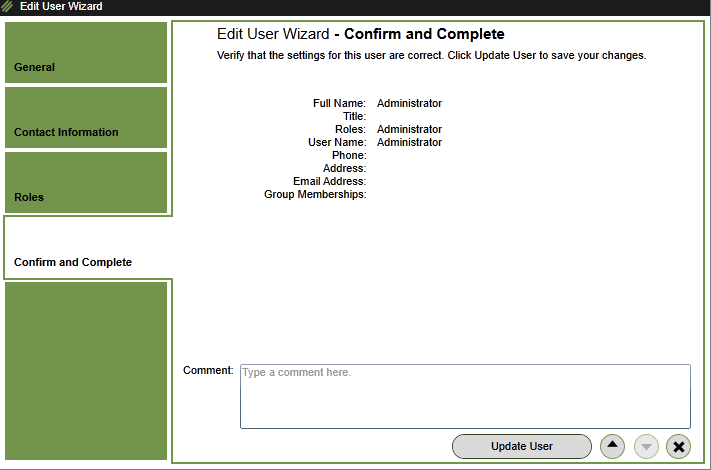
Click on – Update user – to apply the rights
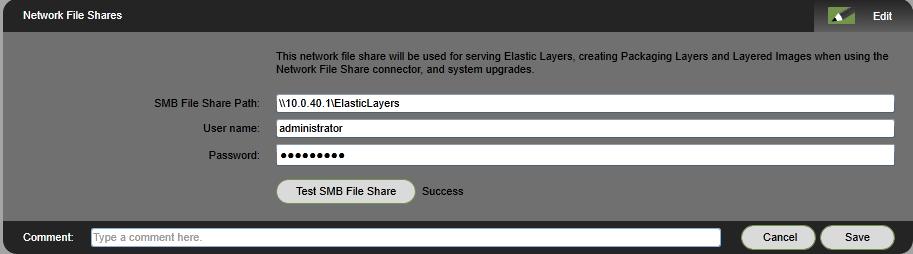
Add together a SMB file share for Elastic and User L ayering
The following setting is needed to activate the Elastic and User Layers in App Layering. Please use a fast (SSD) and reliable UNC connection to shop the Rubberband Layers on.
Get to System – Settings and Configuration
Click on Close
Click on Edit – adjacent to Network File Shares
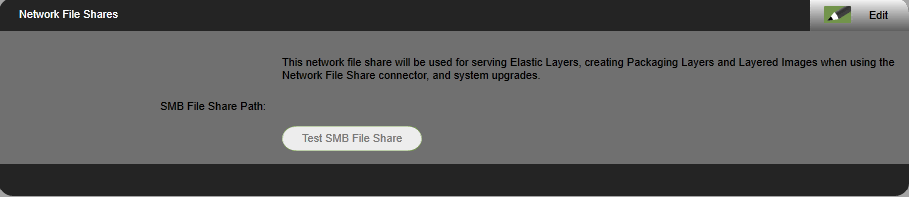
Cheque this article for the setup of the user rights that are required for User Layers.
Add the (fast) file share to shop your Elastic Layer. Test the SMB File Share and click on Save
Annotation : I'll recommend using Azure Storage Spaces Straight for this setup in Azure. Interested? Please accept a look at this article – or just employ a UNC path or Storage Blob Business relationship.
Create the Base – Os Layer – Virtual Car in Azure
Search for the Windows Server 2016 VM in the Marketplace.

Enter in the requested information.
I'll recommend using a SSD disk type to increase the performance of capturing a Layering epitome
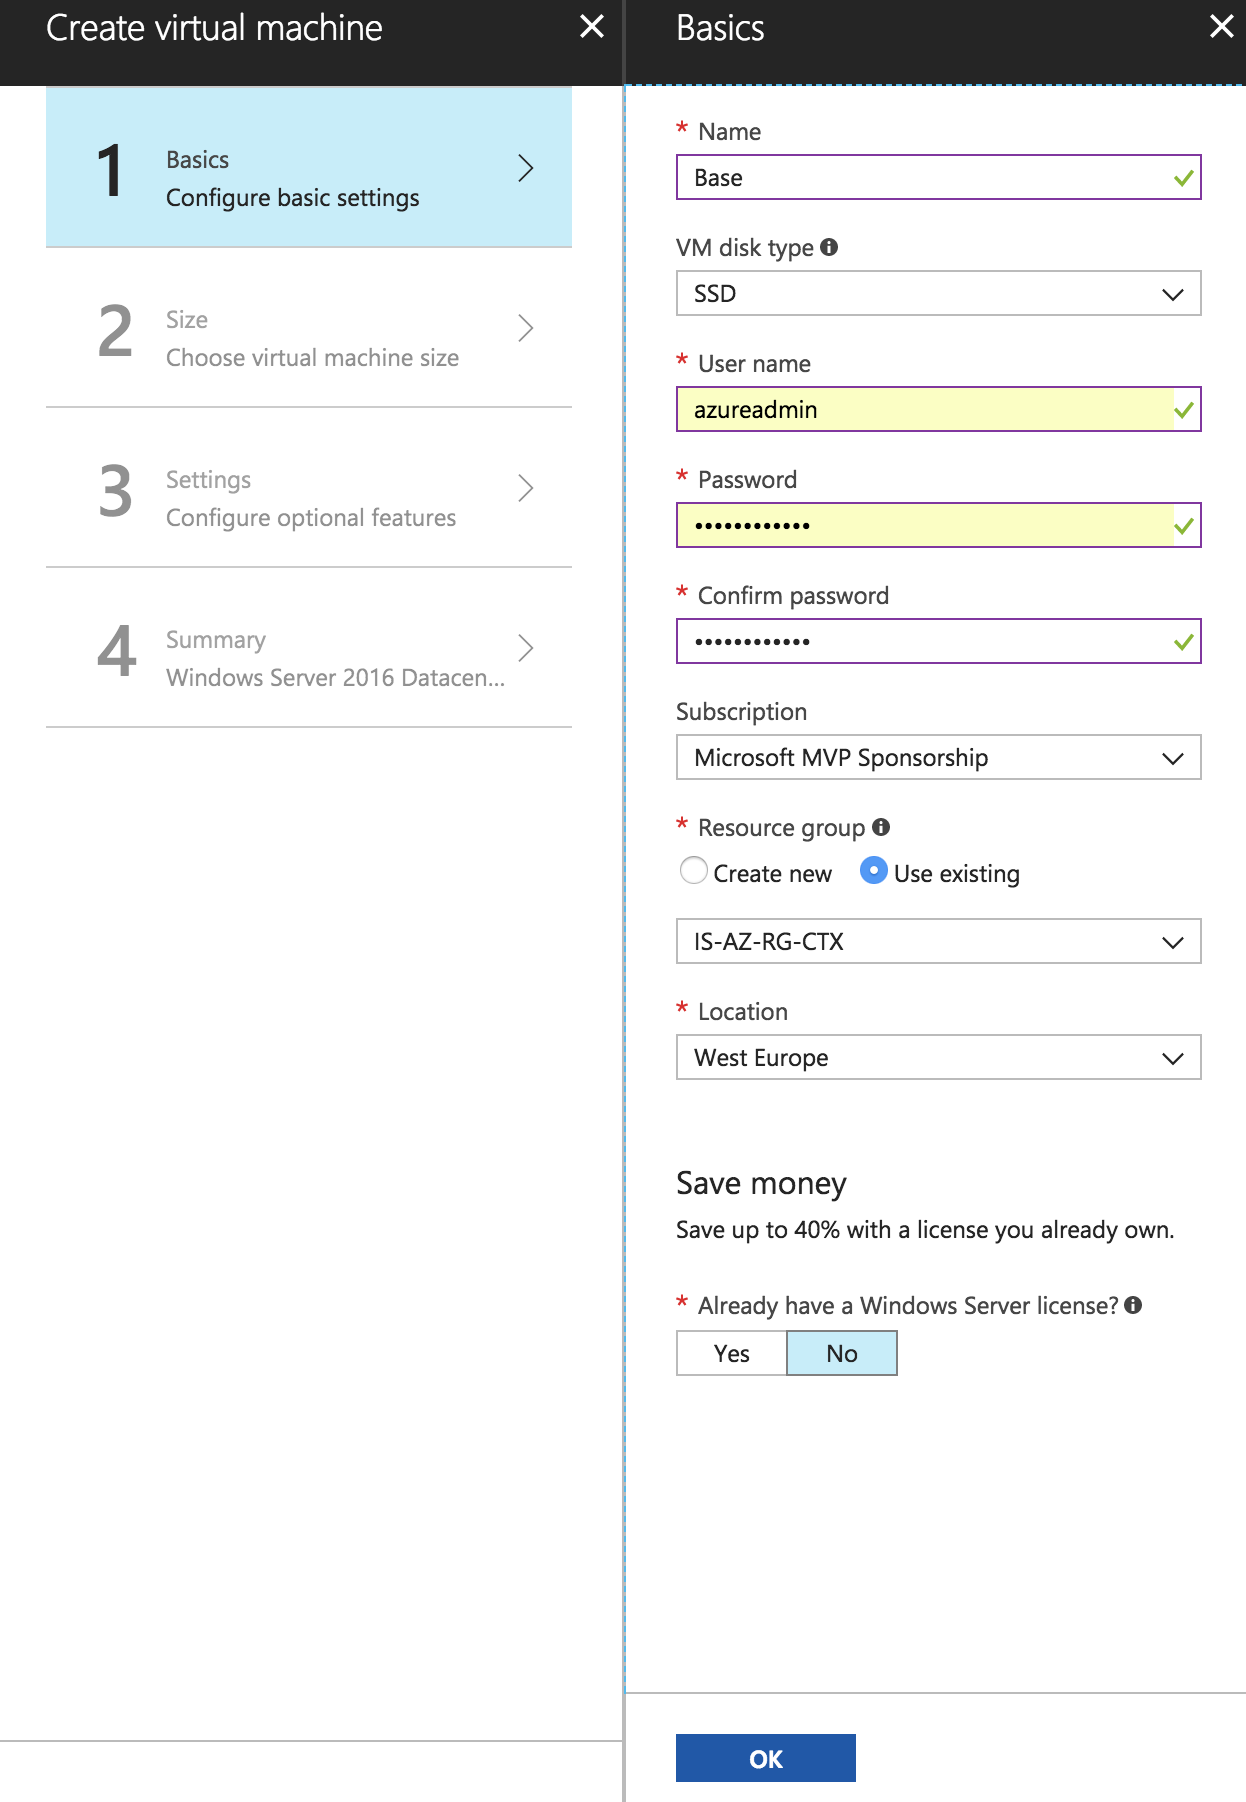
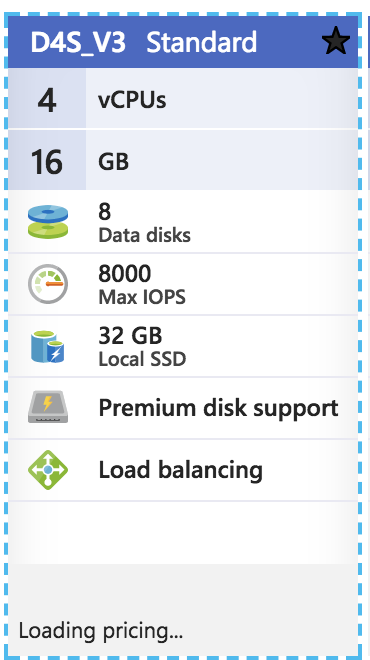
Choose the sizing of the machine
Select / enter all the requested data
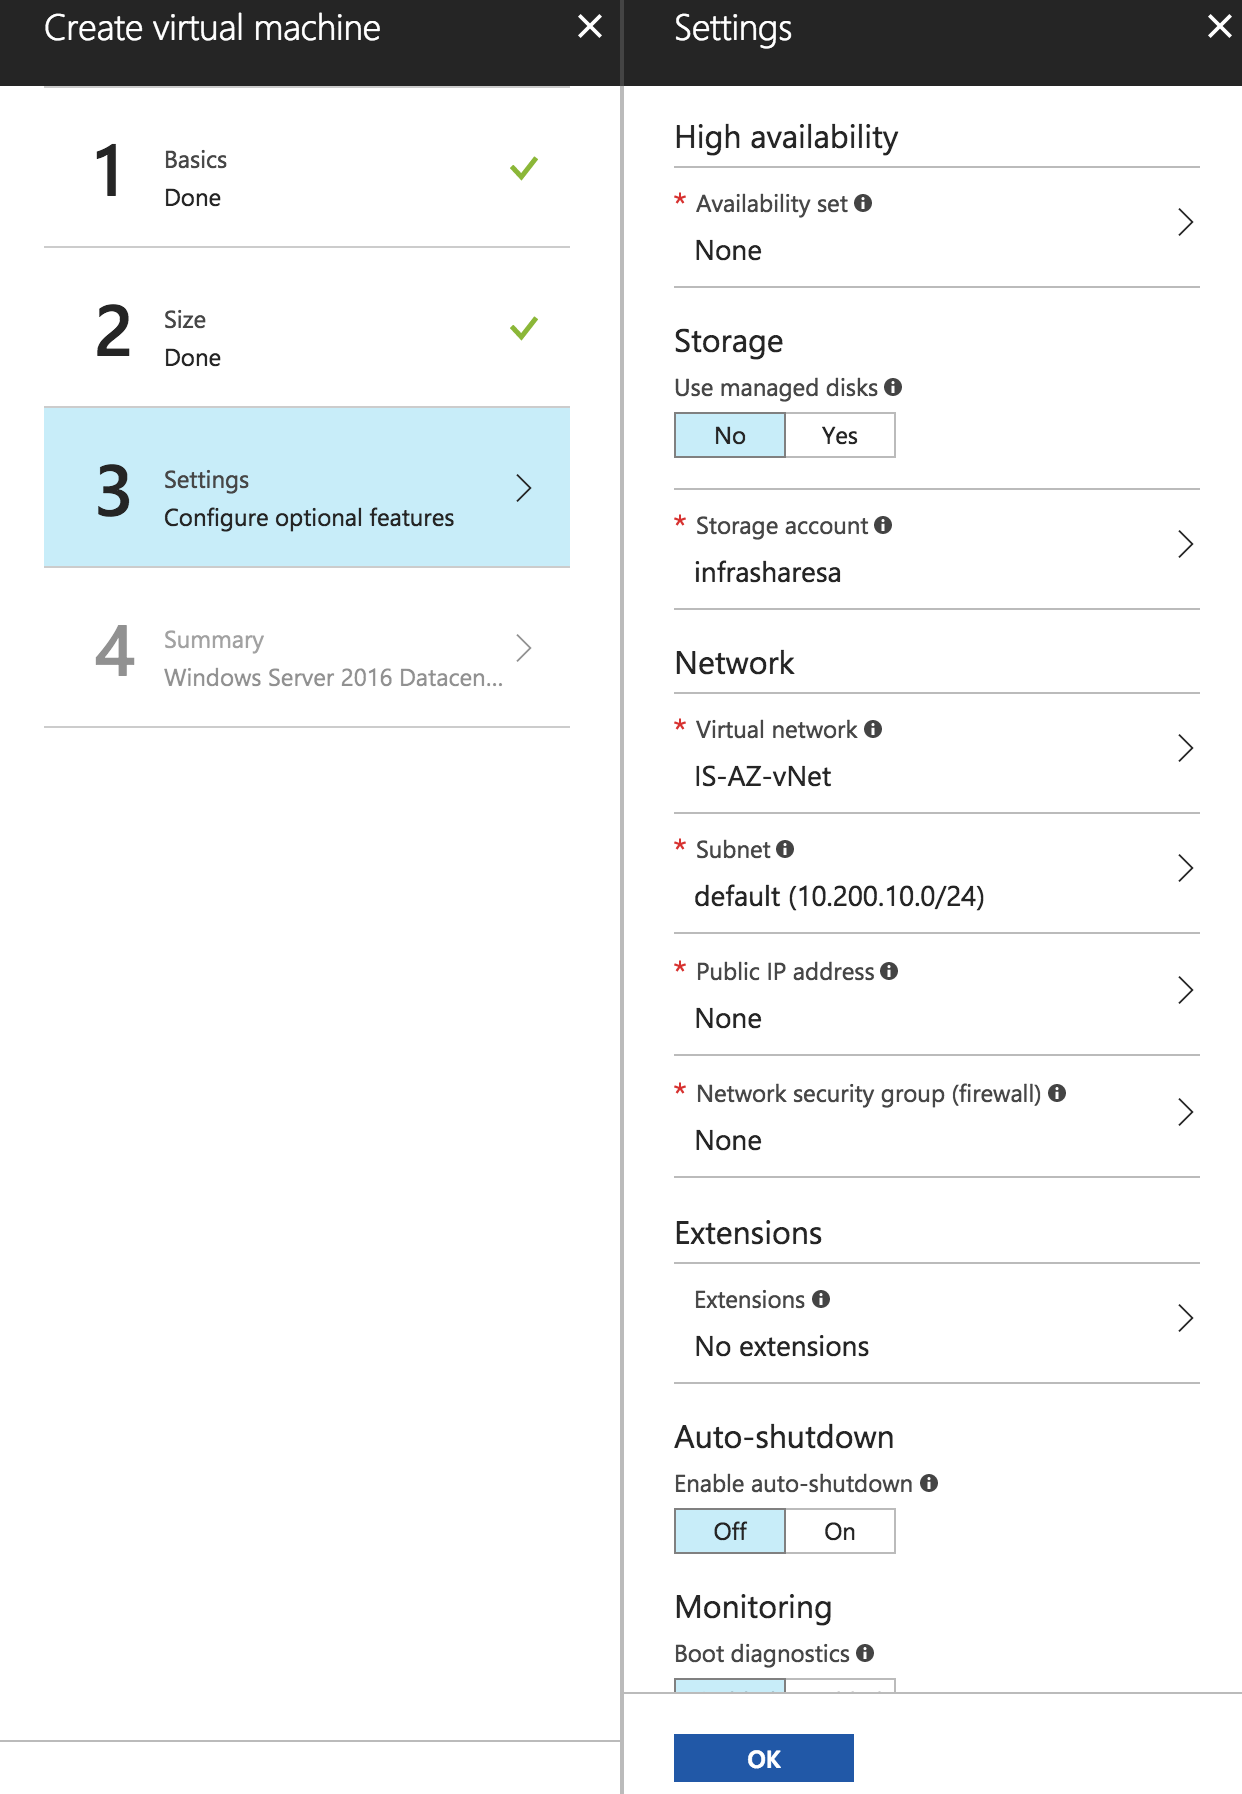
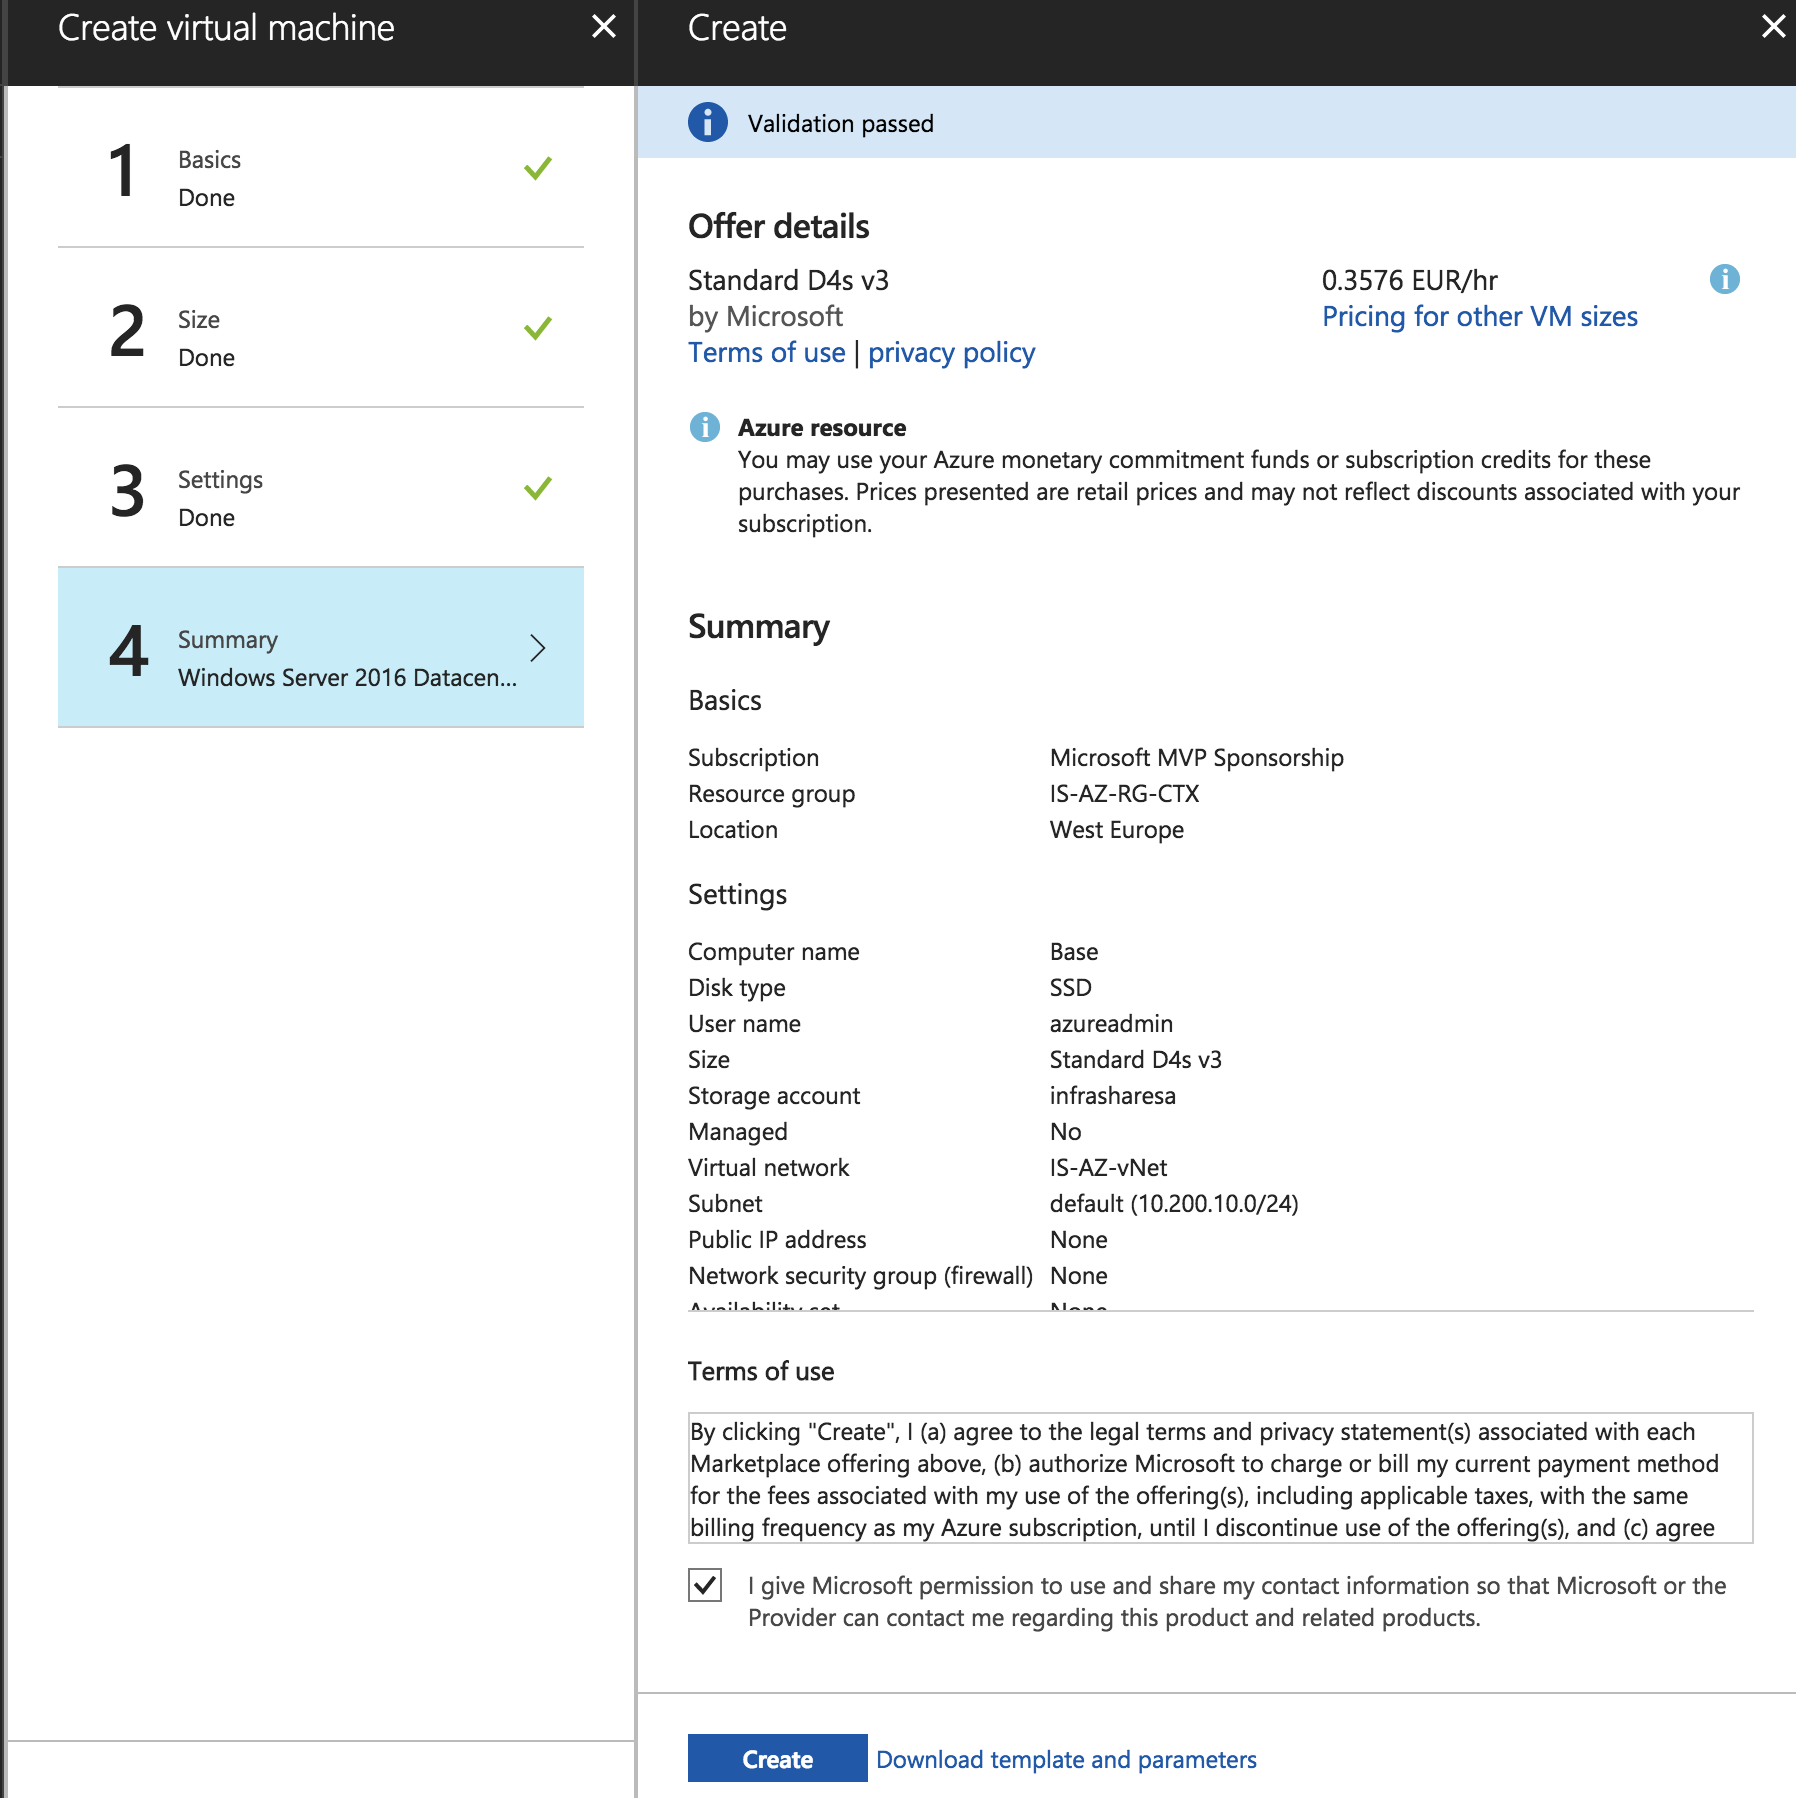
Confirm the settings and kickoff the deployment process
Setup a remote Desktop connectedness to the automobile and perform the following steps.
Update the OS with all Windows Update hotfixes

Do NOT bring together the domain
Do non optimize the Bone
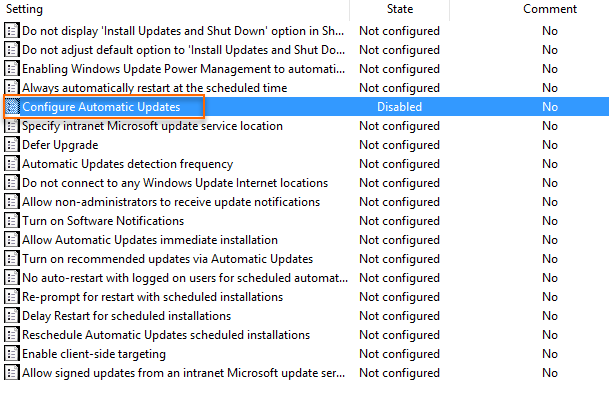
Disable Automated Updates in gpedit.msc
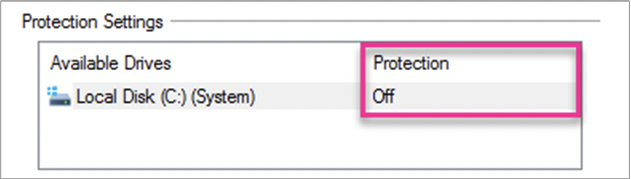
Ostend that Protection is turned off
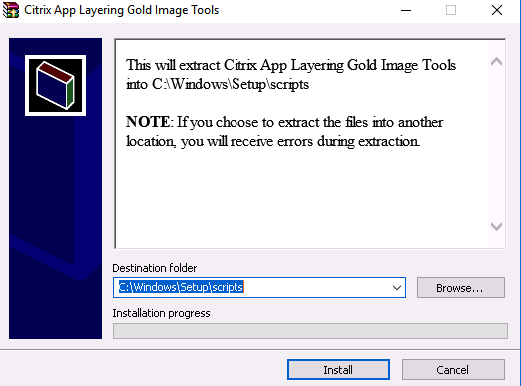
Connect to the UNC location of the .nada file to locate the MCS agent software. Unrar the – citrix_pp_layering_os_machine_tools_4.8.0 – file
Become through the setup – click on Install
Open a command prompt and install .Cyberspace Framework iv by entering the following command.
C:\Windows\Microsoft.Internet\framework\v4.0.30319\ngen.exe update

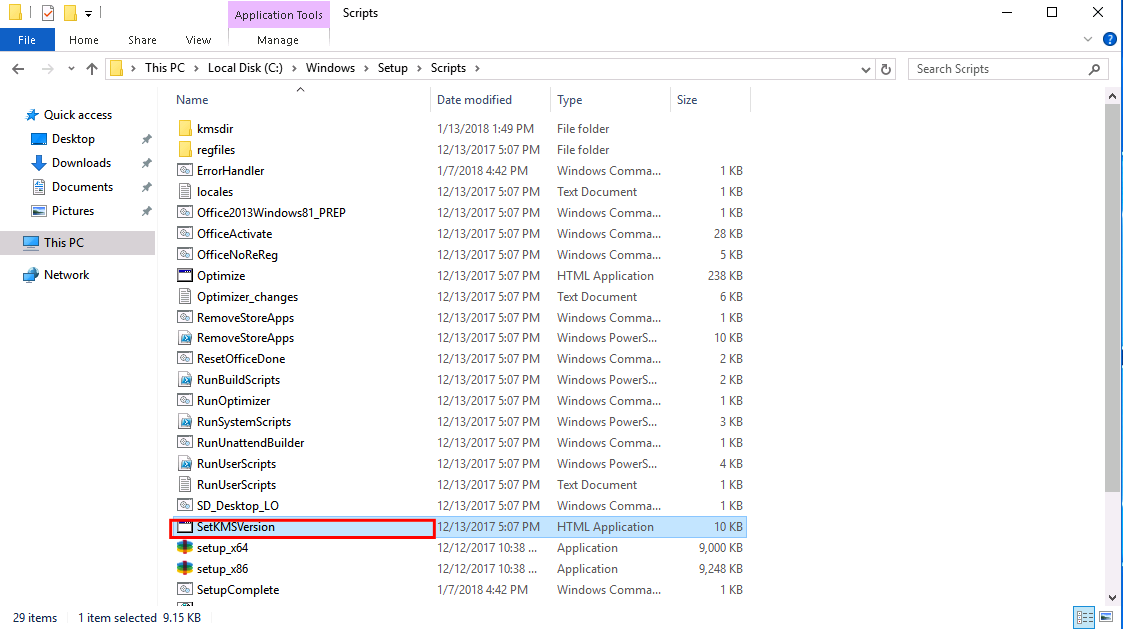
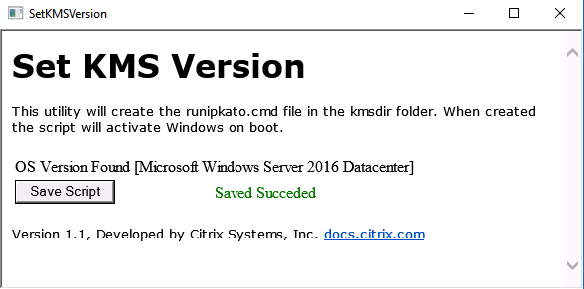
Become to the C:\windows\setup\scripts location and open the – SetKMSVersion – application
Click on Save Script
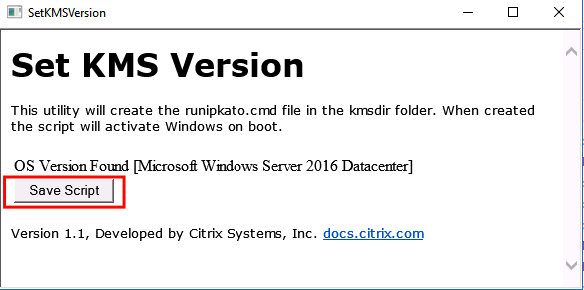
Confirmed and saved the script
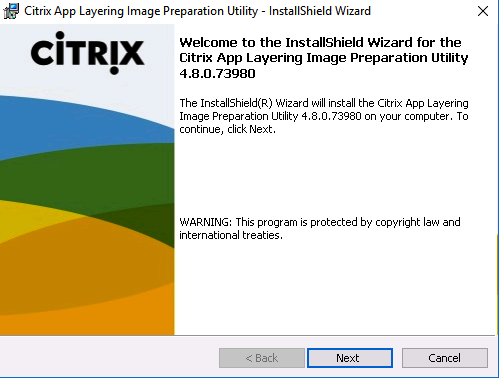
Now we need to install the Machine Preparation Utility. Click on setup_x64.exe

Go through the setup, click Next
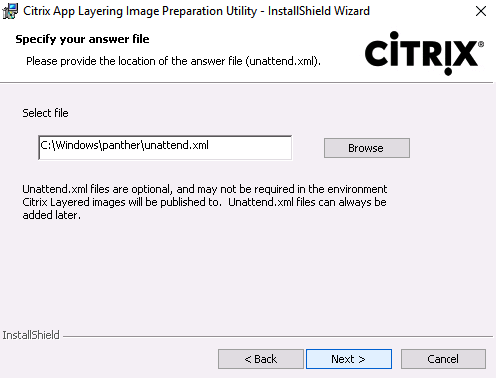
Click next
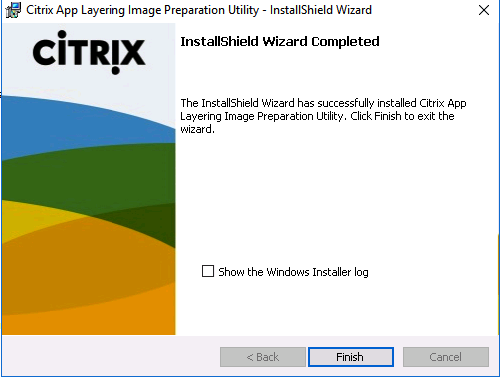
Click on Finish
Extra: Citrix Optimizer Supplement for App Layering
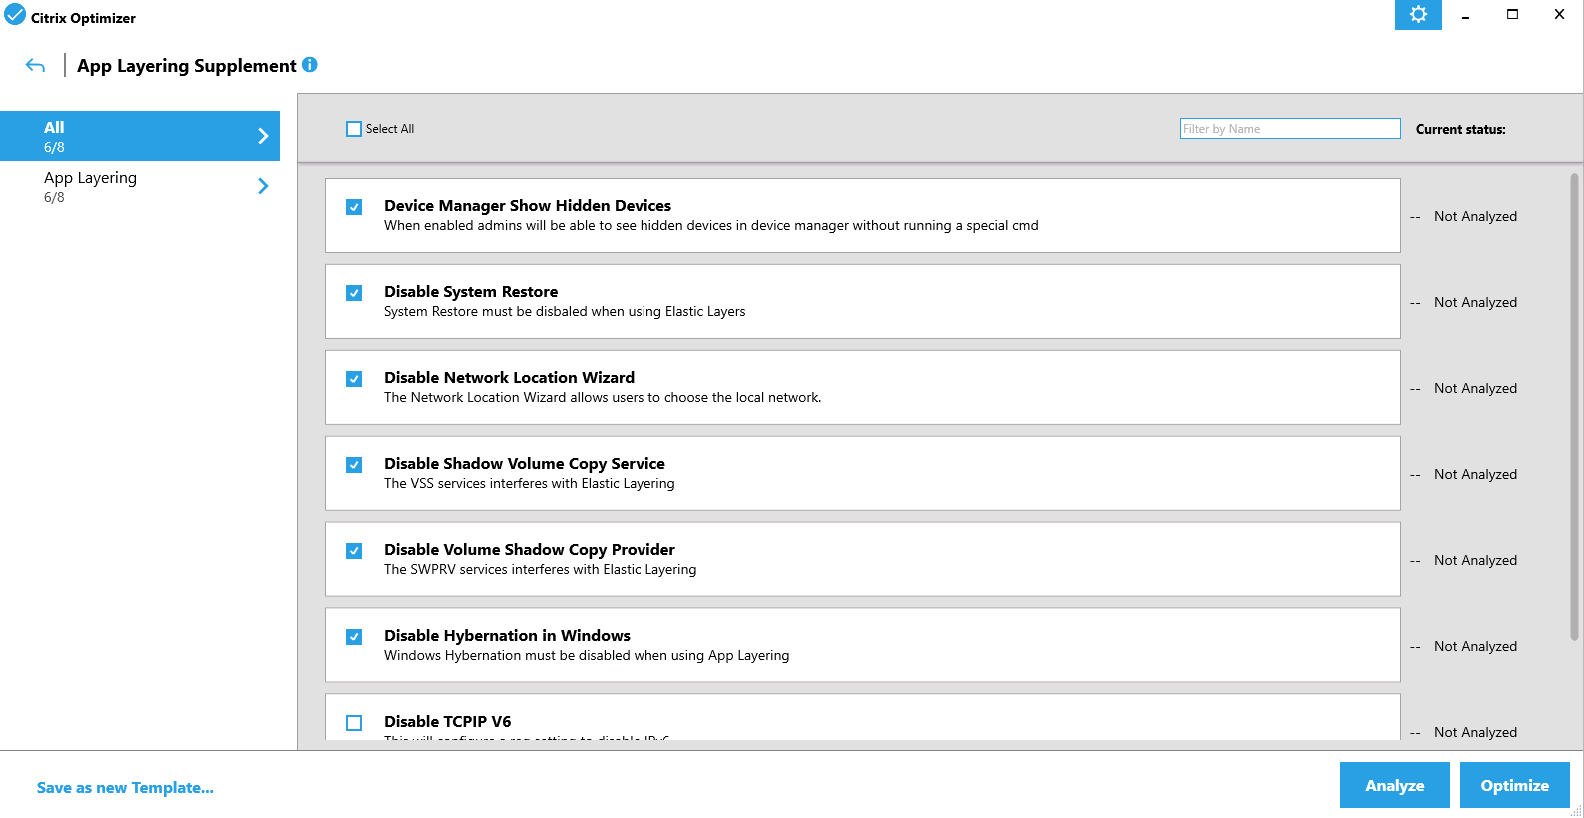
As you may know, Citrix just released the Citrix Optimizer tool to tune and tweak Operating Systems to eventually taking full reward of the resources. The great part of this tool is that you tin create own custom .xml templates to run specific optimizations. This resulted in 1 groovy Supplement template for Citrix App Layering, for optimizing the OS Layer for example. The template is created by Rob Zylowski.
The template and script included in this article extend the optimizations provided by the optimizer for settings that employ to App Layering, which are non plant in the included templates.
To use these but put them in the templates binder when y'all set upwardly the Citrix Optimizer. The settings to disable IPV6 take to be run in the OS layer and you can certainly add all your optimizations there if you wish. The removal of the Windows Universal Applications must be performed in the OS layer. Think to always keep a non-optimized initial version of the OS layer to fall back to just in case something you lot fix using the tool becomes a problem.
Note : Run the steps before finalizing the OS Layer!
The Citrix Optimizer App Layering Template tin be downloaded here
Citrix Optimizer can be downloaded here
Open the Template
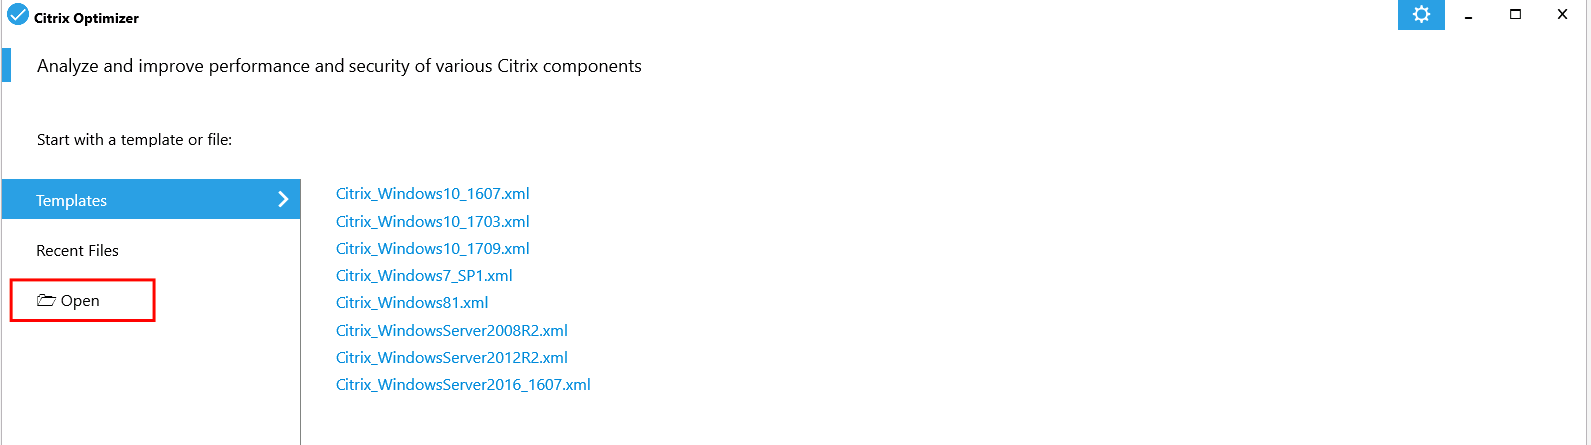
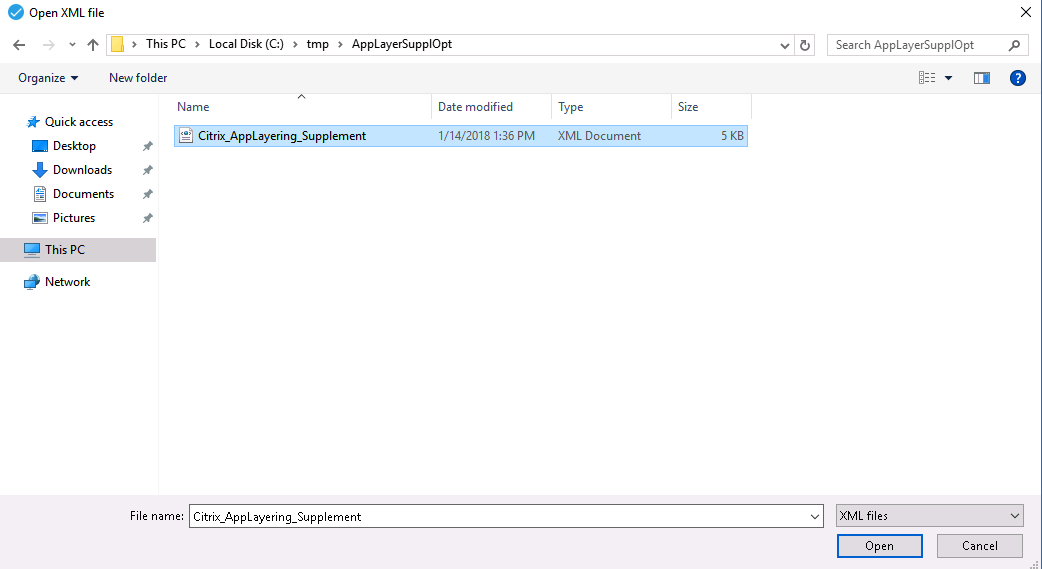
Search for the XML file
And optimize the Bone Layer by clicking on the Optimize push button !
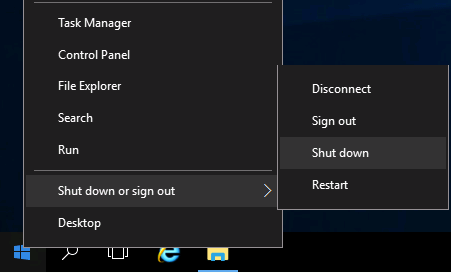
Shutdown the Base (aureate image) Motorcar in Azure
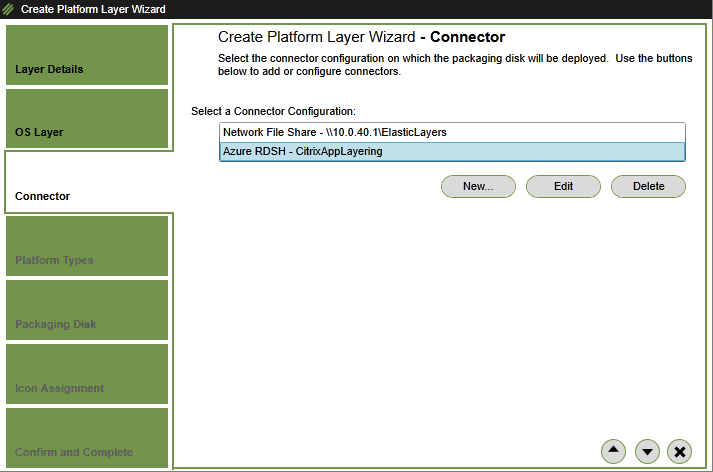
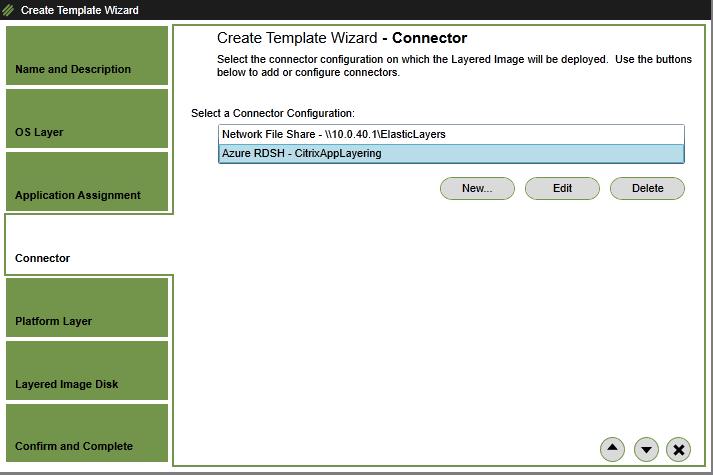
Create an Azure Connector configuration
A Connector Configuration is a stored set of values for connecting to a storage location in your environment. A configuration typically includes credentials for hallmark, a storage location, and any other data required to interface with the surroundings where yous volition be creating layers or publishing images. You tin can create multiple Connector Configurations, each configured to access a unique location in your environment.
When you create an OS Layer, you demand a Connector Configuration to give the appliance access to the location of the Os paradigm that you want to utilize for your OS Layer.
This is definitely different from the on-premise version of App Layering. Delight follow the next steps to perform the configuration.
Notation : For more information nigh the Azure Connector, delight check this Citrix article.
Firstly, we need to create a App Registration in Azure Agile Directory
Open the Azure portal
Become to Azure Active Directory and open up the App Registrations bill of fare. Click on – New Application registration
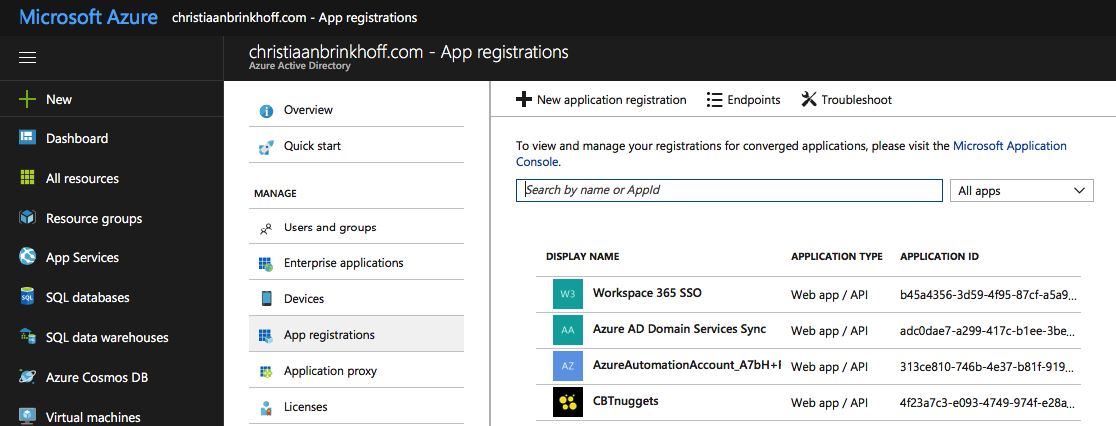
Give in a random name – and accept over the following settings . Click on Create

Create the Server 2016 Bone Layer
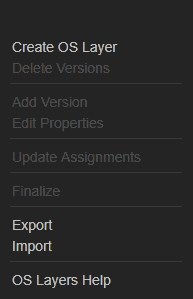
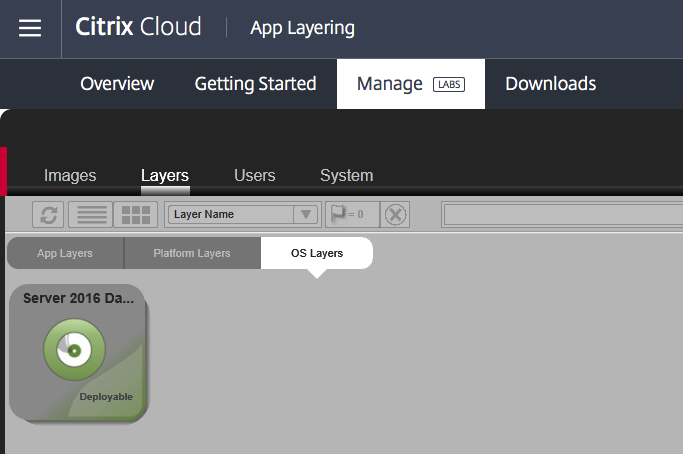
Switch dorsum to the ELM Spider web portal and open the Layers tab – followed past OS Layers

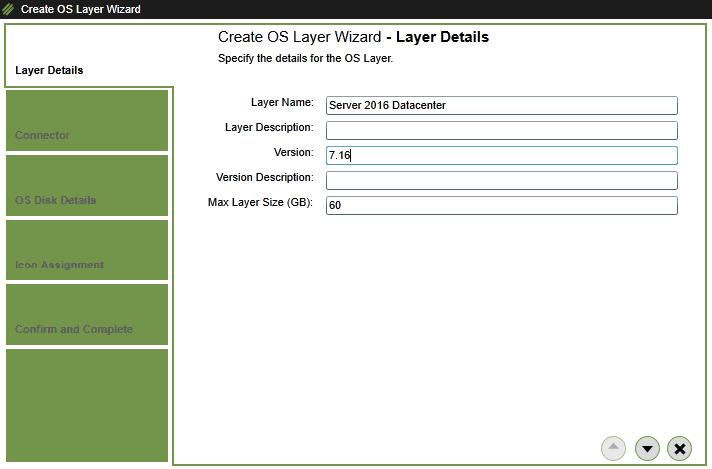
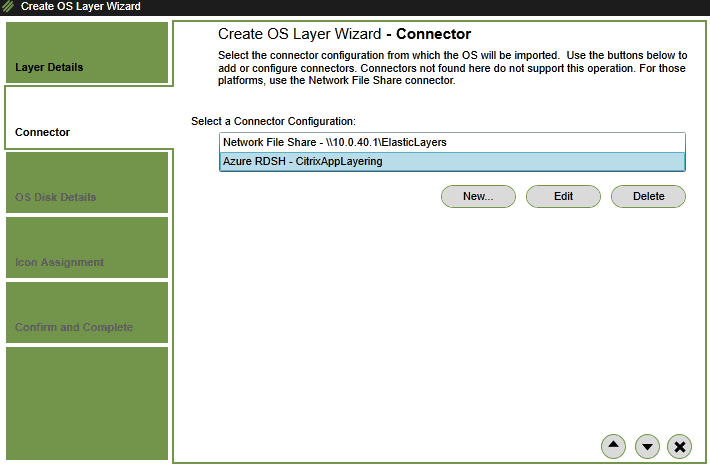
Click on – Create OS Layer
Enter in a Layer Proper name , version and Size (C:\ drive) . Click on the arrow downwards
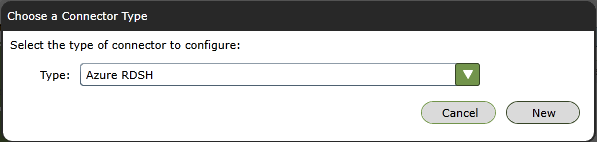
Click on new
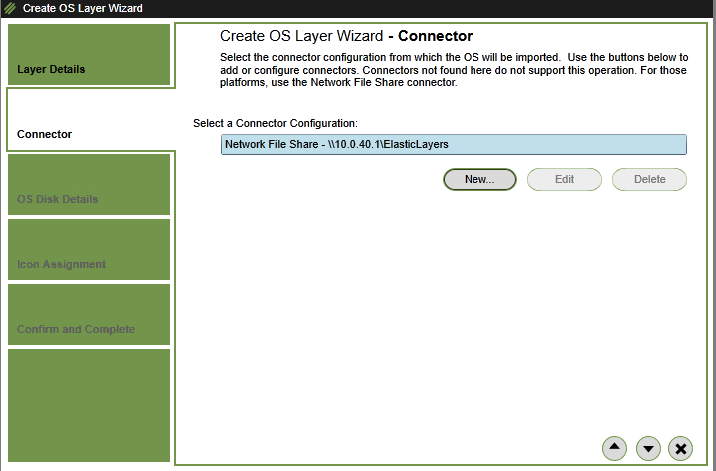
Select – Azure RDSH
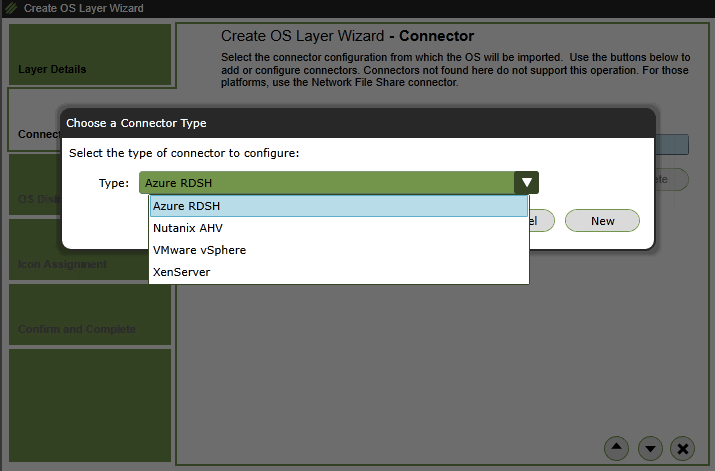
Click on New
Delight await – this can take up to one – five minutes…

And washed loading…
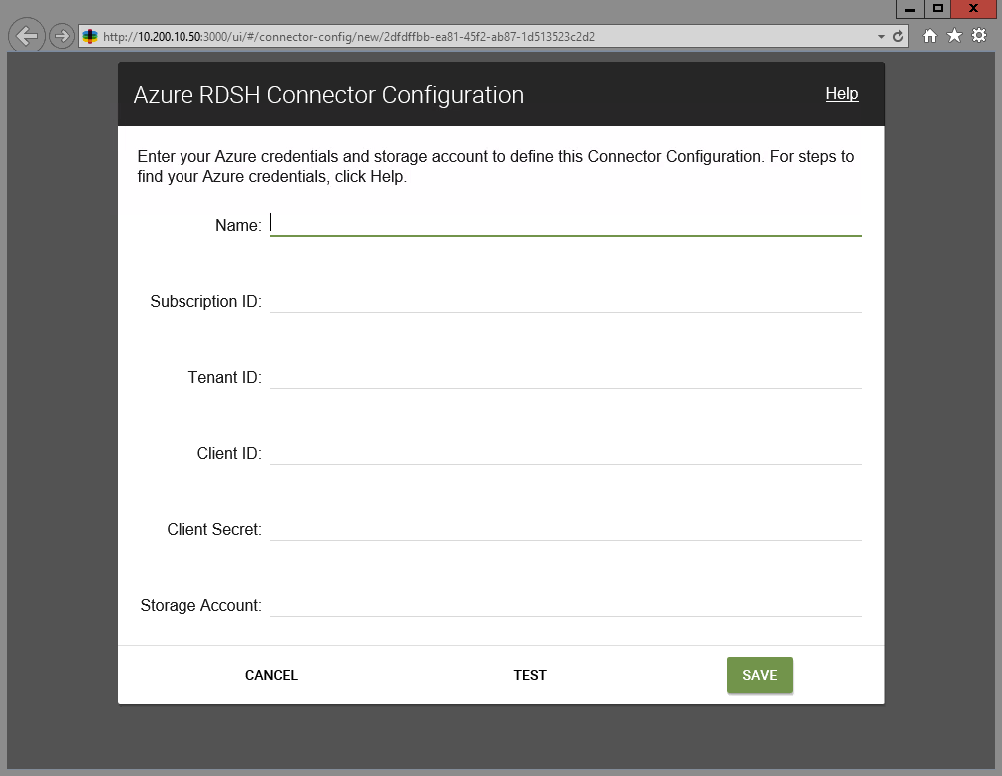
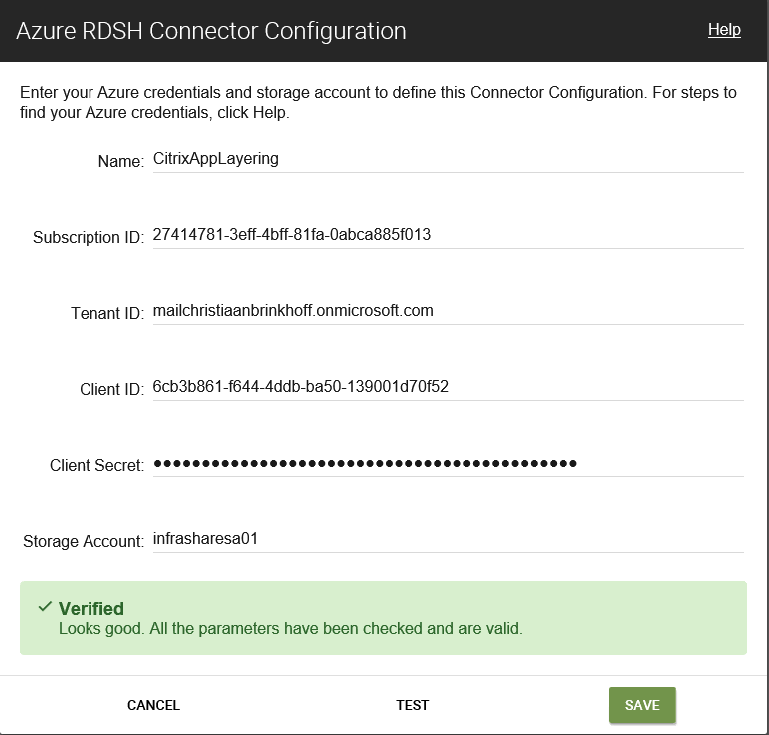
At present nosotros need to enter all the data from the App Registration, including some more.
To collect all the information – open up the CitrixAppLayering – App Registration and open up the Properties carte du jour.

Name information technology the same every bit the App Registration name, such as CitrixAppLayering
The Subscription ID is the Azure Subscription that u use for the deployment, which can be found at the Subscription carte in the Azure portal

App ID URI is the Tenant ID
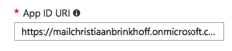
The Tenant ID you need is in the middle of the App ID URI. The Tenant ID is everything after the https:// portion of the App ID URI, up until the side by side slash. For instance, if your App ID URI is this: https://mailchristiaanbrinkhoff.onmicrosoft.com/1234-5432-43421 – So your Tenant ID is this: mailchristiaanbrinkhoff.onmicrosoft.com
Paste the Application ID from the previous step at the Client ID field
![]()
Utilise the Clipboard feature in the meridian menu to paste the information. Saves a lot of fourth dimension…

Open the Keys carte of the App Registration.
Click on the Cardinal description field and type in a description, such as App Layering Central – set the Expires to Never and click on Save
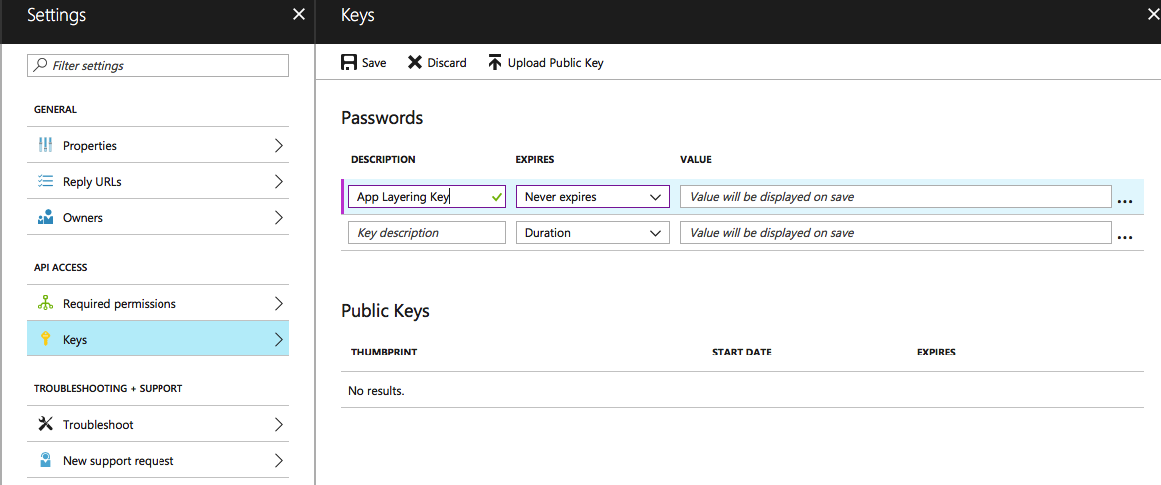
The Value field is now filled in. This is the Client Secret – paste it in the Connector Configuration.
Note : This cardinal does non announced again after yous close this window. This key is sensitive information. Treat the key like a password. If someone gets admission to this value, they can potentially proceeds authoritative access to your Azure subscription.  Now nosotros demand to assign RBAC – Contributor Rights on the App Layering – App Registration, for the Azure Subscription nosotros are using.
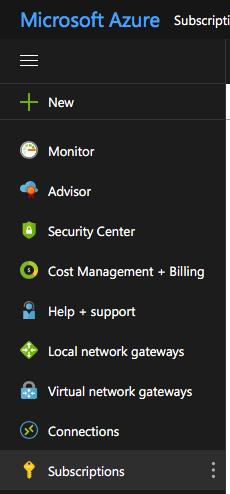
Open the Subscriptions option in Azure
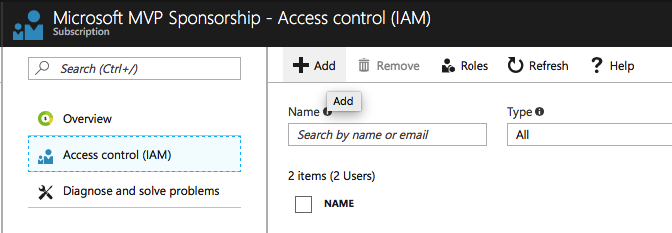
Select the Subscription . Click on Access Control (IAM)
Click on Add
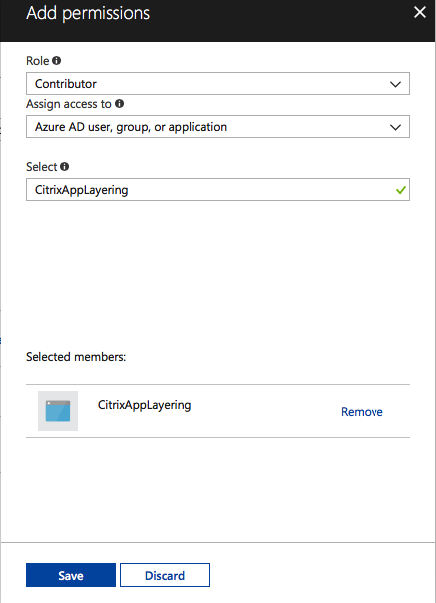
Select the Correspondent Function, assign access to Azure AD user, group, or awarding and requite in the App Registration name in the Select field .
Select the fellow member and click on Save
And the terminal one – enter in a storage account name.
This can be an existing one or a new 1. It needs to be a Basic storage account for Azure ARM with Storage service encryption Disabled. And then you cannot use the aforementioned Premium SA every bit from the previous steps.
Paste all the required information in the screen and test the connector configuration
Click on Save
Select the new created Azure RDSH – CitrixAppLayering Connector . Click on the downwards arrow
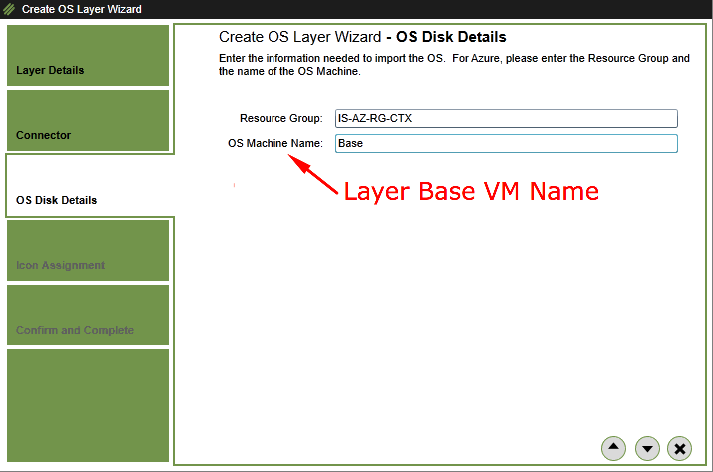
Enter an Existing or new Azure Resource Group and the VM Base VM proper noun, which nosotros created earlier. Click on the Downward Arrow
Select an icon. Click on the Down Pointer

Confirm all the settings – Click on Create Layer
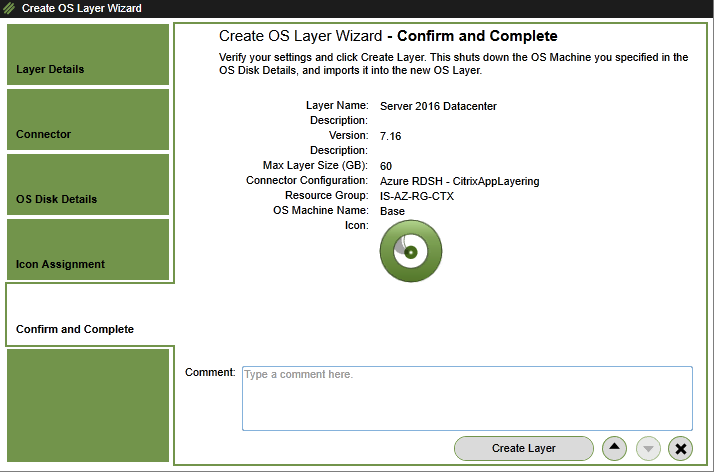
The new Bone layer is now listed in the OS Layers section, therefore it's notwithstanding busy with the creation procedure. This tin can take up to 30 minutes…

The procedure is finished when the status is Deployable
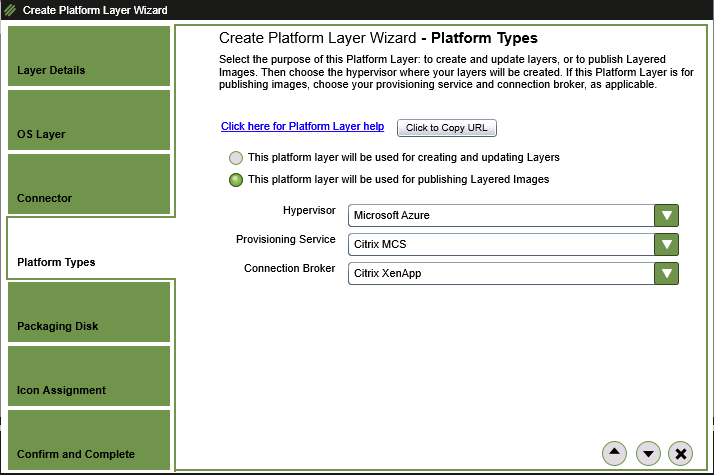
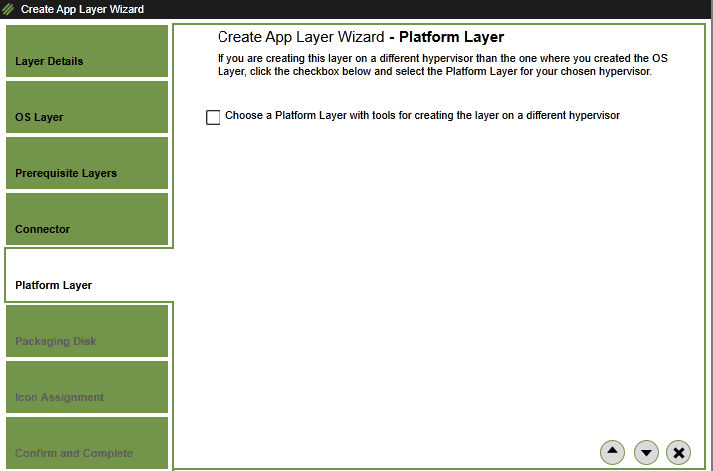
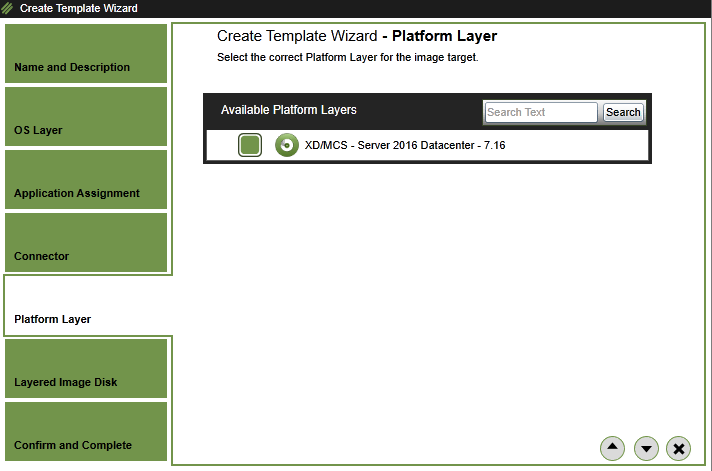
Create an Azure ARM – RDSH platform layer
The Platform Layer is a special layer where Azure (if they are not office of the Os layer), broker and provisioning tools reside. The Platform layer is only used when creating a Layered Image.
If they were to subsequently decide to move to another provisioning mechanism, they would create a new Platform Layer for that platform. The operating system and applications would stay the same.
Open the Layers tab and become to Platform Layers
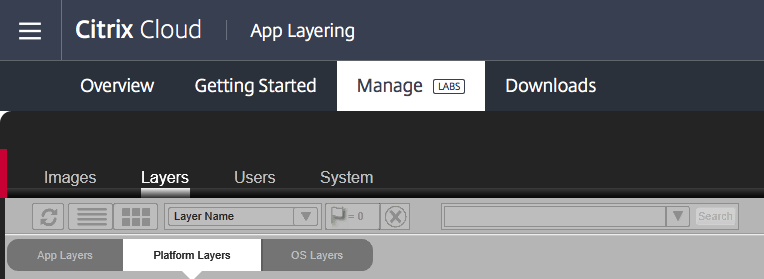
Click in the right menu on – Create Platform Layer

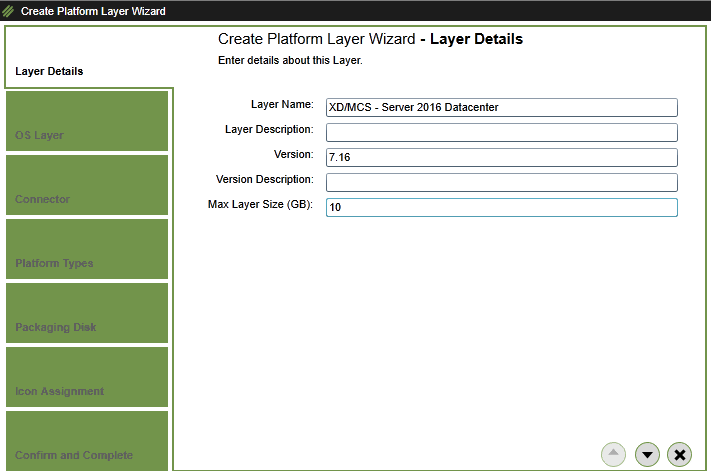
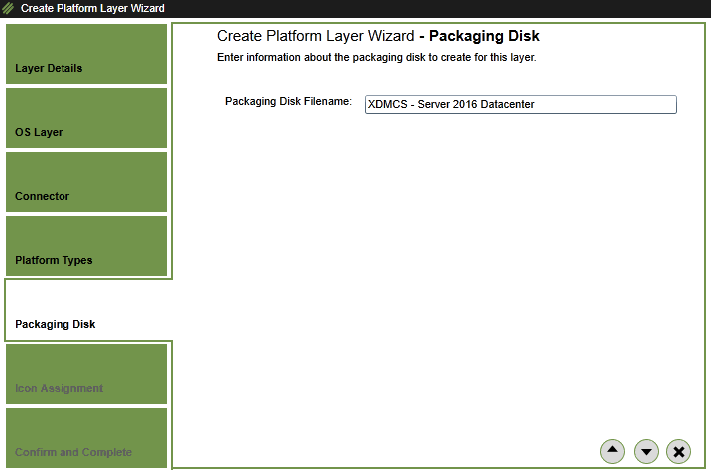
Enter a proper noun for the Platform Layer.
Note: Max Layer Size is the maximum size of the deejay used for the layer. This typically does not demand to be lowered since all layers are thin provisioned. You may desire to bump it up for large applications. This setting tin can also exist adapted whenever you create a new version of a layer.
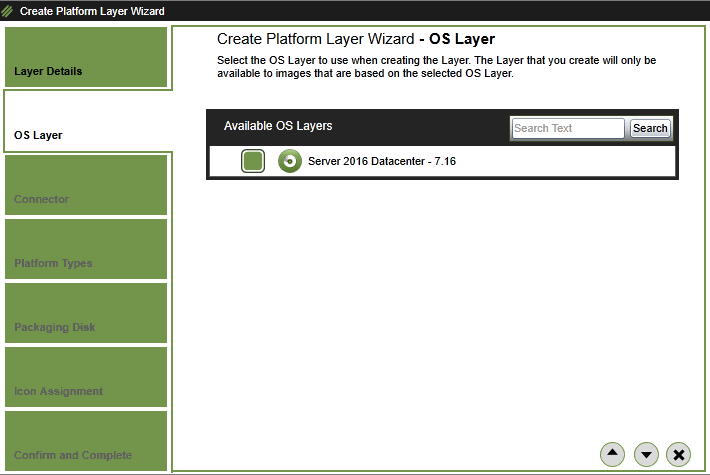
Select the OS Layer
Select the Azure RDSH – CitrixAppLayering Configuration
Select 1 of the 2 options. For this commodity, I'll use the second selection, select Microsoft Azure , Citrix MCS and Citrix XenApp and click on the down pointer
Platform Layers for packaging Layers (Required in some cases) – These Layers include the hypervisor software and settings yous demand to easily install the software for your other layers on a VM in your hypervisor environment.
Platform Layers for publishing Layered Images (Required) – These Layers include the software and settings required for a Layered Image to run flawlessly in your environment.
Click on the down arrow
Select an icon , click on the down arrow

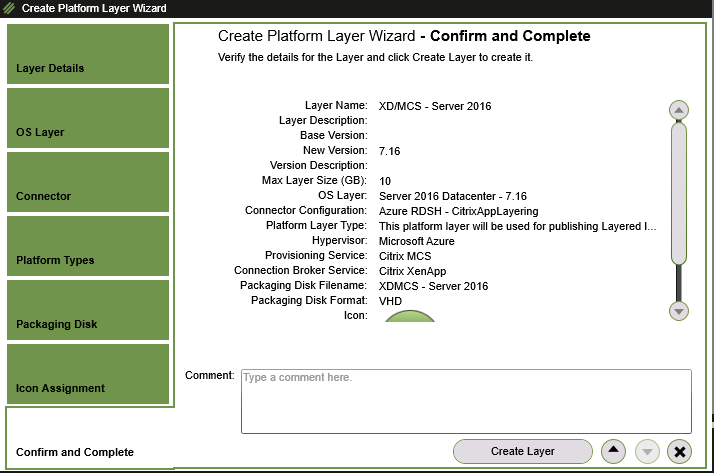
Confirm the settings. Click on Create Layer
Again, check the status in the Tasks card. Task completion may take 5 – ten minutes to consummate so delight exist patient.

The job is complete, double click on the chore

The task is completed – click on – Click here – to finalize the platform layer

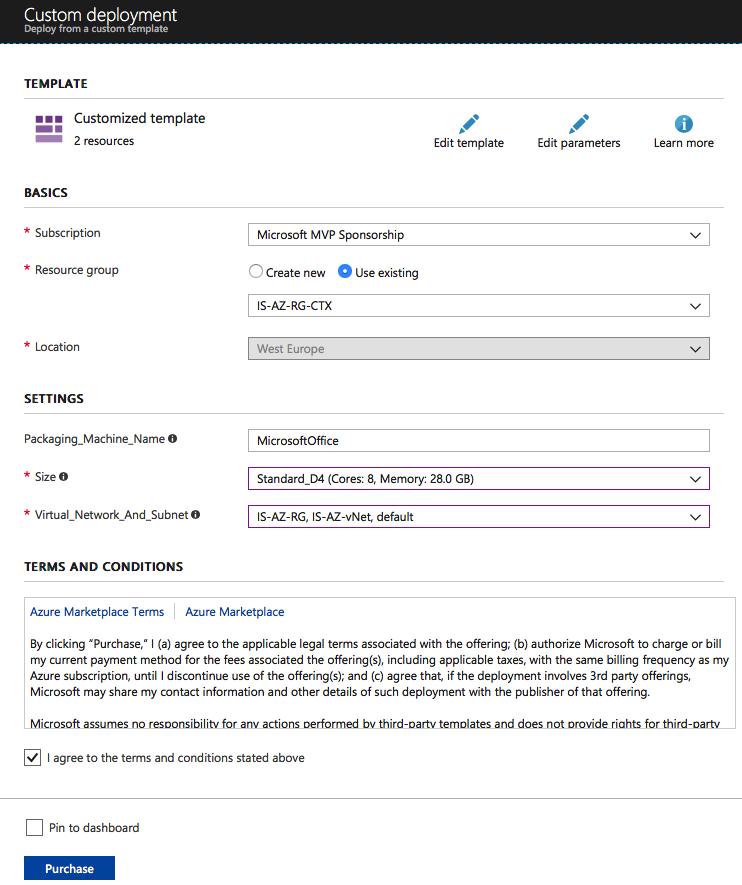
A Virtual Car with the Layer name will be created in Microsoft Azure

Select the Azure subscription, Resource Grouping, Machine name, SKU Machine sizing and Virtual Network.
Have the terms and atmospheric condition and click on Purchase
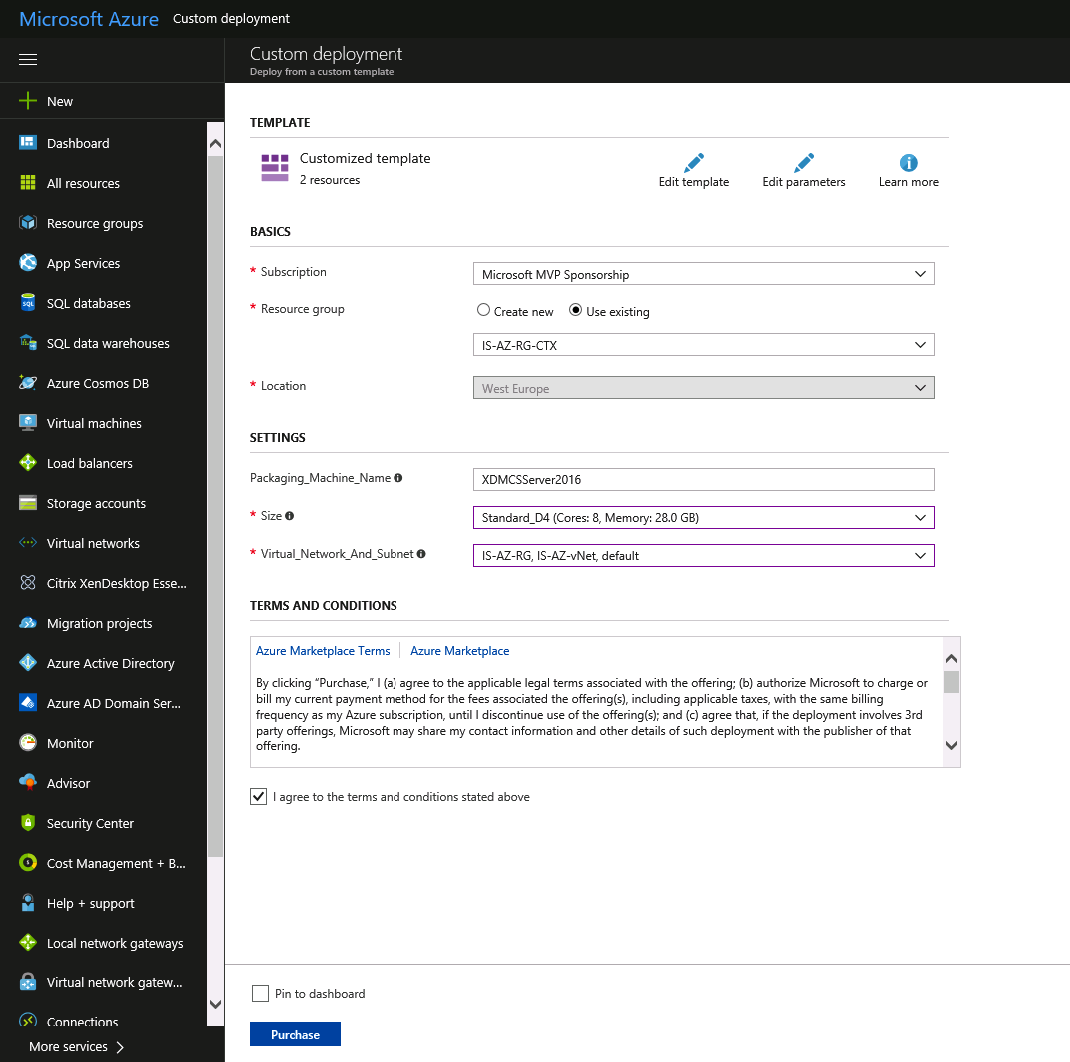
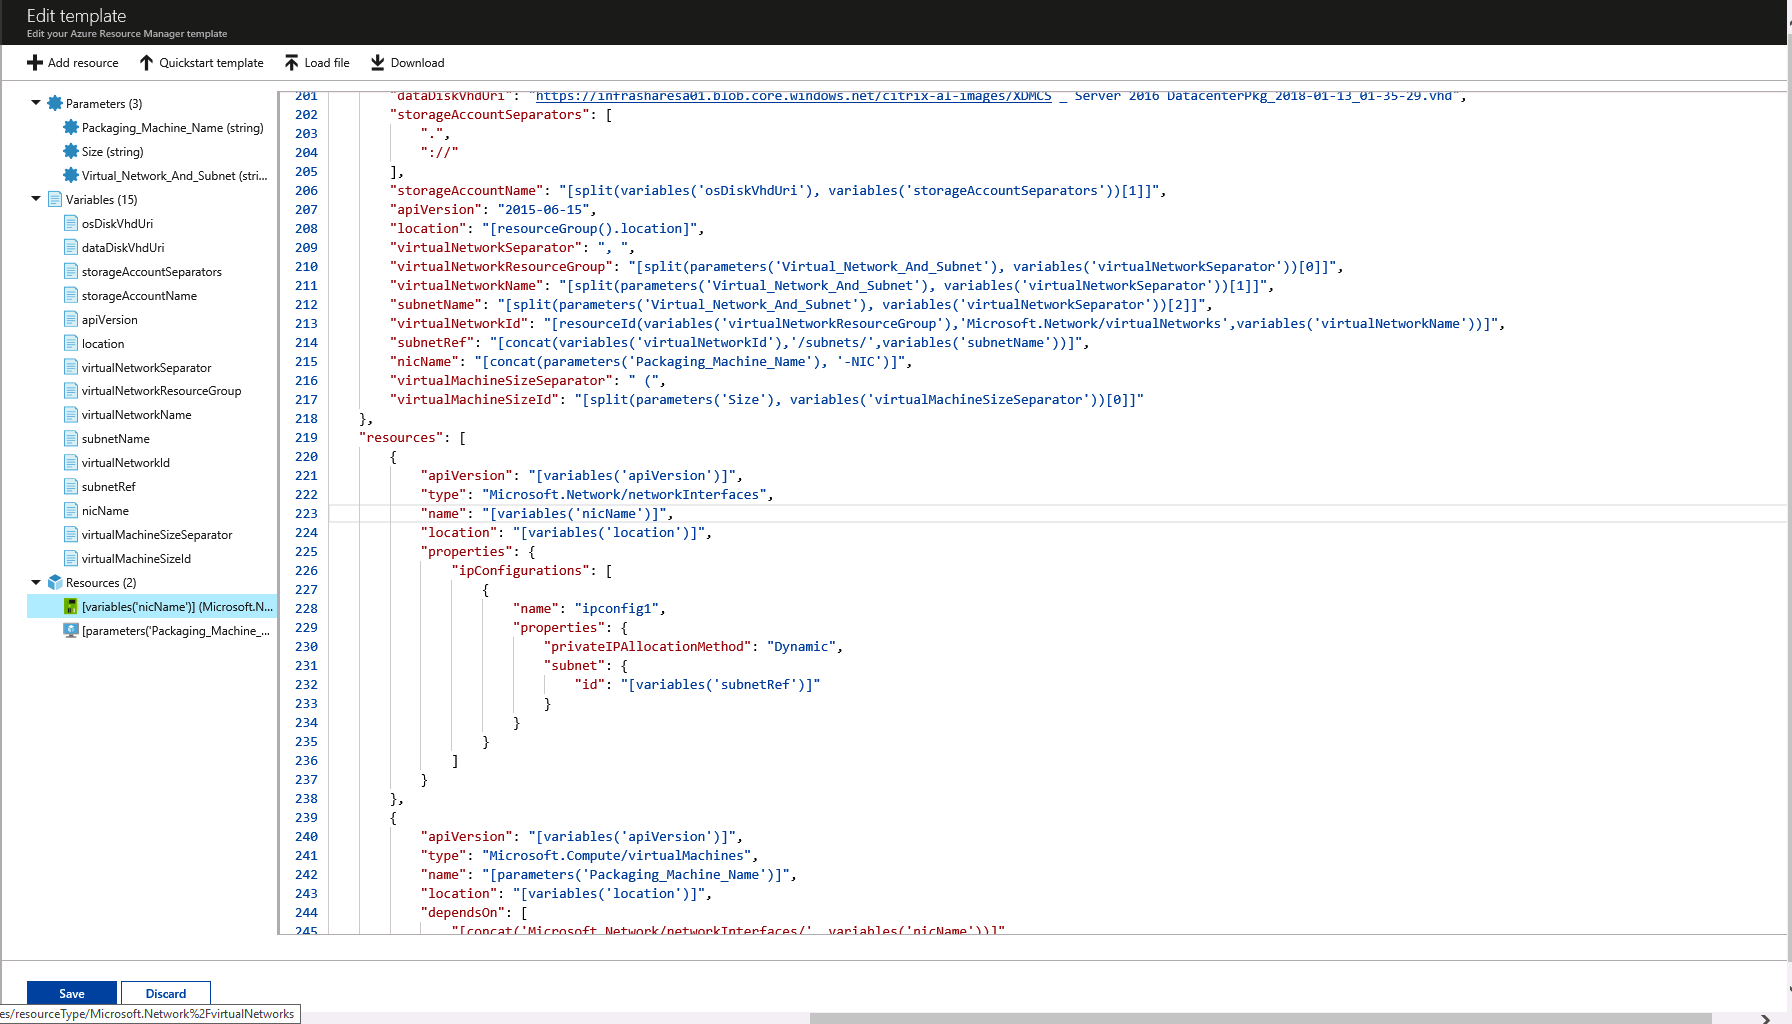
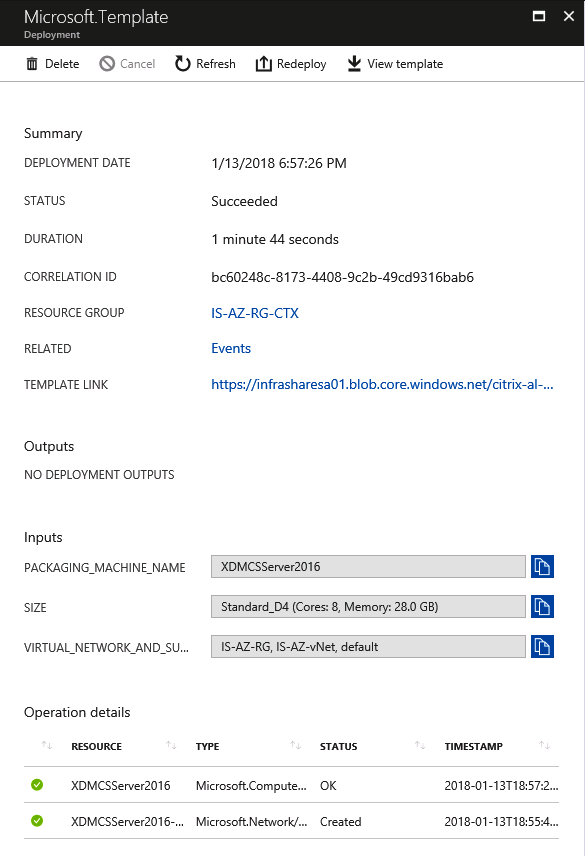
Annotation : When u click on Edit template, you'll see the JSON template file, which created the Os platform Layer in Azure IaaS.
Click on the notification
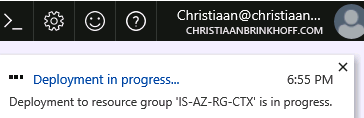
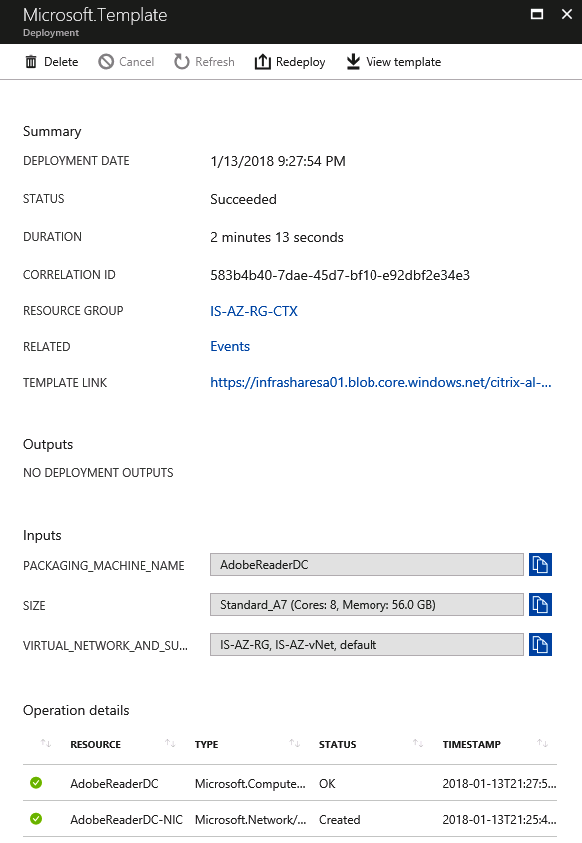
The JSON template deployment took i minute and 44 seconds!
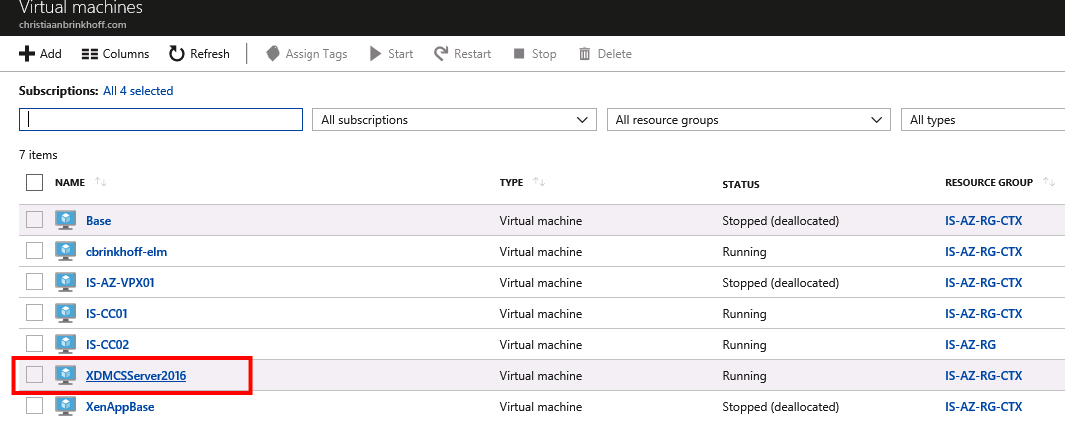
Bank check Virtual Machines and open the Machine
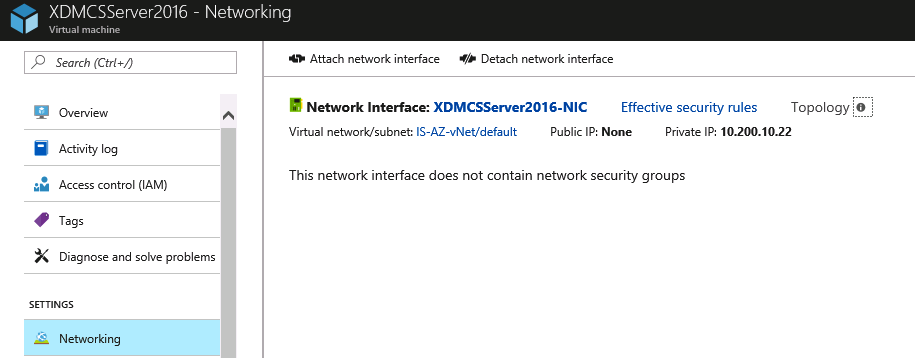
Detect the Private network address – setup a Remote RDP Connection to finalize the layer.
Join the Layer – Virtual Motorcar to the domain
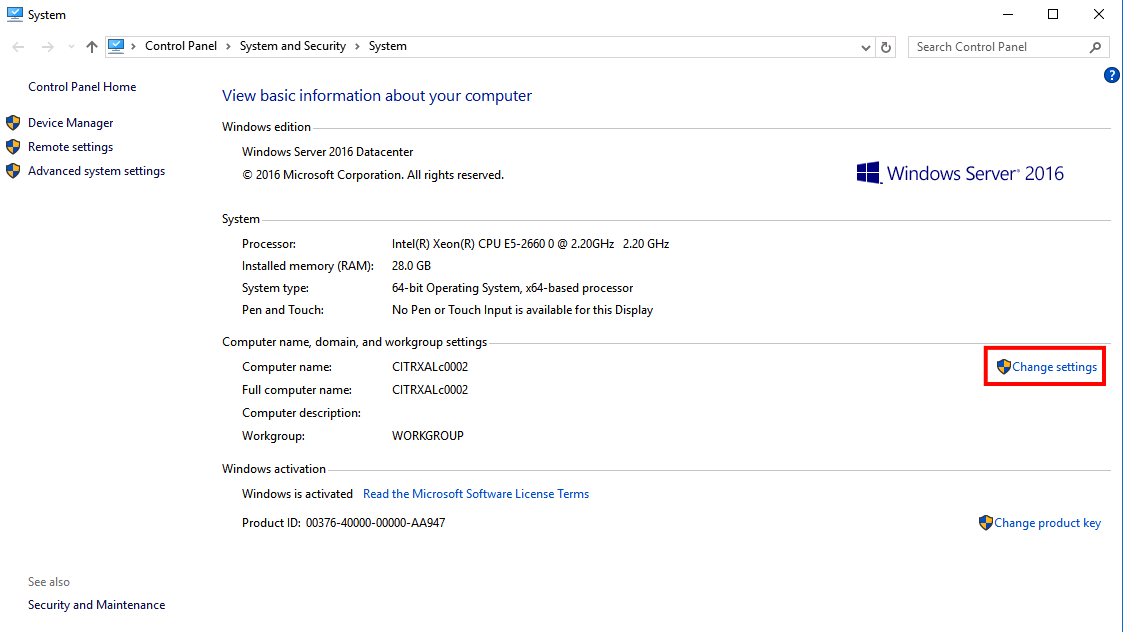
Give in the domain name, authenticate and click Ok
(It's likewise possible to change the computer proper name)
Note : Issues with the domain join? Make sure that the Master DNS of the Azure Virtual Network points to the Active Directory server!

Click Ok
Reboot the Virtual Car
When the machine is back online – open again a RDP as local ambassador
Note: After joining the domain, movement the computer account to your OU, to make certain the GPO computer settings are practical to the Platform Layer.
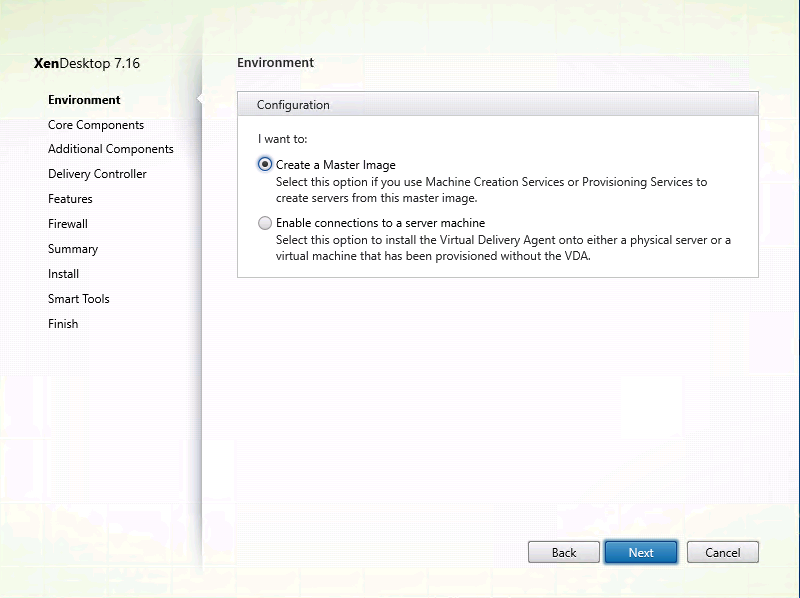
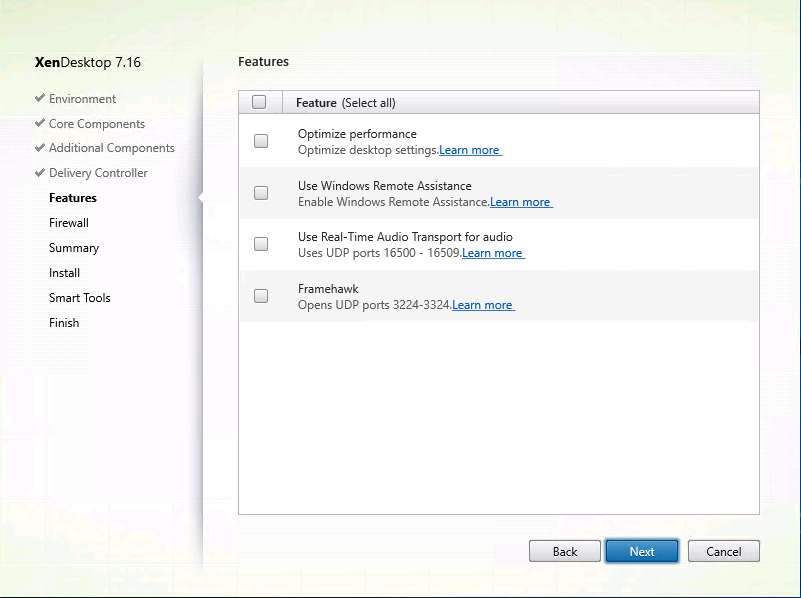
At present we need to install the Citrix Virtual Desktop Agent (VDA) in the platform layer. I'll use the latest 7.16 version.
Click Side by side
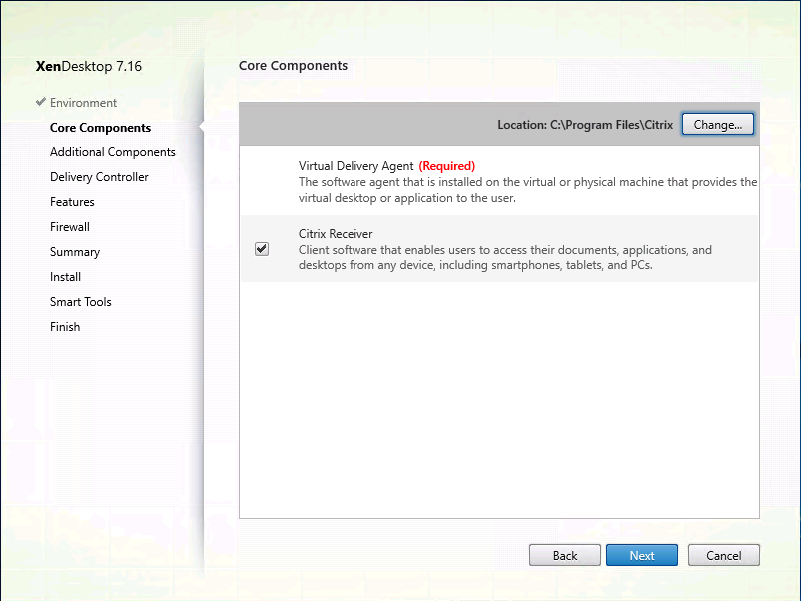
Click Next
Click Next

Add the Citrix Deject Connectors FQDN and click Adjacent
Note : I'1000 going to use the platform layer every bit base prototype, so for this reason I'll add together the Delivery Controllers to my Citrix Cloud XD XA Service environment.

Don't select the optimize performance feature. Click Adjacent
Note : George Spiers also created a great Citrix App Layering Grooming Script . Which tin can be used to optimize the Platform Layer earlier Finalizing the App and Os Layer !
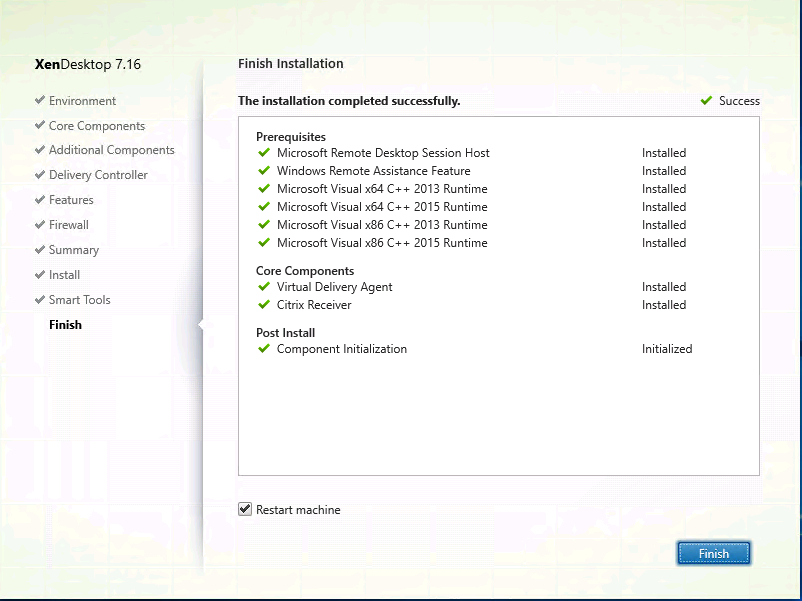
Go through the other settings, ostend the summary and click on install

Reboot the machine
Choose – I do not.. – Click adjacent

Remove the VDA setup files from the machine – Reboot (again) the automobile
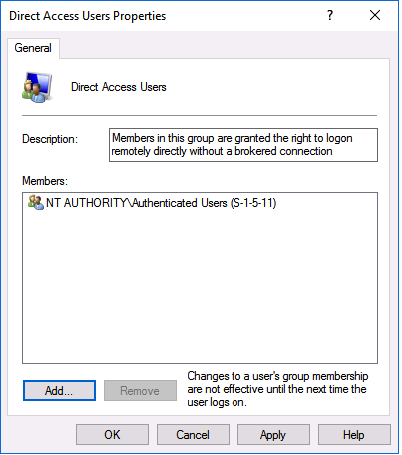
Add authenticated users to the Direct Access Users / perform the aforementioned steps for the Remote Desktop Users Group
Finalize the image – click on the Shutdown For Finalize shortcut
Annotation : If you also use Citrix Workspace Environment Direction – then likewise install the Citrix Workspace Environment Management Agent in the platform layer!
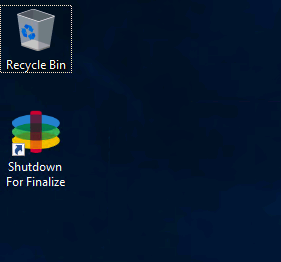
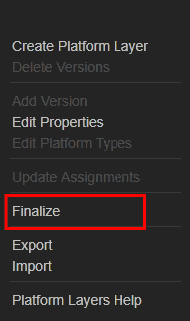
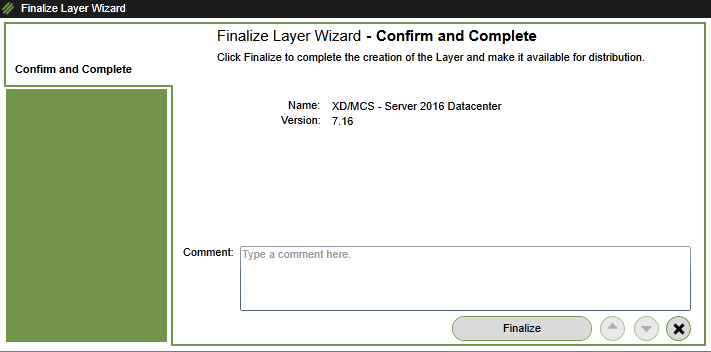
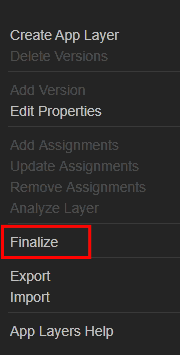
Switch dorsum to the ELM Portal and Finalize the Platform Layer
Note : When you finalize a Platform Layer, App Layering software deletes the Packaging Machine.
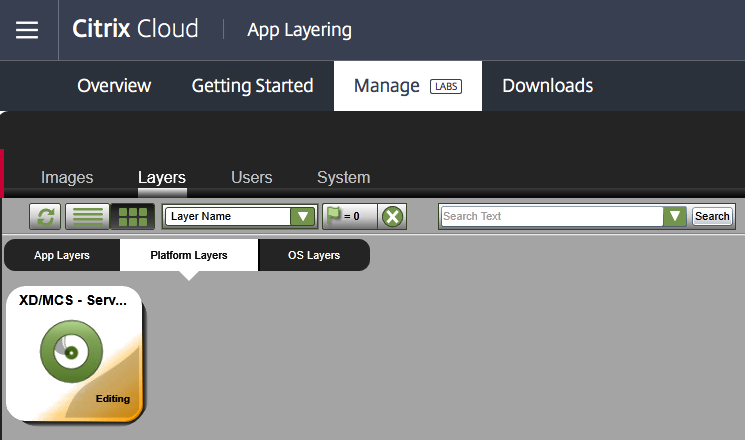
Click on Finalize
Confirm the process – click on Finalize
And the finalizing process is ongoing…

Click on the chore to get a more than detailed explanation of the process

And done!

Creating Application Layers – Adobe Reader
Awarding Layers may contain a single awarding or multiple applications. Citrix App Layering gives the administrator the flexibility needed to evangelize their applications .
I'one thousand going to demonstrate Adobe Reader and Microsoft Part in this article. I'll use Outlook subsequently for the Office365 User Layering support for the Outlook OST caching!
Creating an Application Layer is a three-step process:
- Run the Create App Layer wizard
- Install the application
- Finalize
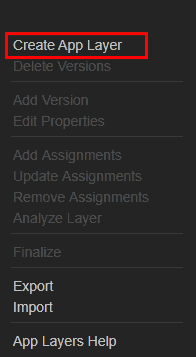
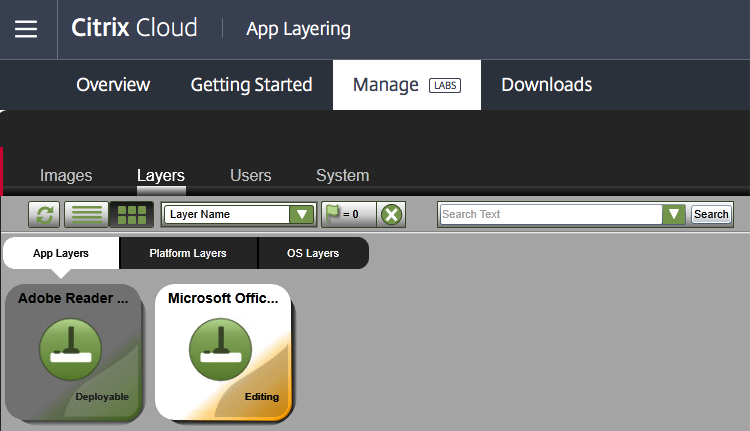
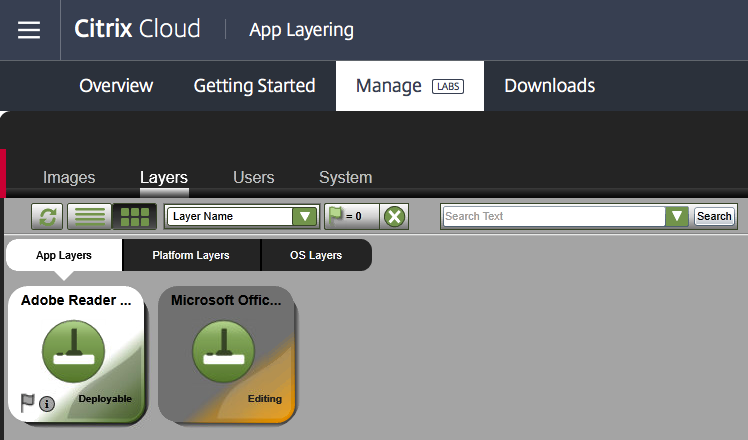
Click in the ELM Portal on Layers -> App Layers 
Click on – Create App Layer

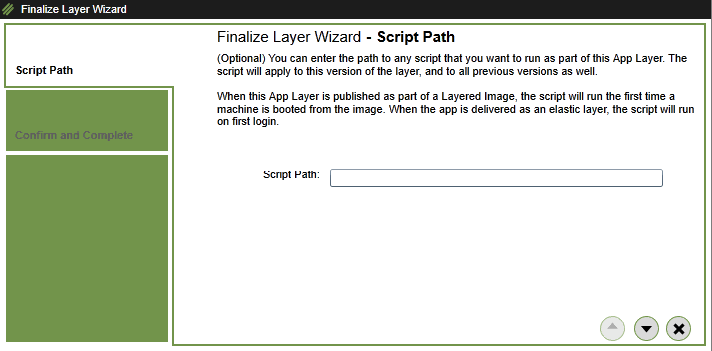
I'll use Adobe Reader every bit example. Give in a version and a maximum layering size . Click on the arrow
Note: The maximum layering size is dynamically expanding, and then the image won't allocate the maximum value of space .

Select the OS
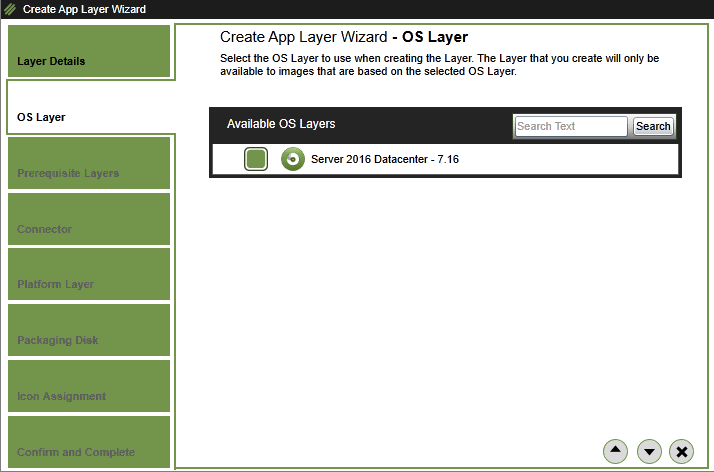
We don't include other layers – Click on the Arrow
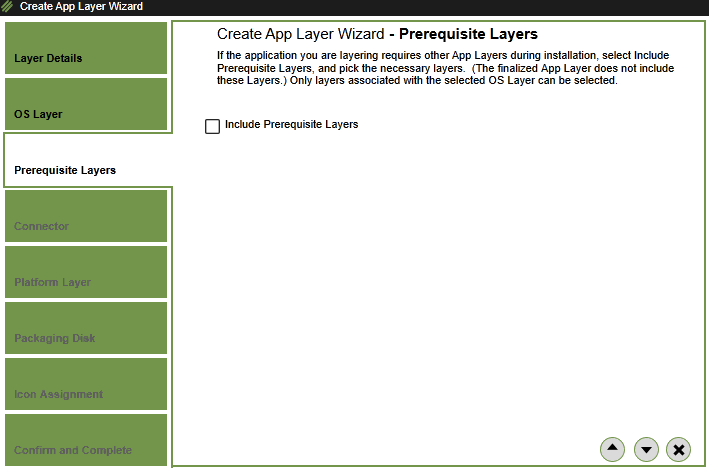
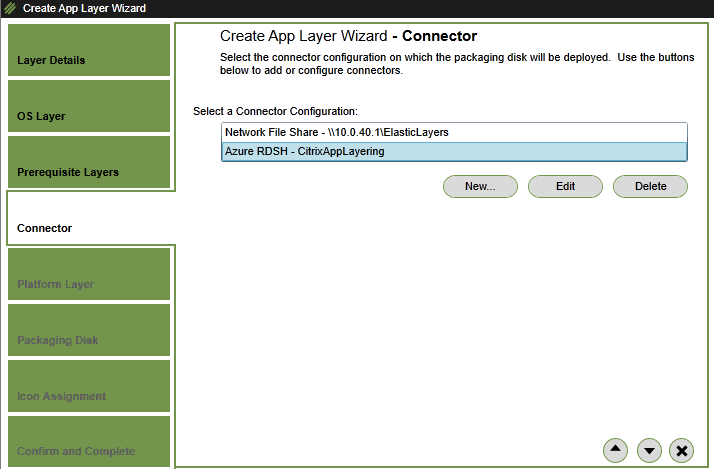
Select the Azure Connector

Nosotros can skip this – Click on the pointer

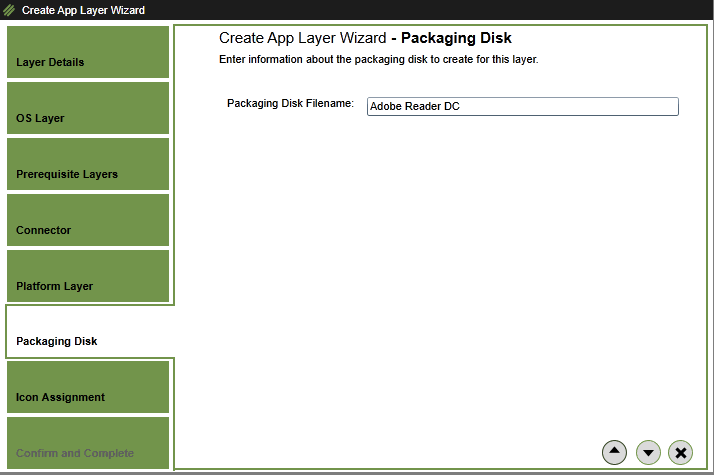
I apply the default name for the bundle – Click on the arrow
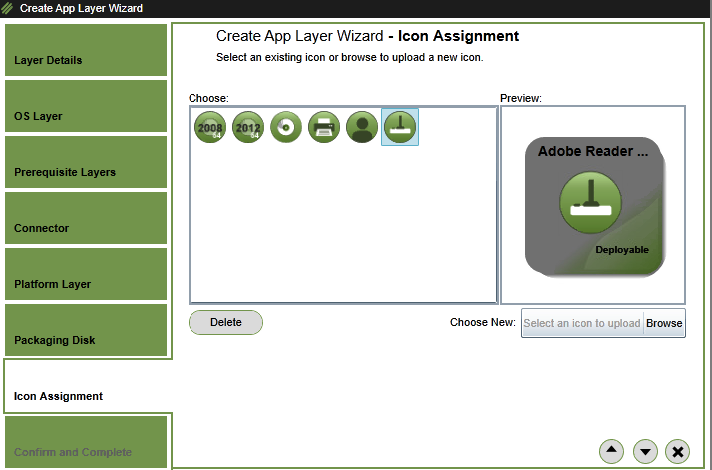
Select an icon
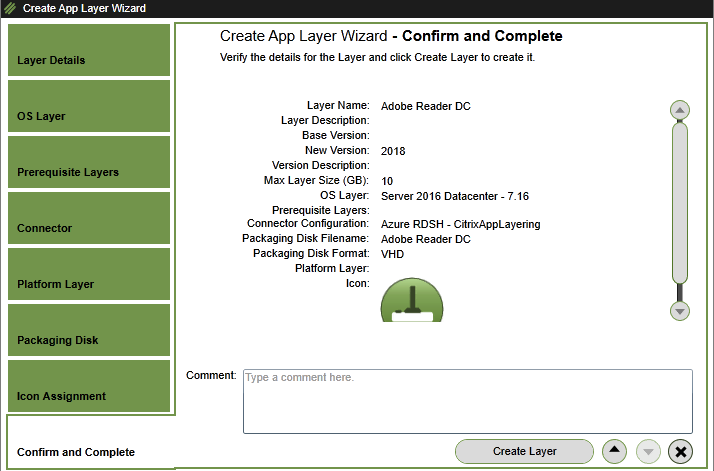
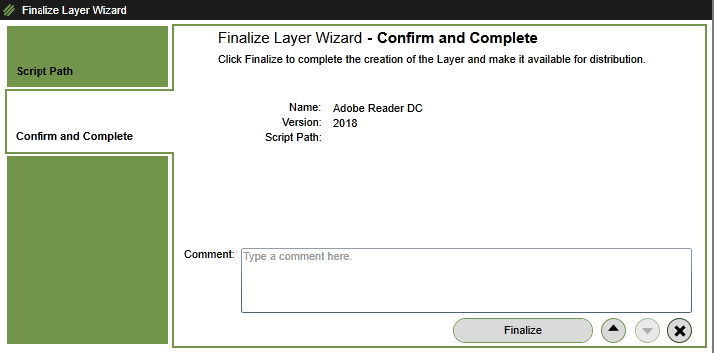
Check the settings – Click on Create Layer
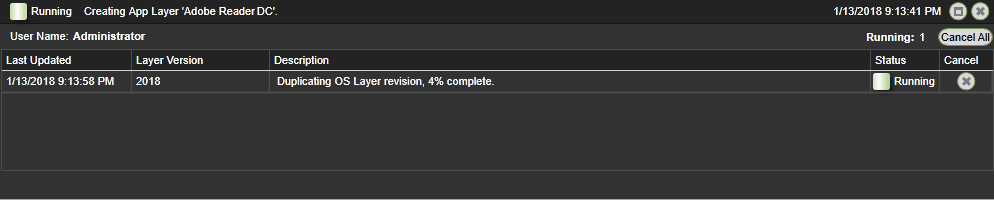
The task is running…

A new version of the OS Layer is being created for the application.
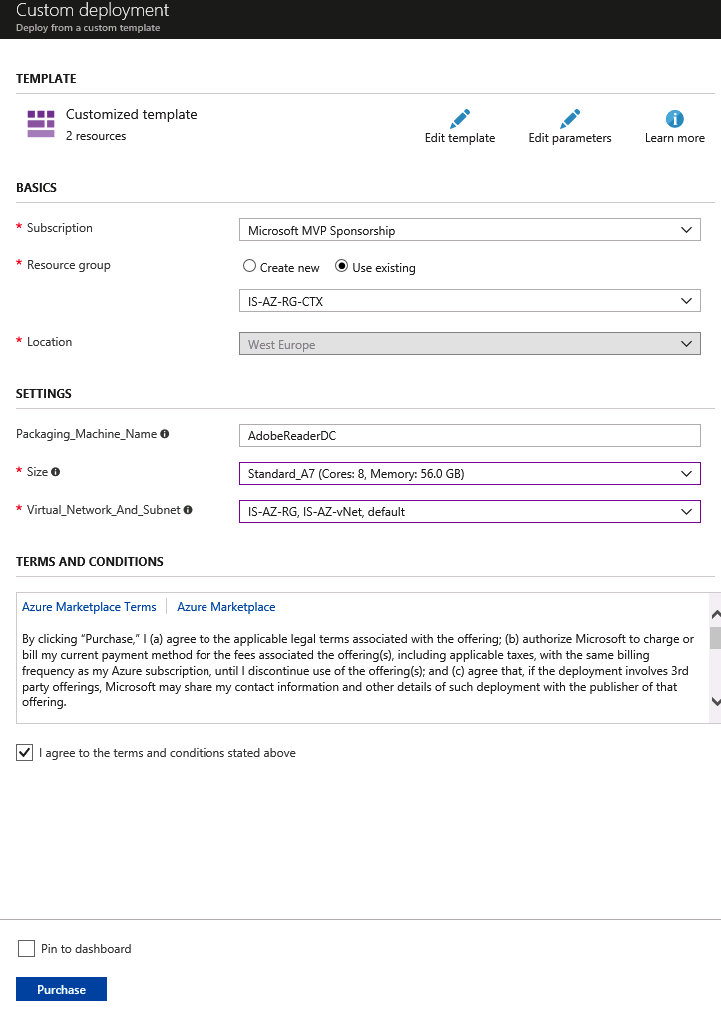
Open up the following JSON file to create the Layering Image Auto in Azure. Again logon with your Azure Ambassador credentials.
Notation : I'm experienced some troubles with opening this link inside the Citrix Deject – Published environment. Seems that internet and traffic to portal.azure.com is blocked. Delight copy the URL and open information technology anywhere else.

Use the aforementioned settings as for the Platform Layer JSON deployment. Click on Purchase
The virtual machine is finished…
Start a Remote Desktop Connectedness to the Layering Machine
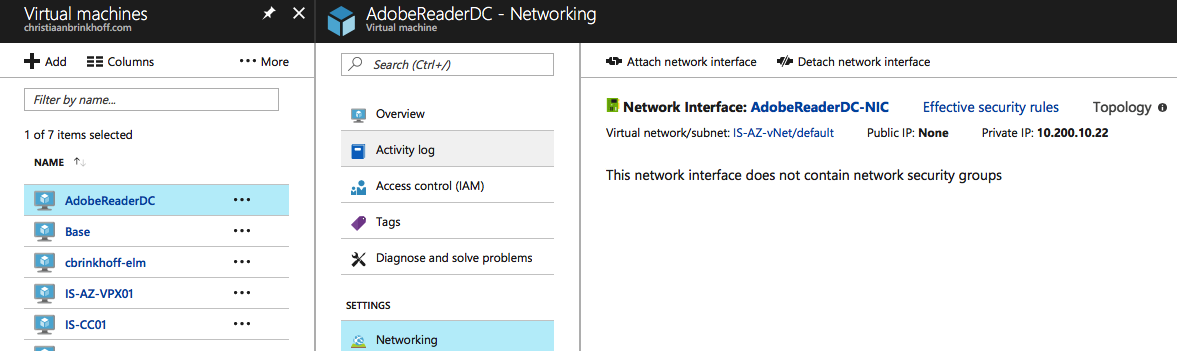
Logon with the local administrator account
Install the Application that y'all want to virtualize.
I'll apply Adobe Reader equally case . Perform the installation merely the aforementioned as normal.

The setup is finished
Remove the shortcuts from the public desktop binder
Finalize the image – Click on – Shutdown For Finalize
Note : George Spiers also created a great Citrix App Layering Training Script . Which can exist used to optimize the Platform Layer before Finalizing the App and Bone Layer !
Switch back to the ELM Portal. Click on Layers -> App Layers . Click on Adobe Reader

Click on Finalize

Click on the Arrow
Confirm the settings – click on Finalize
Check the tasks bar for the status …

Detailed condition…

And done!

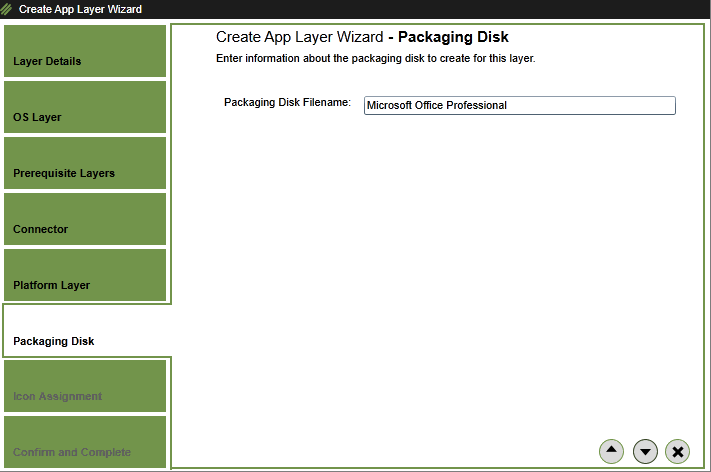
Creating Application Layers – Microsoft Office Professional 2016
Repeat the same steps for Microsoft Office Professional person
Click in the ELM Portal on Layers -> App Layers
Click on – Create App Layer
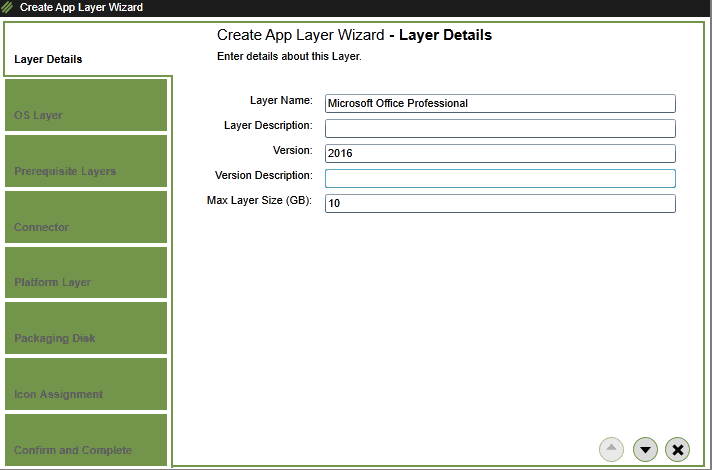
I'll use Microsoft Office 2016 equally example. Give in a version and a maximum layering size . Click on the pointer
Note: The maximum layering size is dynamically expanding, so the prototype won't allocate the maximum value of space .
Select the Bone

We don't include other layers – Click on the Arrow

Select the Azure Connector
We tin can skip this – Click on the pointer
I use the default name for the packet – Click on the pointer
Select an icon

Cheque the settings – Click on Create Layer

The job is running…

A new version of the OS Layer is being created for the application.

Open the following JSON file to create the Layering Image Machine in Azure. Again, logon with your Azure Administrator credentials.
Annotation : I'g experienced some troubles with opening this link within the Citrix Deject – Published environs. Seems that cyberspace and traffic to portal.azure.com is blocked. Delight copy the URL and open it anywhere else.

Use the same settings as for the Platform Layer JSON deployment. Click on Purchase
The virtual machine is finished…

Kickoff a Remote Desktop Connexion to the Layering Auto

Logon with the local ambassador account
Install Microsoft Function 2016 (or 2013).
Perform the installation merely the aforementioned as usual.
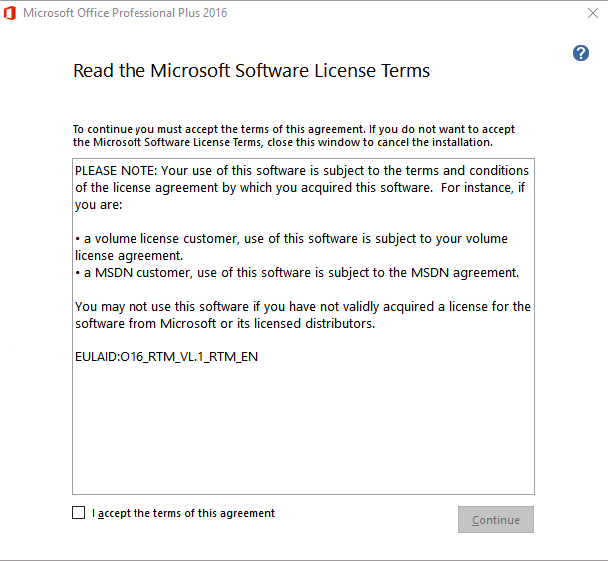
Install Now

The setup is finished
Before we finalize – open the (as administrator) following C:\Windows\Setup\Scripts\RunOptimizer.cmd
Select – Actuate MS Office via KMS
Note : If you lot utilize a MAK cardinal, skip this setting and select the Active MS Office via MAK option
Use this choice (instead of KMS) when u install Part through Office365 (Online activation). Please check this article from Marius Sandbu for more information
![]()
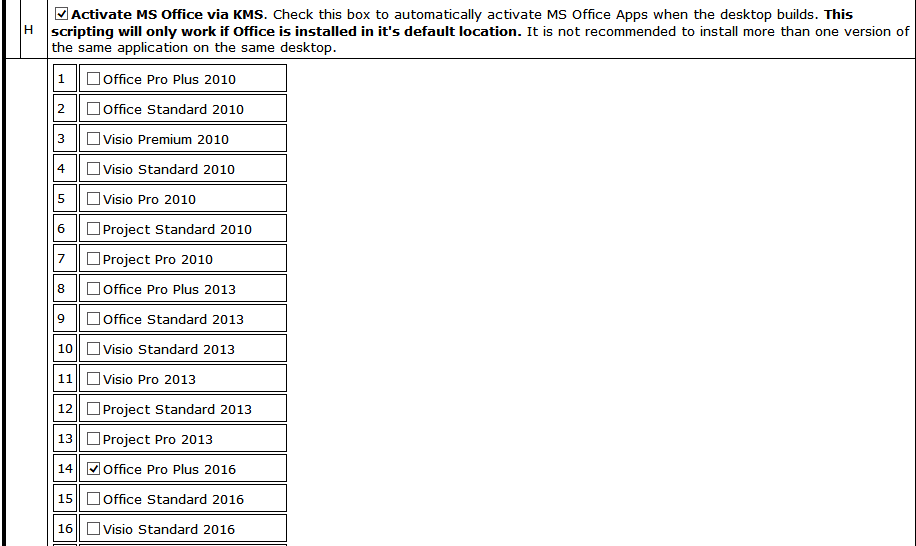

Click on – Save Settings A-K
![]()
The script ran successfully
Note : Y'all should run C:\Program Files\Microsoft Office\Office16 \ OSPPREAM.exe as an ambassador to make sure the layer is properly prepped. This is merely necessary if you opened upwardly Part during the packaging/layering process .
More problems with the activation process? Please check this Citrix support article.
Click on – Shutdown For Finalize

Reboot the auto
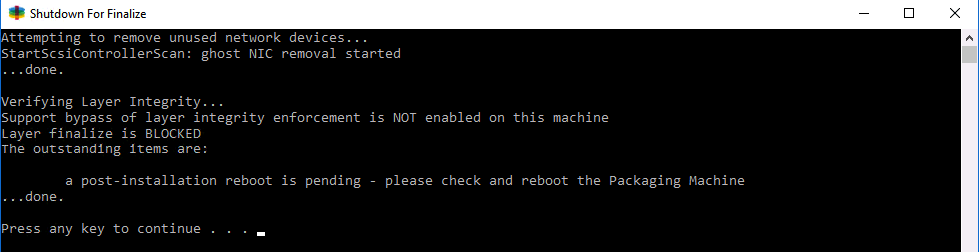
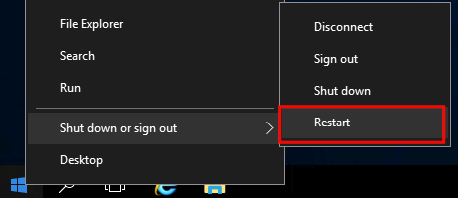
Finalize the image – Click on – Shutdown For Finalize
Switch back to the ELM Portal. Click on Layers -> App Layers . Click on Adobe Reader
Click on Finalize
Click on the Pointer

Confirm the settings – click on Finalize

Bank check the tasks bar for the condition …

Detailed status…

And done!

Repeat the aforementioned steps for all the other applications that yous'll demand to virtualize with the App Layering technology.
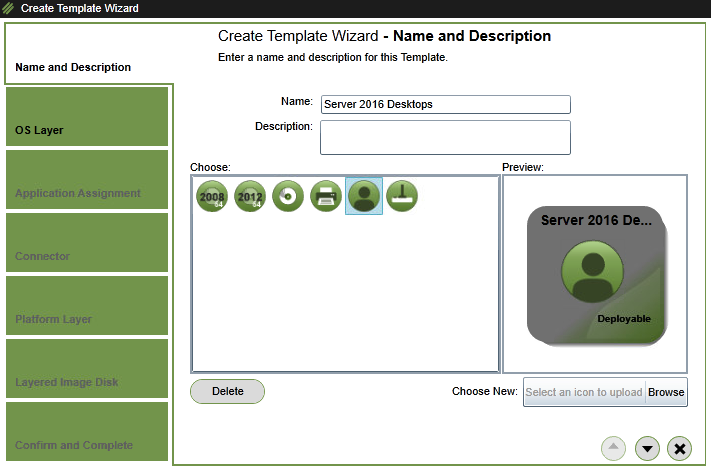
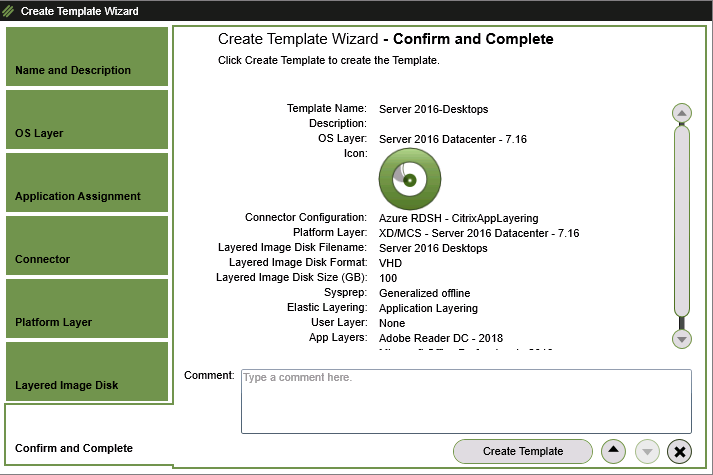
Create the Server 2016 I mage Template
Image templates are a bill of materials. It specifies what Bone, Platform, and Application Layers volition exist delivered as a Layered Image. Once you have created the Image template, the OS can and so be publish ed from the Citrix Cloud . Information technology is the publishing process that turns the various layers into a single disk that is so delivered to the connector specified.
Return back to the ELM Web Portal Console and click on Images
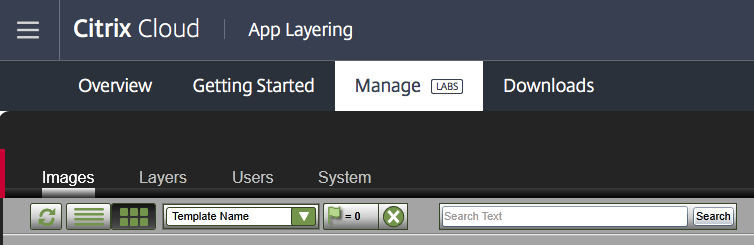
Click on – Create Template
Give in a random name and icon
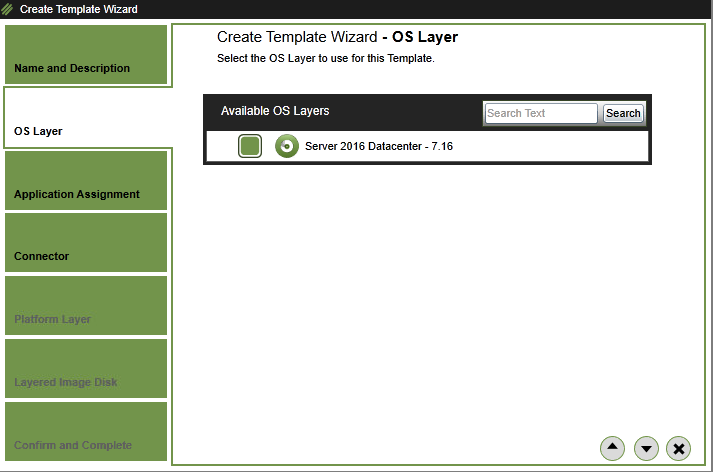
Select the Os Layer
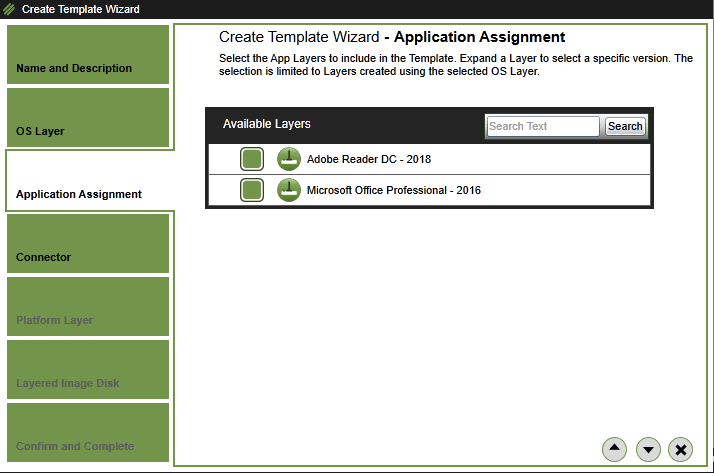
Select the Applications (layers) that you need – assign ed to the Desktop
Select the Azure RDSH Connector
Select the Platform Image
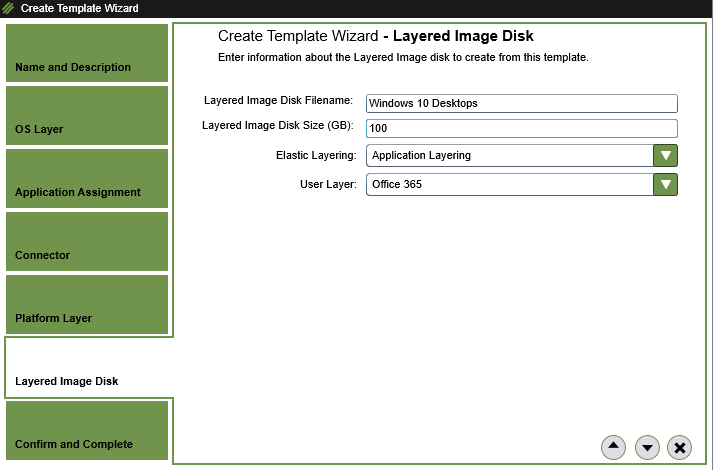
Requite in a proper noun and a size of the C:\ Bone disk .
Choose for Application Layering .
Note : The User Layers (are not notwithstanding) supported for Windows Server (SBC / Multi-Session) Operating Systems. Select the User Layer on – none

Confirm the settings – click on Create Template
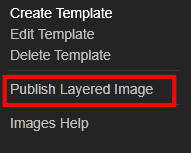
Click on the Layered Image
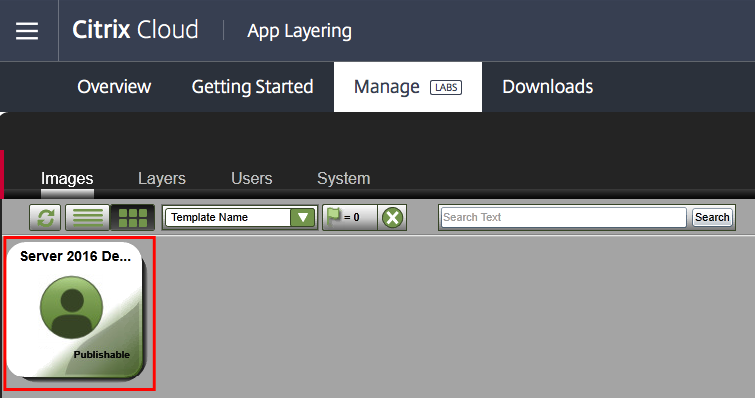
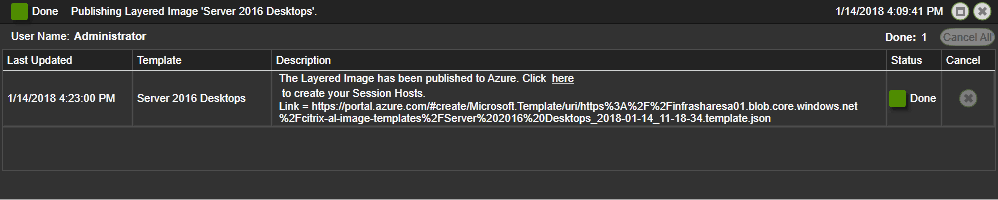
Click on – Publish the Layered Epitome

Click on (again) on – Publish Layered Image

The deployment status of the new prototype…


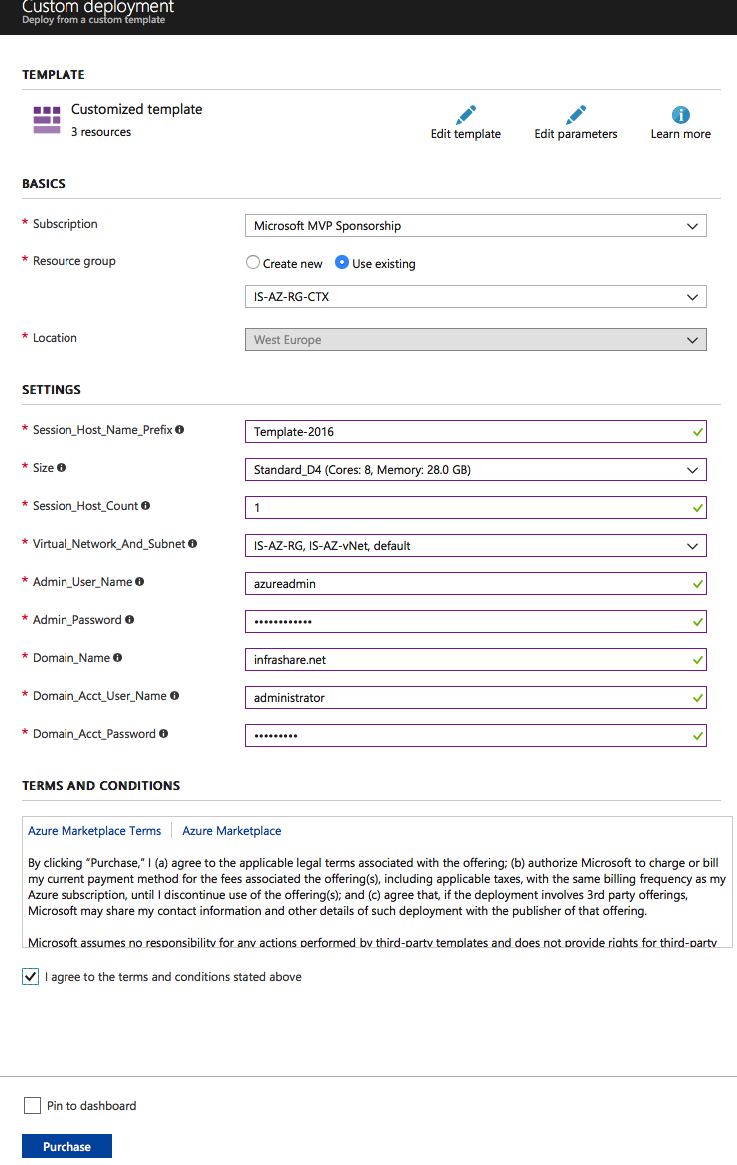
Open the JSON template link (the same equally the others) in a browser to start the Virtual Machine deployment.
Give in all the requested information.
Tip : When u deploying multiple machines – the JSON file automatically created follow upward numbers after the Host Proper name prefix, for example Template-2016 will be: Template-20160 second volition be Template-20162
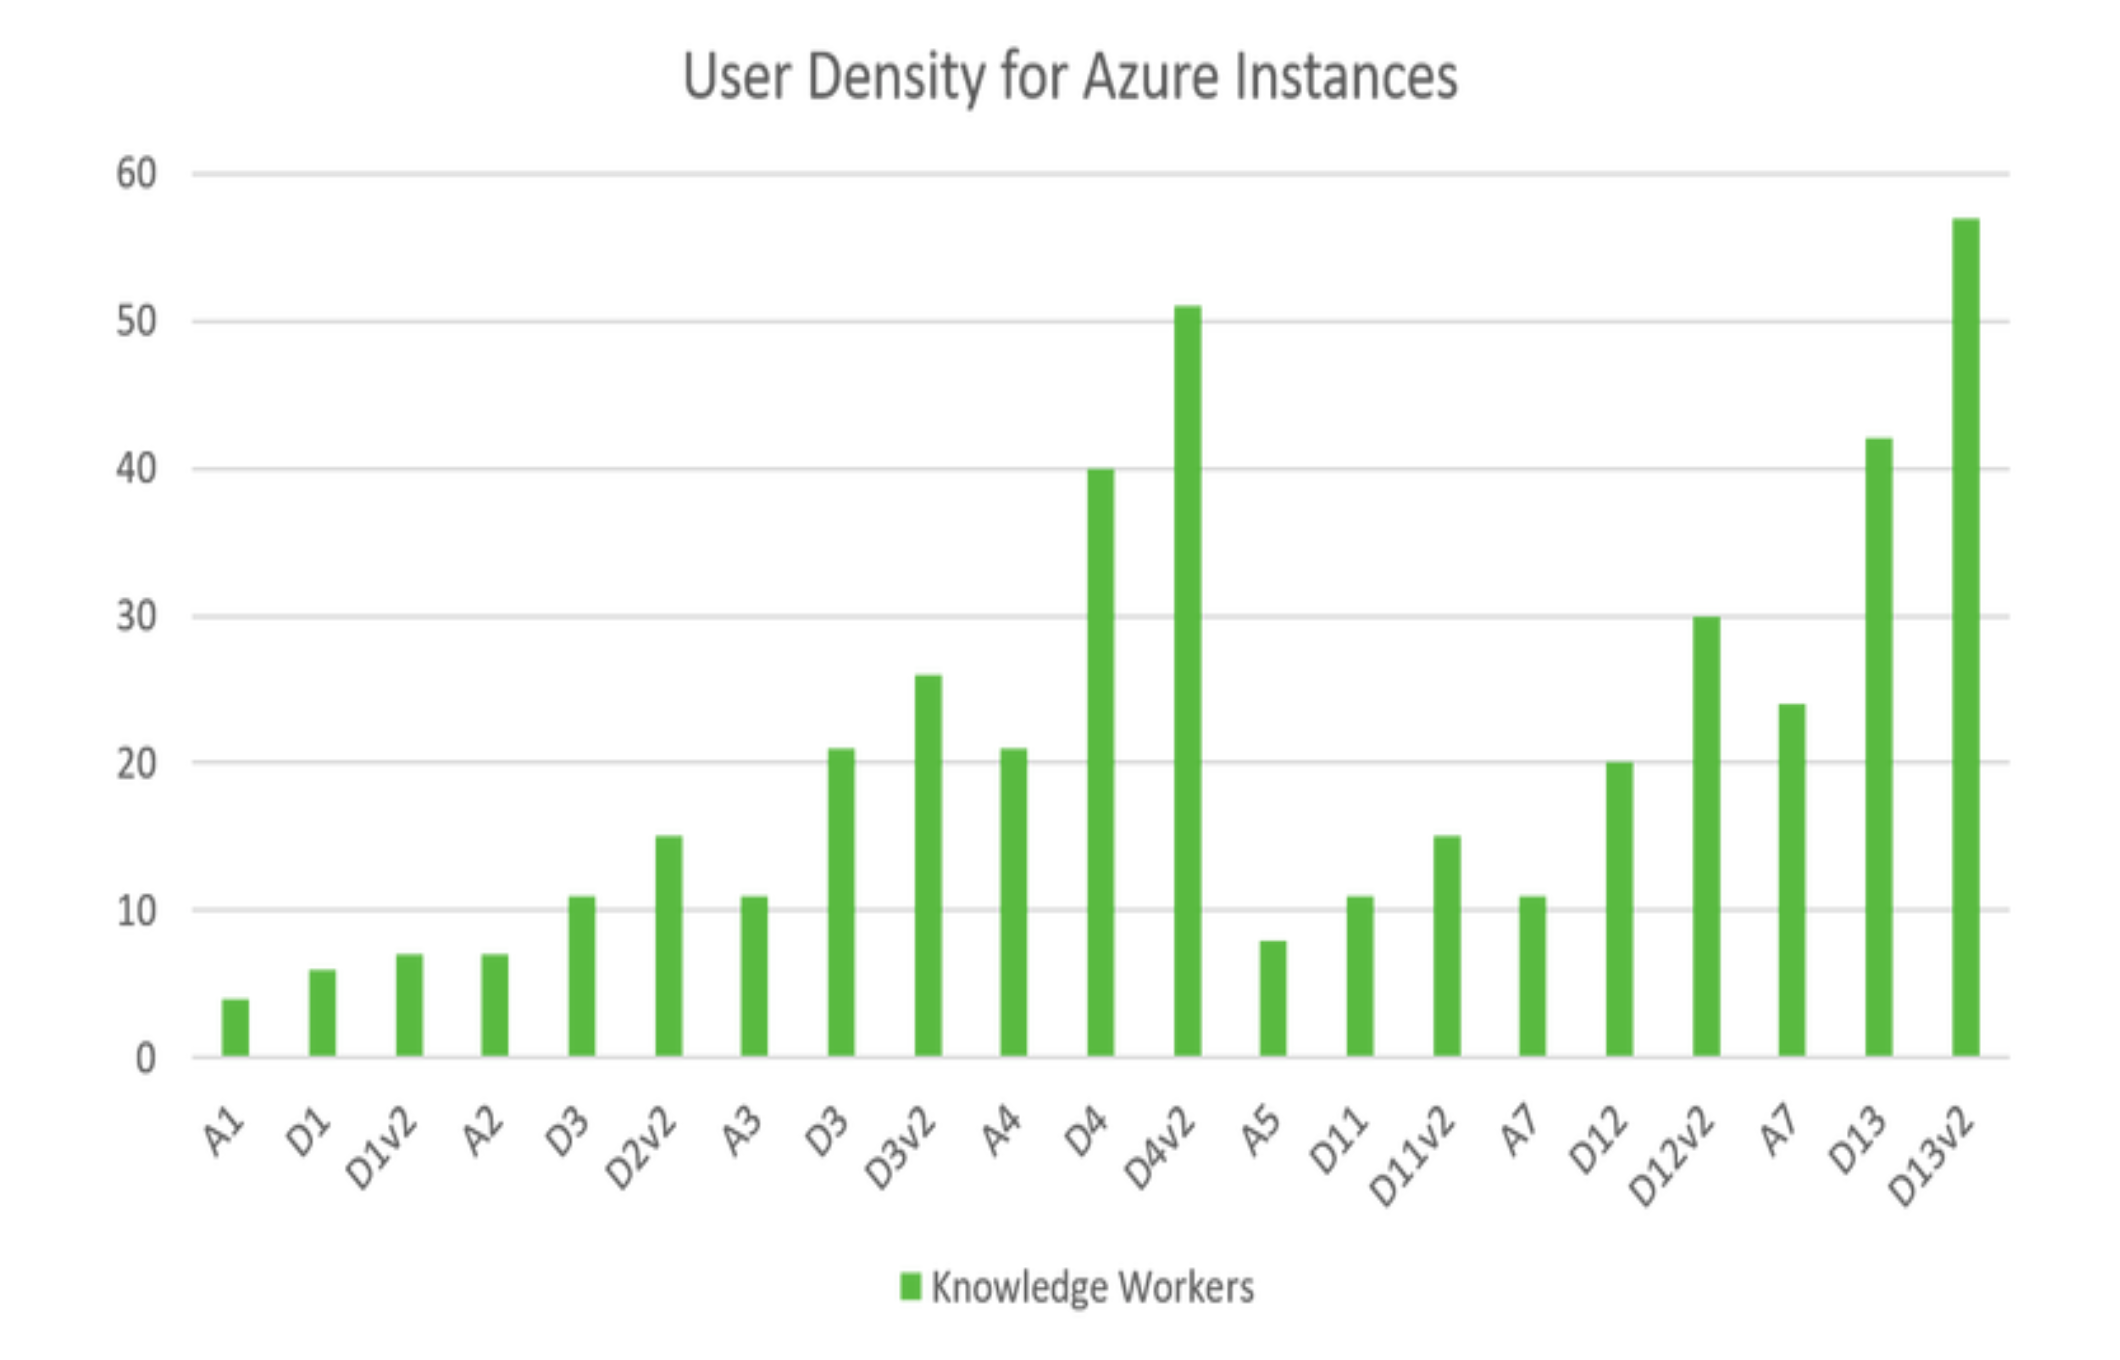
Use the following measurements to make a skillful determination on the sizing.
Note : Session_Host_Count means the number of XenApp Workers.
When all the information is filled in and checked, click on Purchase to deploy the new primary Template
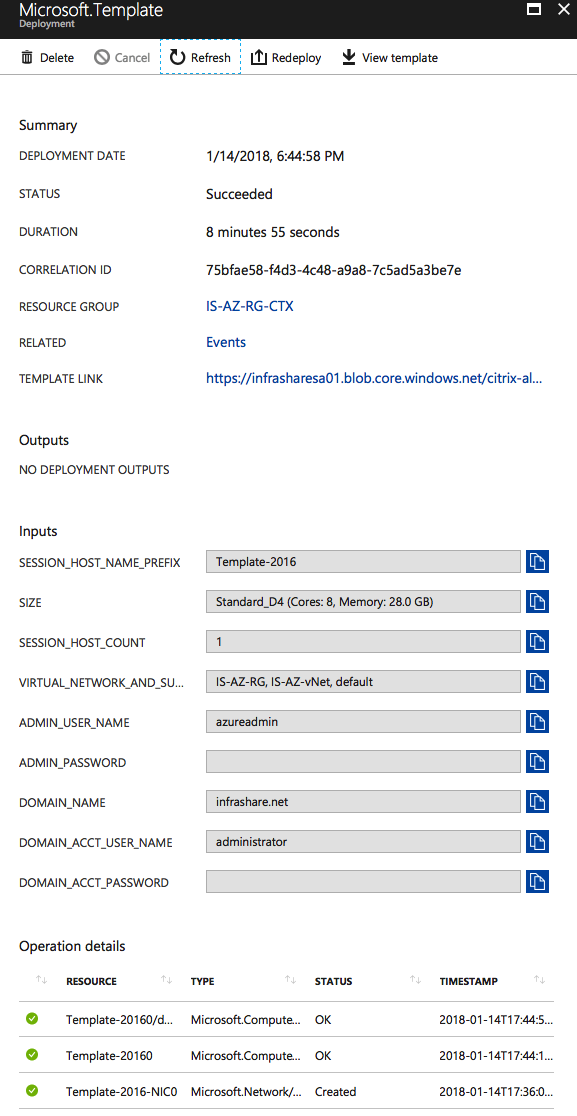
Deployment is finished successfully…
We now demand to apply this Template Machine for the Motorcar True cat a log setup for the XenApp and XenDesktop Service Desktops
Stop the Car in Microsoft Azure

Create the XenApp and XenDesktop Service Machine Itemize
Note : I'm assuming that you already take a fully performance Citrix Deject XenApp and XenDesktop Service environment with a Host Connection configured to your Azure tenant environment. If you lot demand any assist with this, I already wrote a complete commodity on the initial configuration steps. Delight have a look at the post-obit article "How to configure the Citrix Cloud XenApp and XenDesktop Service using Azure Managed Disks and Citrix Optimizer".
To use the new App Layering – template layer as basis for our Automobile Creation Services deployment in Microsoft Azure, using the Citrix Cloud XenApp and XenDesktop Service. We'll need to detect the location of the VHD drive of the template on the Azure storageaccount.
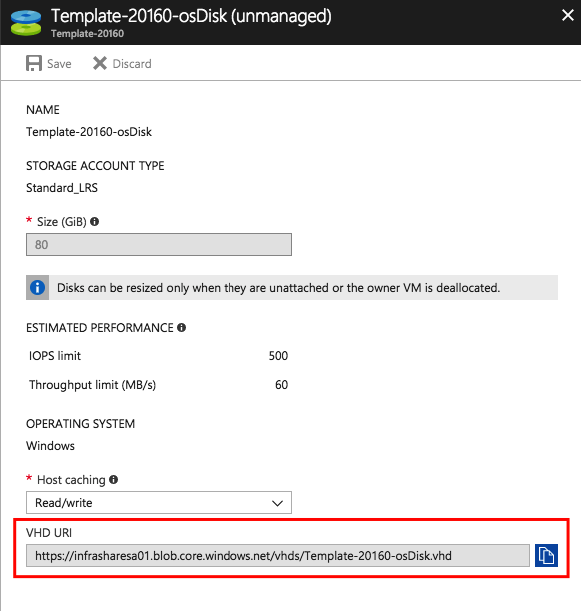
Open the template Virtual Machine in Azure, and go to Disks

Copy or remember the VHD URI / path, nosotros demand this for the next steps, during the Machine catalog creation
Switch to the Citrix Cloud XenApp and XenDesktop Service Manage portal.
https://xenapp.cloud.com/manage
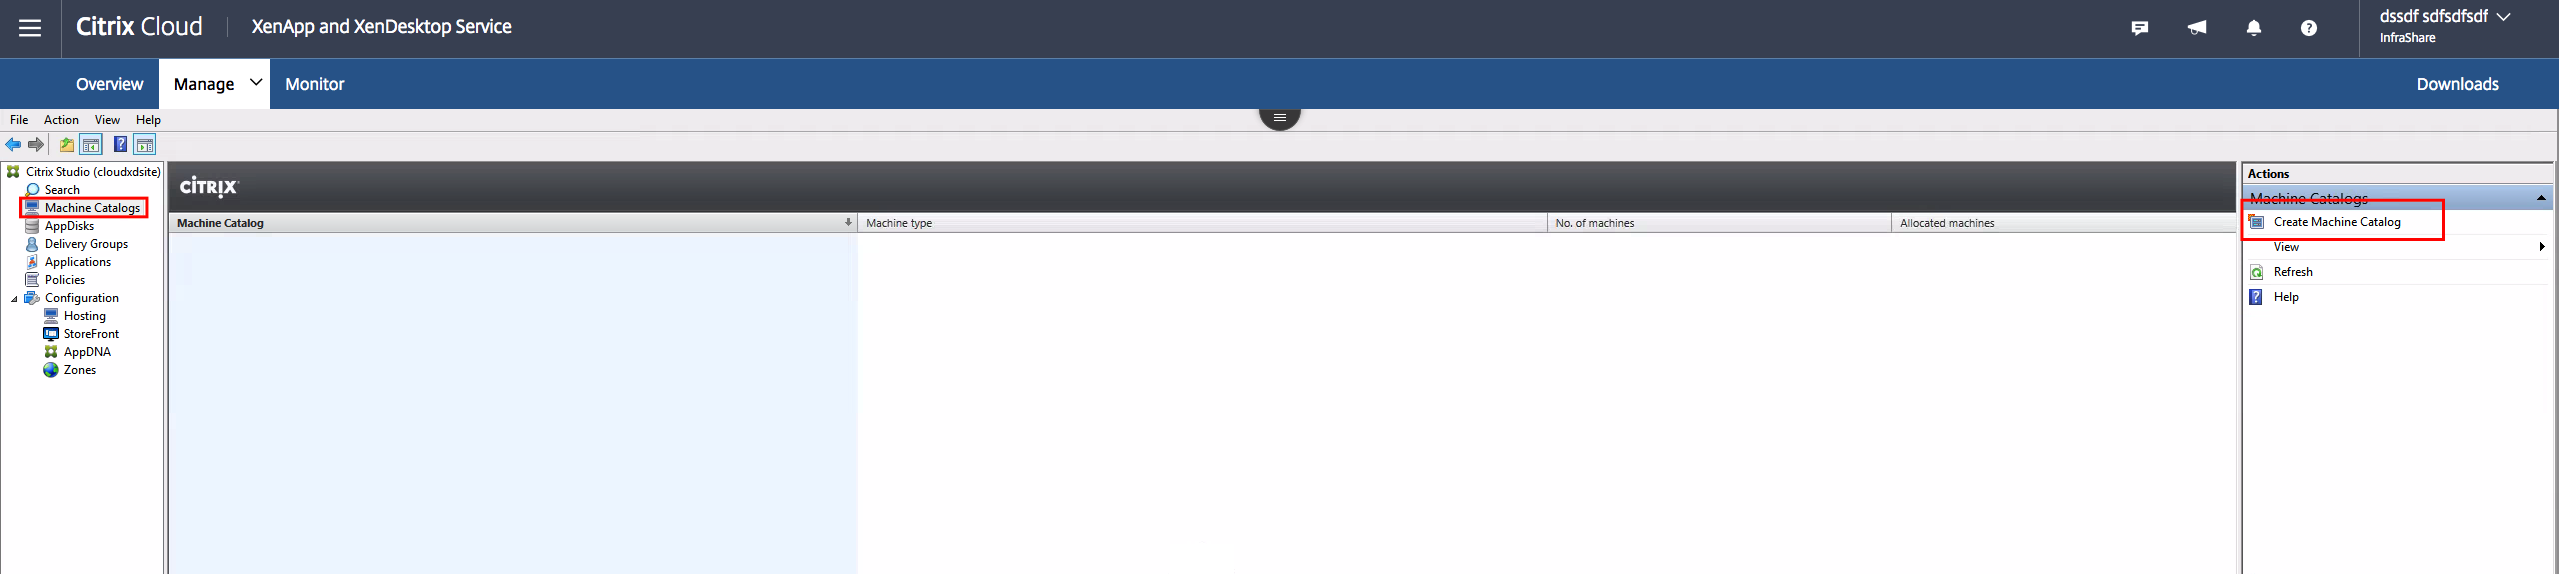
Open up Machine Catalogs – Create Machine Catalog
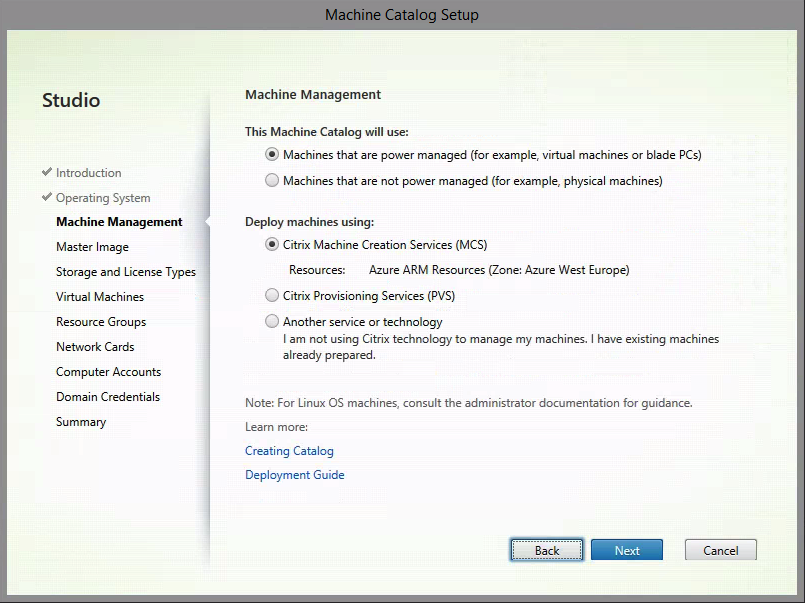
Select the Bone type – for me that volition be Server Bone

Select the (only bachelor for Azure) Machine Creation Services
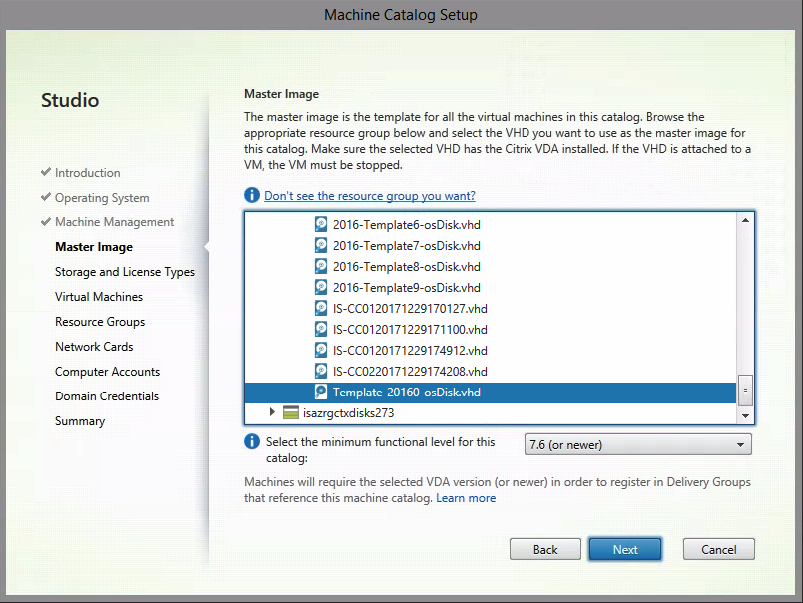
Nosotros now need the VHD URI location, which we'd captured in the previous step. Search through the Resources Group for the Storage Account and Path of the (App Layering) Template Prototype.
Select the VHD
Note: Before you lot continue to the next footstep, please bank check if the Template Virtual Machines has the status Stopped (de-allocated) in Microsoft Azure, the creation process otherwise will fail!
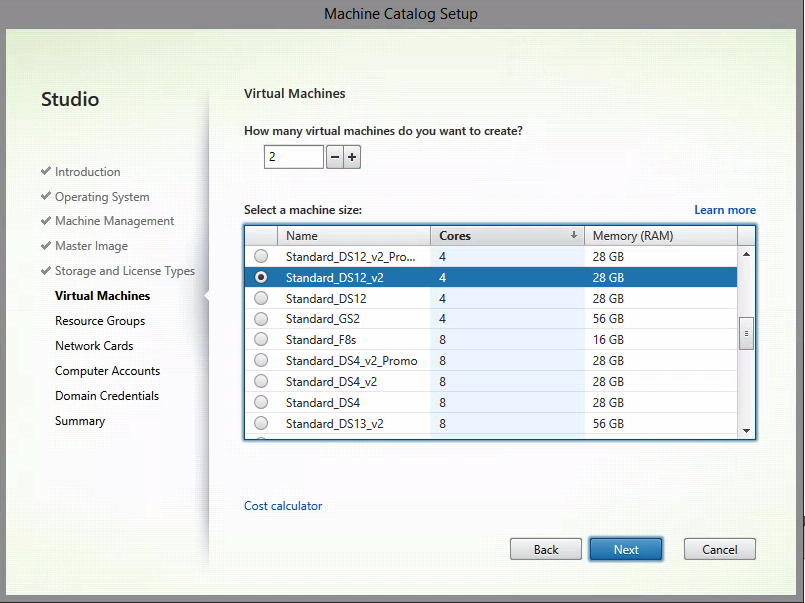
Make good decisions on this screen . Always employ Premium (SSD) storage for the highest user density and user experience!
Actuate the HUB program if you take an Enterprise Agreement and Software Assurance for the Operating System that you're using.
Select Managed disks only for lab and/or testing purposes.

Utilize the diagram below to make a good determination on the sizing of the XenApp Workers, to avoid oversizing of resource costs.

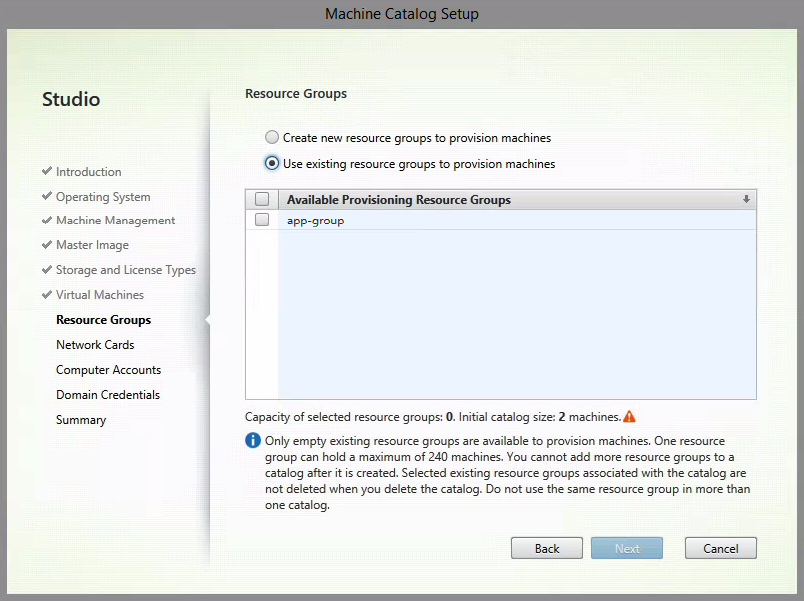
Choose to use existing Resource Groups or create a new one for the deployment
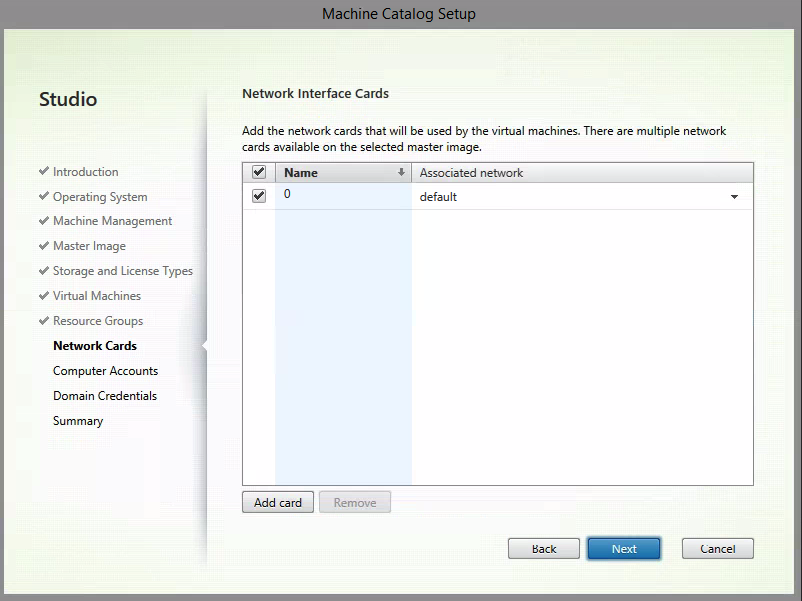
Let this be default – or add extra network interfaces if you need them
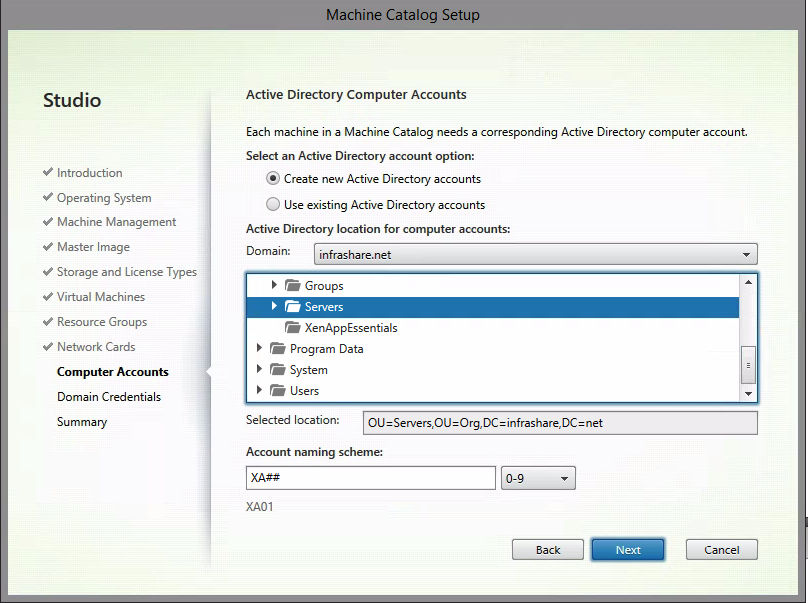
Select the Active Directory OU location and naming convention
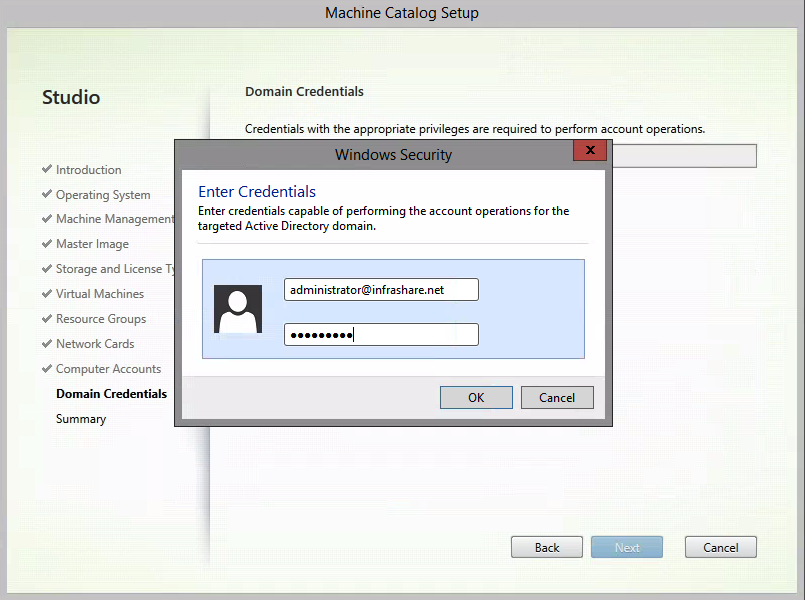
Add the credentials to provide the Domain join
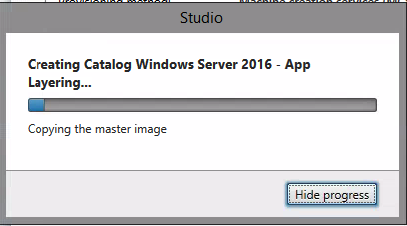
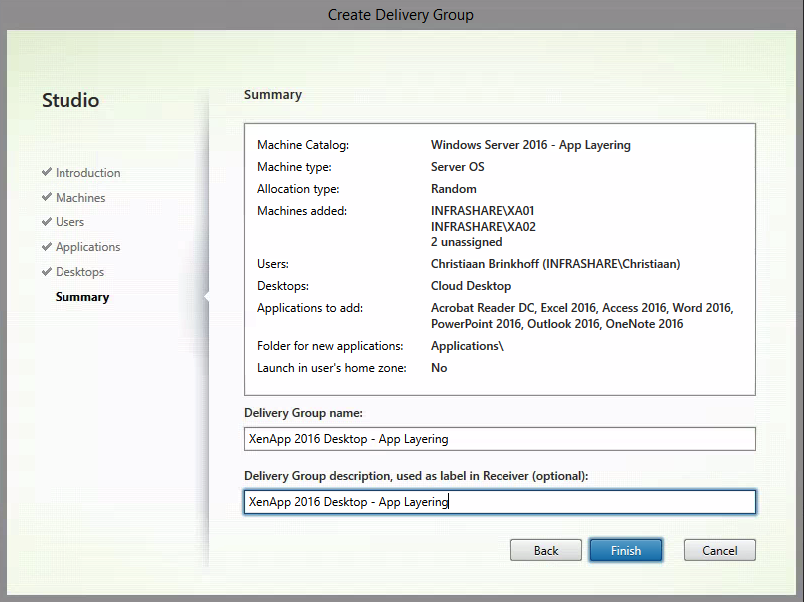
Check the summary and provide a Motorcar Catalog proper name. Click on Stop to start the deployment in Microsoft Azure

This process tin take up to 30 minutes …
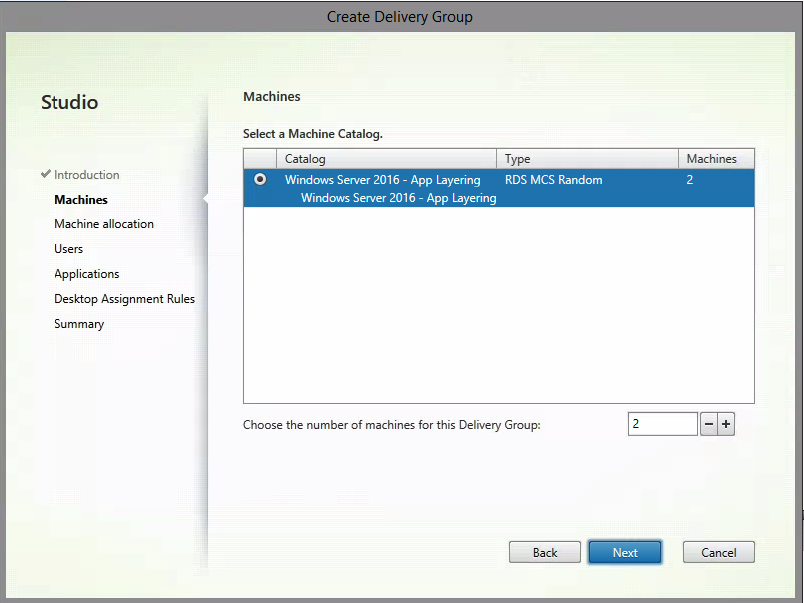
Create a delivery Grouping and assign the Desktop to you're users and/or groups.
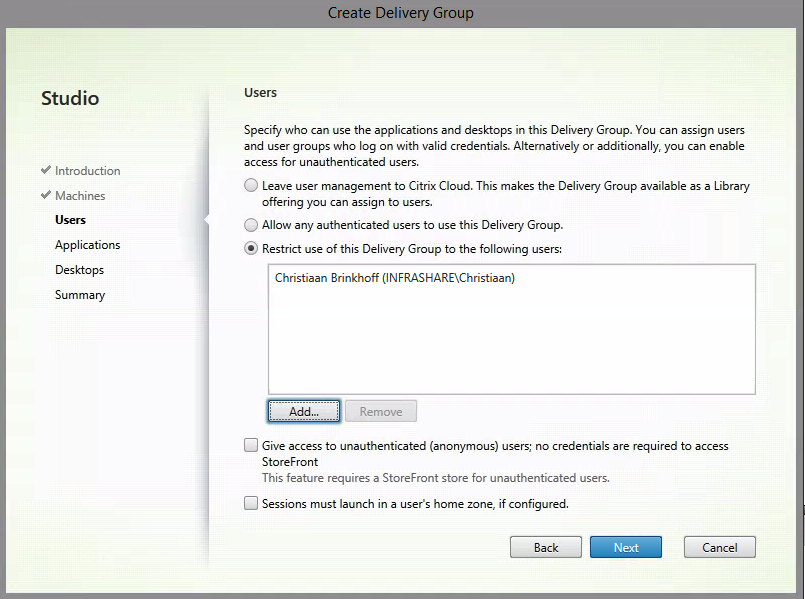
Select the authentication method – select the users and groups
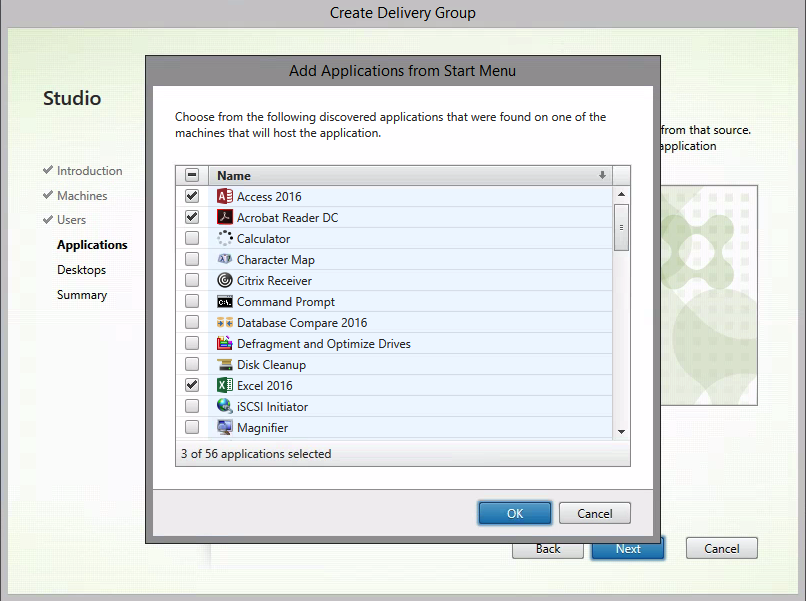
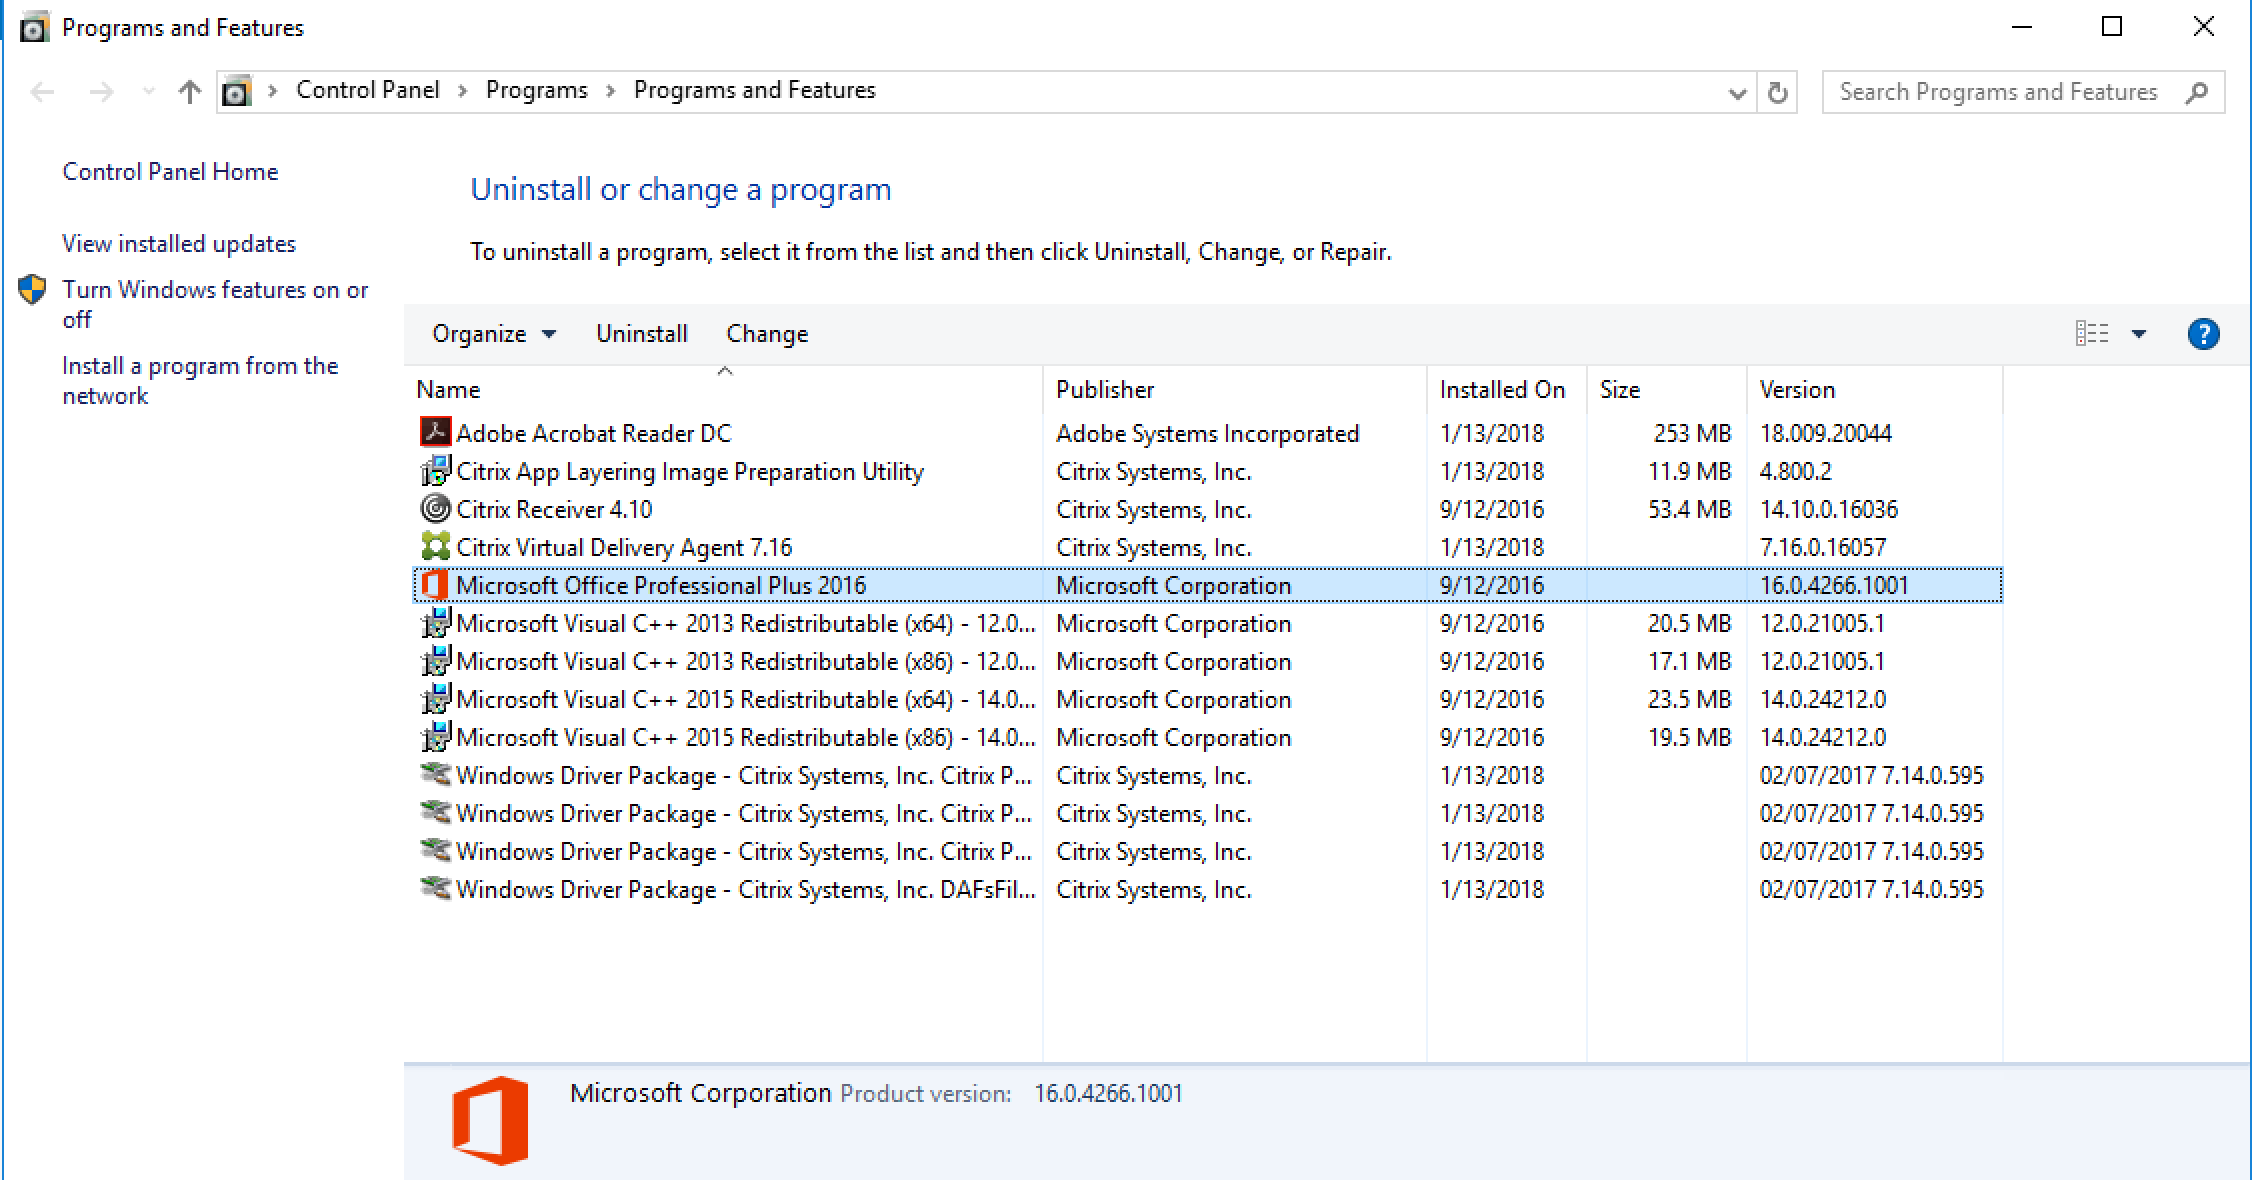
Publish the (Layered) Apps from the prototype, I'll apply Adobe Reader and Office
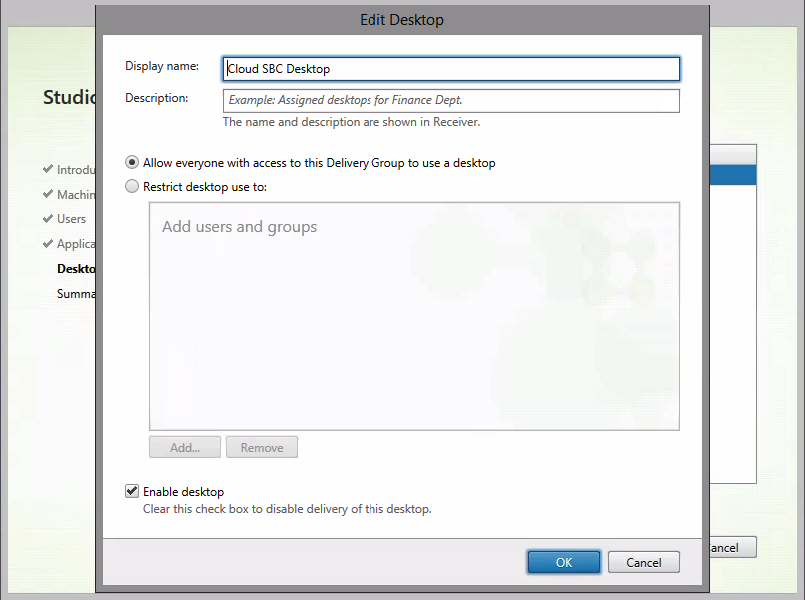
Give in a name for the App Layering Desktop
Give in a name for the Commitment Group
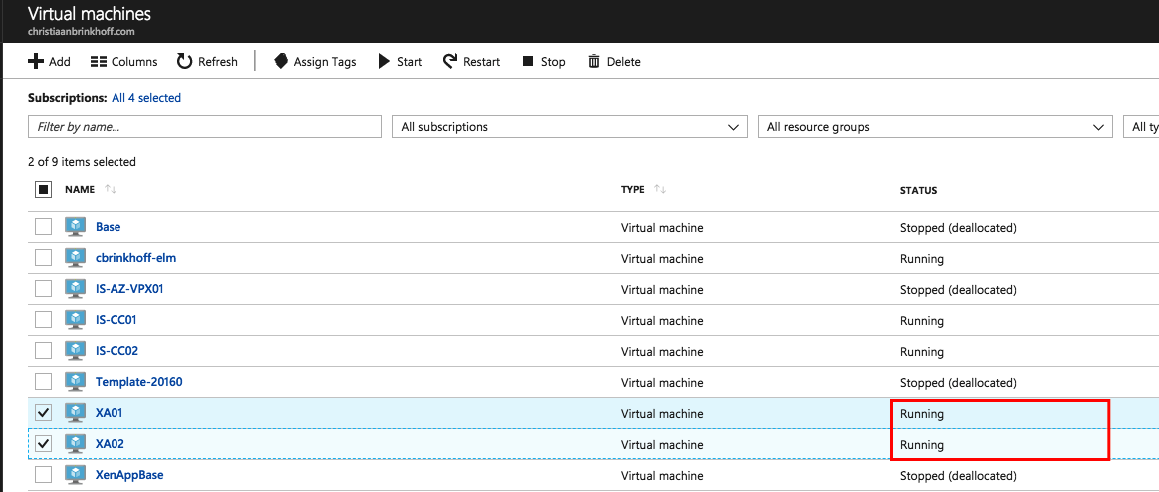
Annotation : Make certain that the machines are running in Azure / the machines will be created as Virtual Machine in Azure at the moment you first them from the Machine Catalog – Delivery Group Management Console – or search for Published Application, during the Delivey Group setup!
And the desktops are registered – before we go to the next footstep !

Perform a (App Layering) Citrix Deject Session
Click on Workspace Configuration – to bank check the Citrix Workspace URL
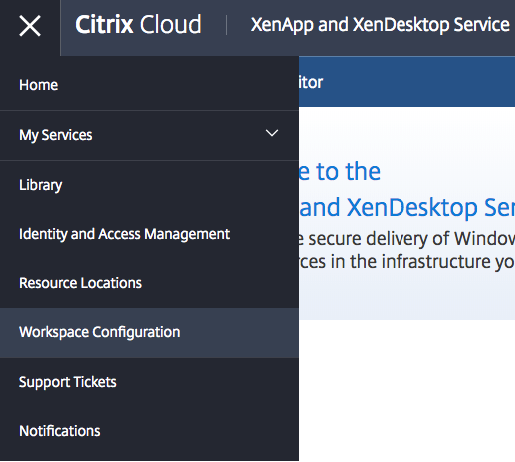
Or open the Manage welcome splash screen, you can see the link below.
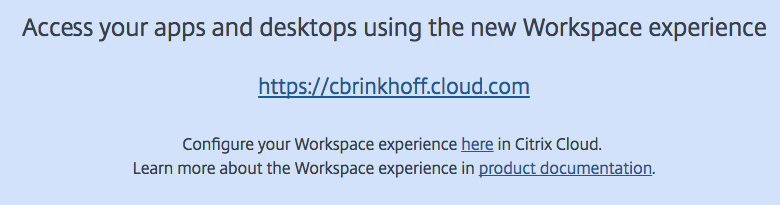
Open the Citrix Workspace url and logon with your credentials

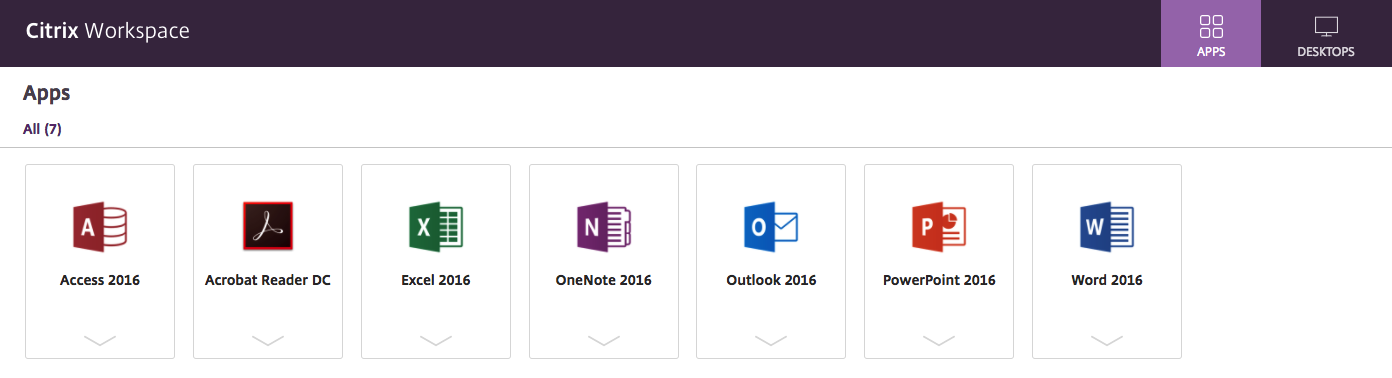
The Published Apps are visible!
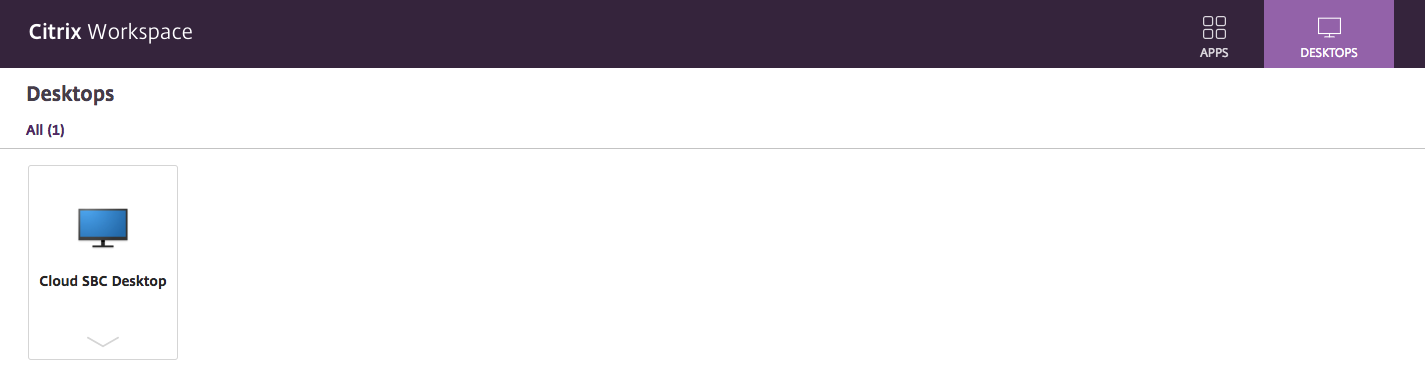
Starting time – Logon to the New Citrix Deject Desktop .
The Layering Service is doing his background tasks…
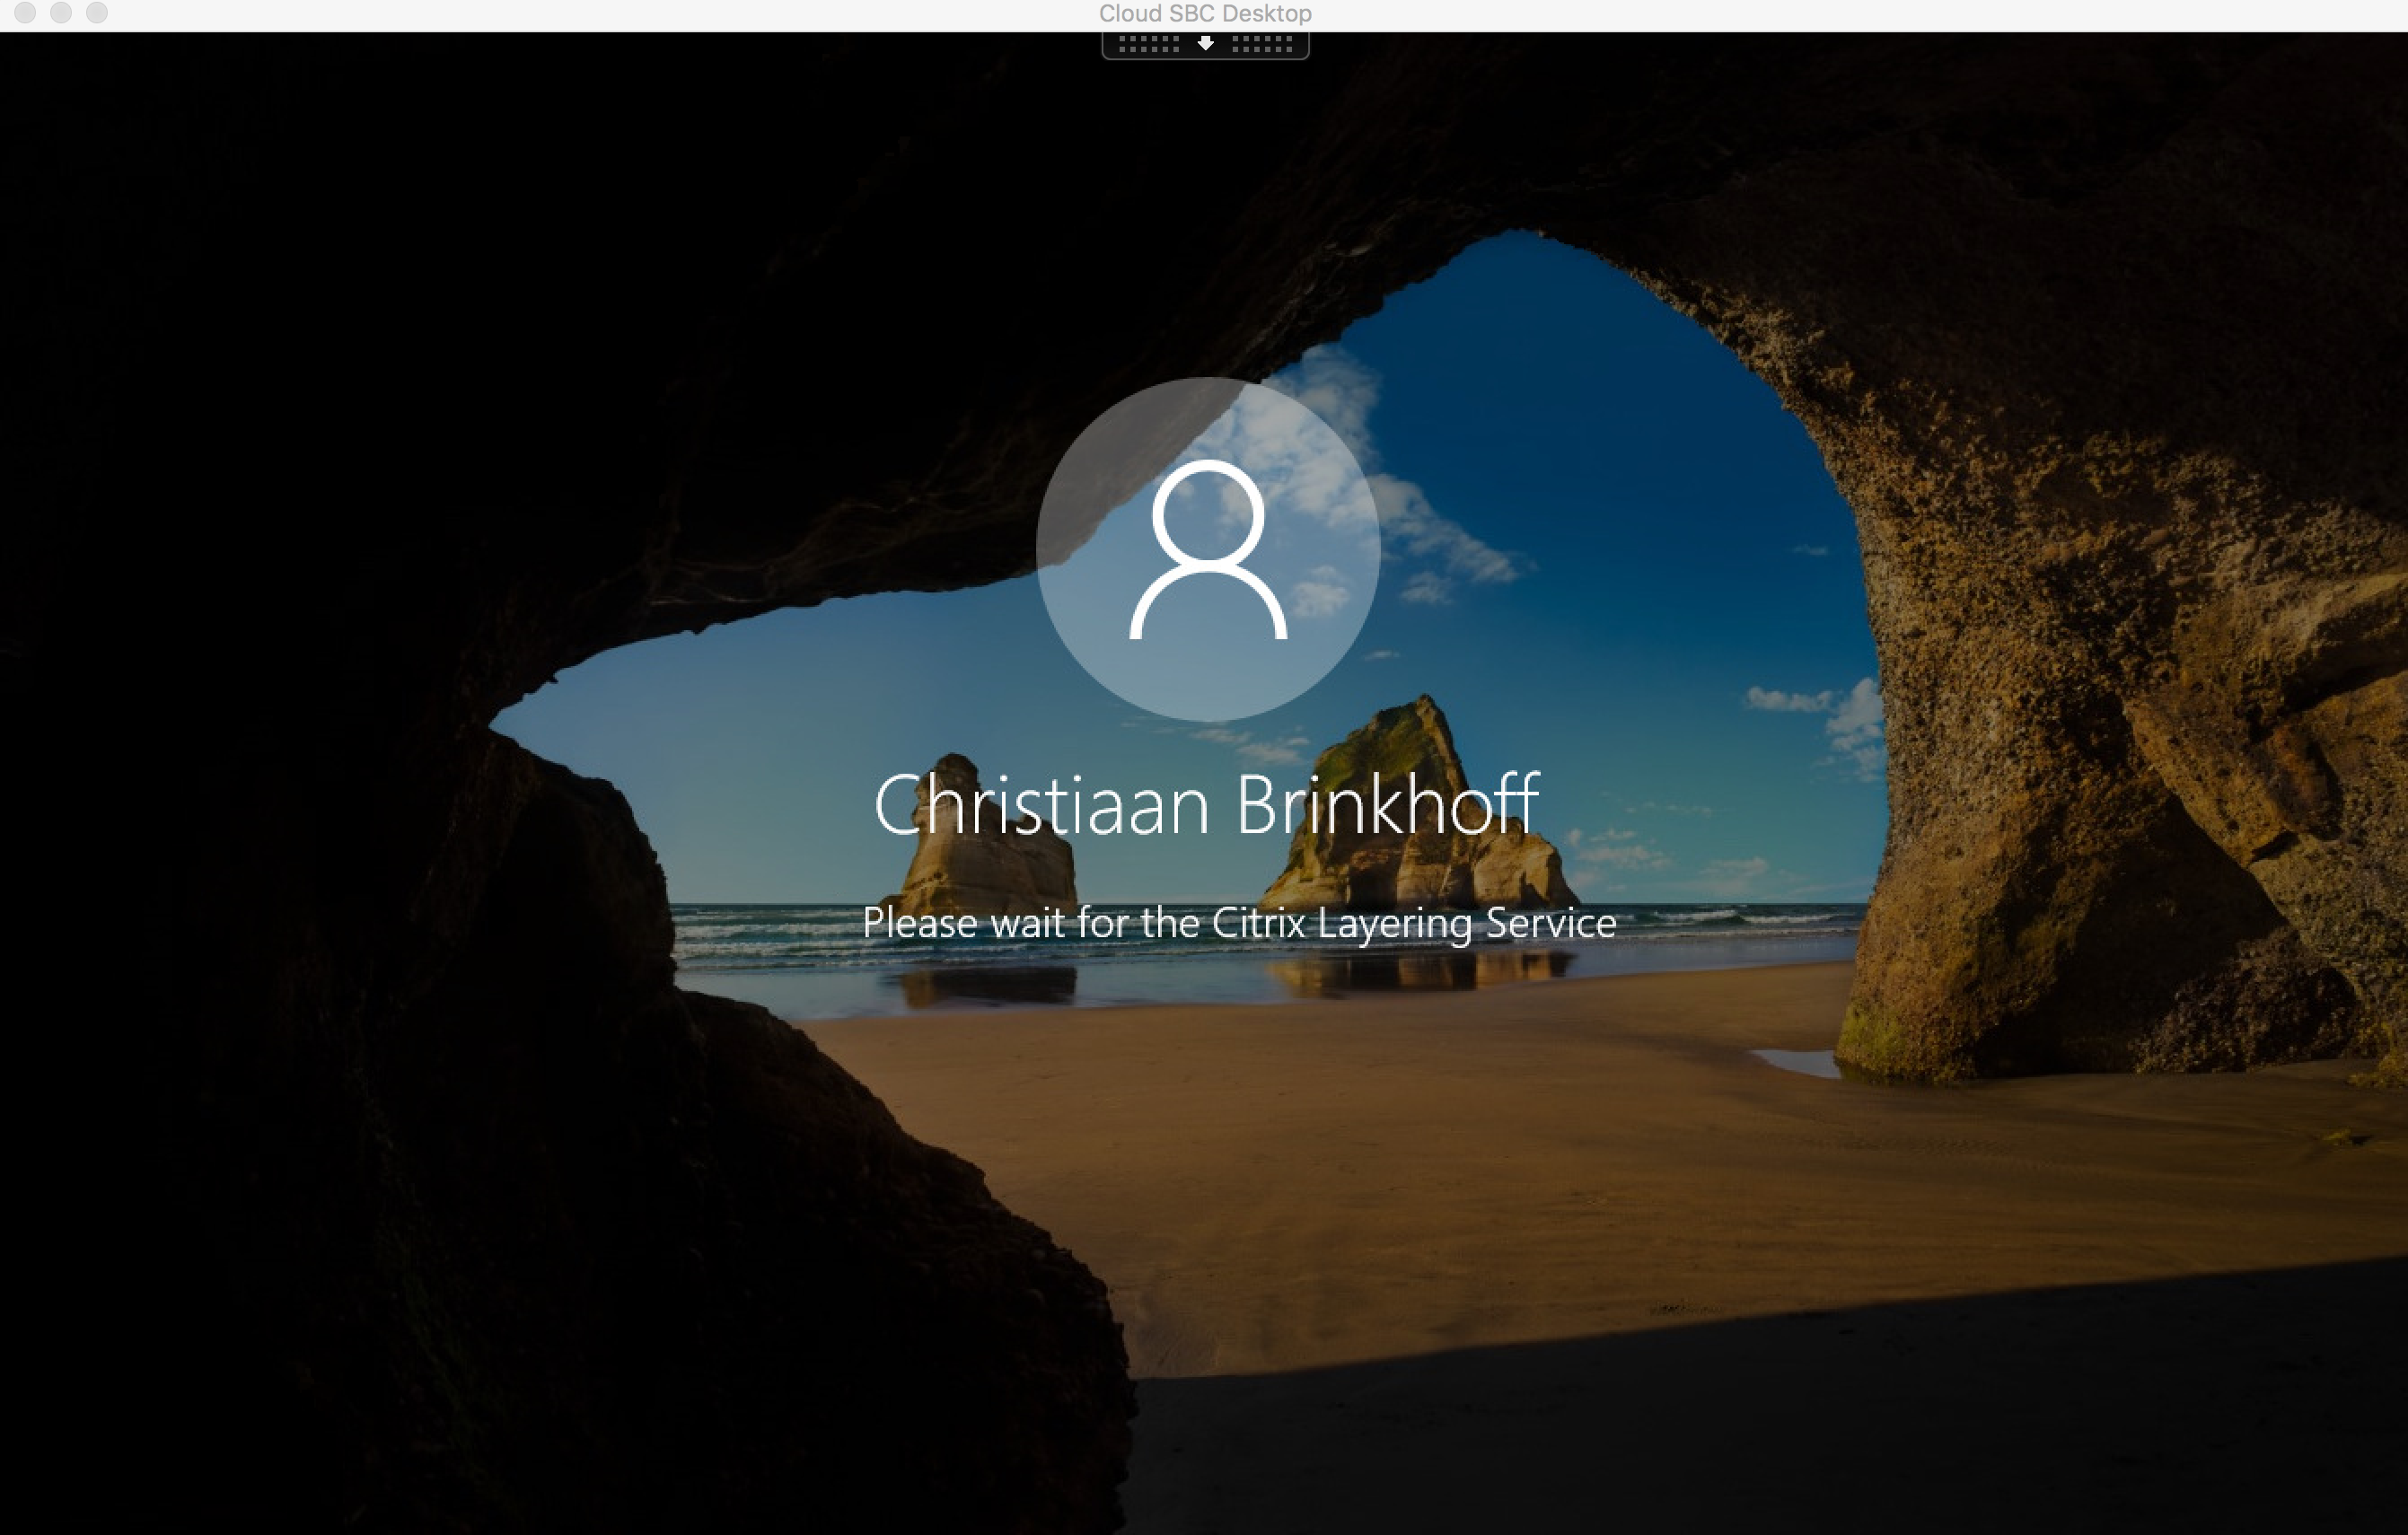
And the Desktop starts…
And all the Layered Apps can be used as local Applications !
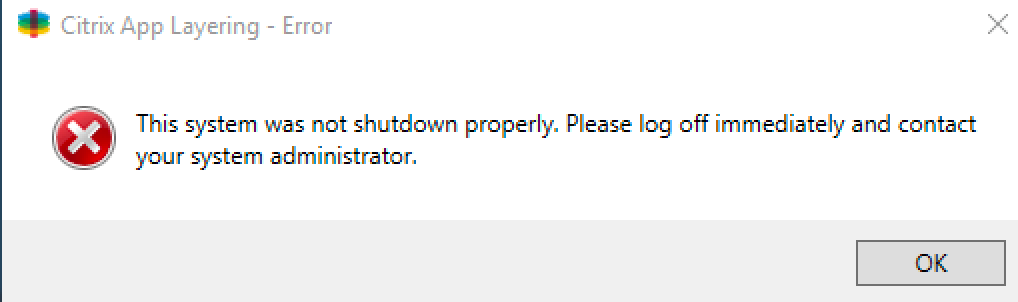
Note : Exercise you receive this error after the logon procedure? You're Rubberband Layering share rights are not setup properly. For more info, check this discussion: https://discussions.citrix.com/topic/392460-citrix-app-layering-mistake-system-non-shutdown-properly/
Activate the Office365 (caching) User Layer for VDI
User Layers permit you persist user profile settings, data, and user-installed applications in not-persistent VDI environments. User Layers are created when – You set Elastic Layering on an Image Template to Application and User Layers, and then that the Layered Image supports User Layers.
A user logs in to their desktop for the first time, and a User Layer is created for them. From then on, the user's data and settings are saved in the User Layer, along with any applications that the user installs locally on their desktops.
Note : App Layering 4.10 at present also supports Office365 layers for Windows vii (64 scrap) and ten (64 chip) VDIs, such every bit for XenDesktop and VMware Horizon!
Some actress notes around Office 365 layers:
-
- Office layer must exist included in the image template and deployed in the layered image.
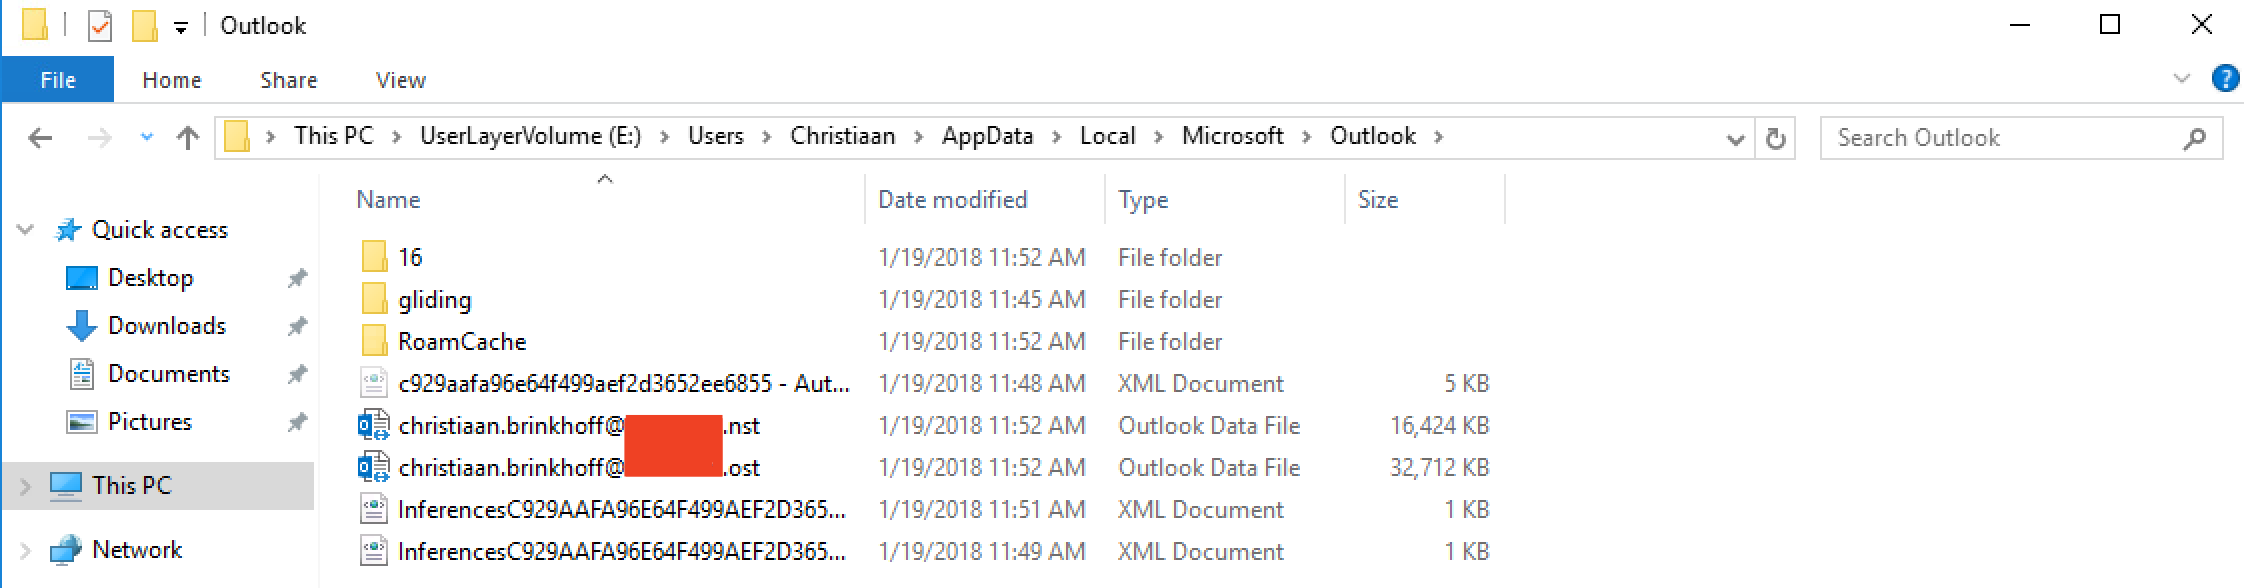
- It only redirects the local Microsoft Outlook binder "%USERPROFILE%\AppData\Local\Microsoft\Outlook" not Search and/or OneDrive and Skype for Concern.
- Citrix User Contour Managing director (UPM) is required to use Office 365 User Layer.
- Make sure that %USERPROFILE%\AppData\Local\Microsoft\Outlook is in the exclusion list.
Requite in a name and a size of the C:\ OS deejay . Choose for Awarding Layering and Office 365 as User layer to actuate the New Persistent Outlook Caching functionality!
Yous first need to create a new Windows 10 OS Layer before you can continue to the next steps. The steps are almost the same as for Server 2016, so I don't go through everything in item.
These following steps are optional, and only needed when u want to use the Function 365 User Layering applied science.
Yous'll need an Enterprise Agreement inside Azure in order to utilise Windows 10 VDIs.
Go through the setup, just the aforementioned that I mentioned for Server 2016. Therefore now with the User Layer – Office 365 activated.
Click on – Publish the Layered Image
Follow the same JSON Procedure in Azure for the imaging deployment.
Create the Machine Catalog and Delivery Group, based on the new Windows 10 Template Virtual Machine, in the Citrix Deject XenApp and XenDesktop Service Manage portal.
Office 365 User Layering – background insights
You tin check and run across the groundwork process around the User Layers – w hen a user logs on to the new Desktop environment by opening Disk Management (diskmgmt.msc).
The User Layer will automatically be attached to the Desktop to storage the Part 365 – Outlook caching files.
Notation : You tin assign a drive letter to the Virtual Disk to check what's inside the Virtual Hd.

The files volition exist played on the Rubberband Layering SMB Storage. The VHD will standard be named equally, <USERNAME>_O365.vhd
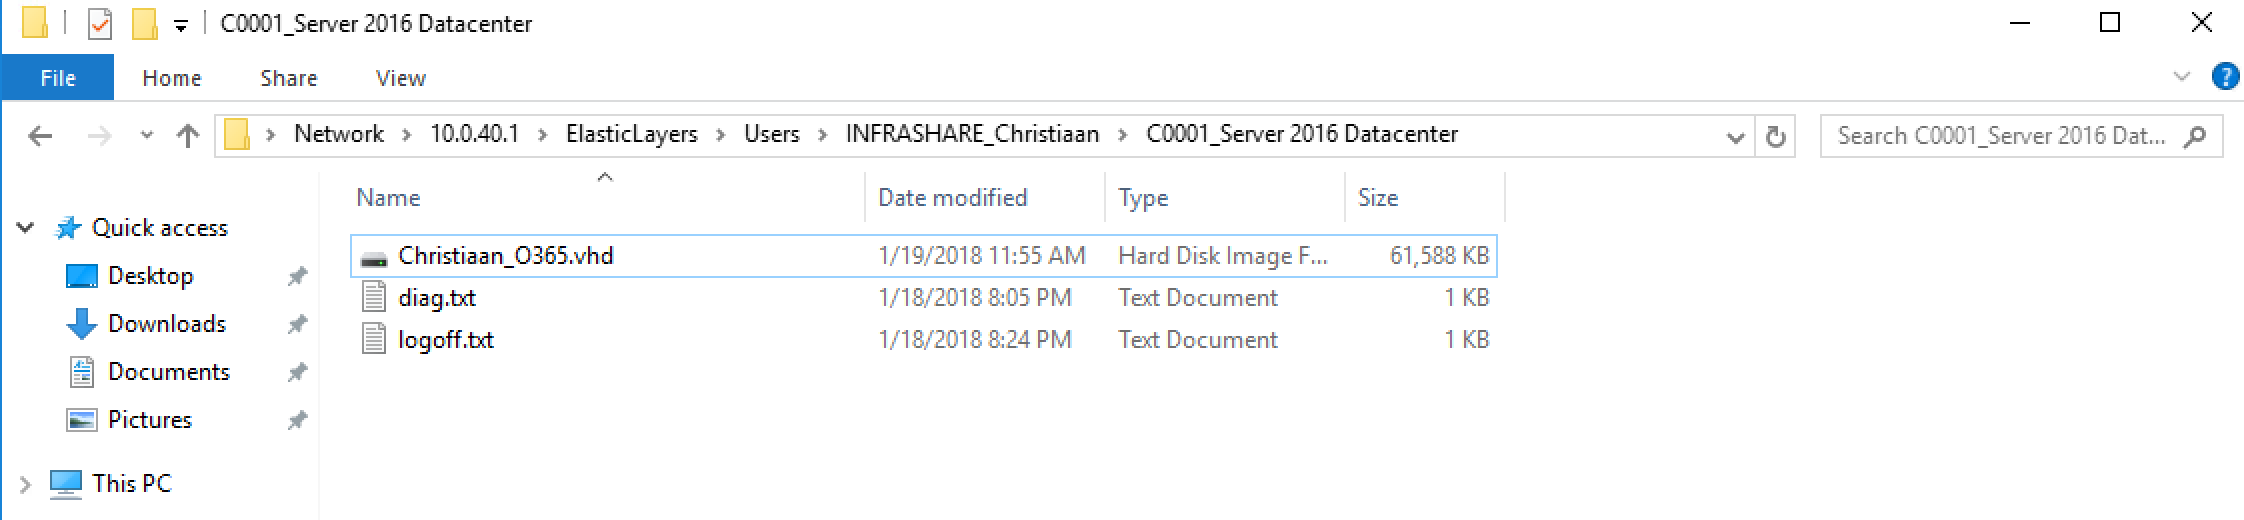
You can mount the file and see that but the %USERPROFILE%\AppData\Local\Microsoft\Outlook folder is redirected.
The User Layer volition exist de-mounted while logoff the Citrix Session and re-attached when you log back on – which makes the Outlook Contour and Caching Outlook files persistent!
Also make certain to setup the Outlook 2016 Slider policy to avoid overloads of caching storage!
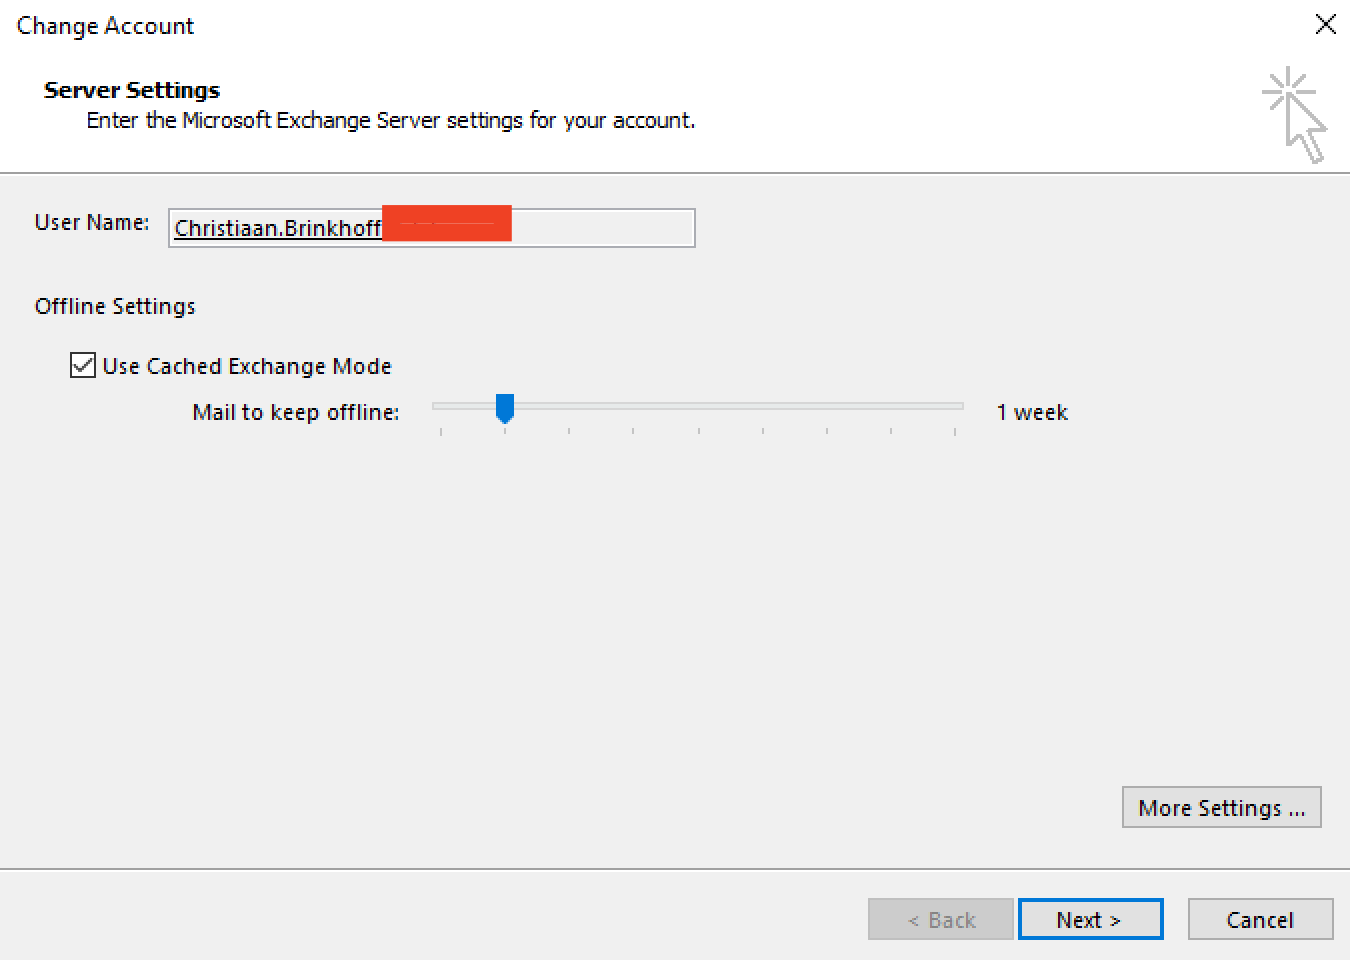
The policy can be plant hither:
User Configuration -> expand Authoritative Templates -> Microsoft Outlook 2016 or 2013 -> Account Settings -> Substitution Double -> Cached Substitution Mode

Delight first optimizing the Digital Workspace further with Citrix Profile Management (UPM) . Make sure that %USERPROFILE%\AppData\Local\Microsoft\O utlook is in the exclusion list. This resides in the VHD Mounting directory!
Visit the comprehensive article from Carl Stalhood for configuring Citrix UPM.
www.carlstalhood.com/citrix-profile-direction/
Actress: Create an Rubberband Layer
Rubberband Layers are published to Active Directory users and groups. Once the wizard is complete, a job kicks off that copies the layer to the file share and updates the JSON files located on that share. The user, if already logged in, must log off and then back in to get access to their new awarding.
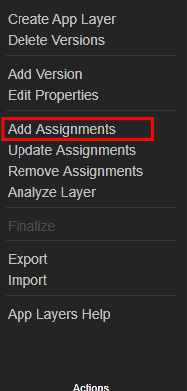
Get to Layers -> App Layers and Select an Application
I'll employ Adobe Reader
Click on Add Assignment
Select the version
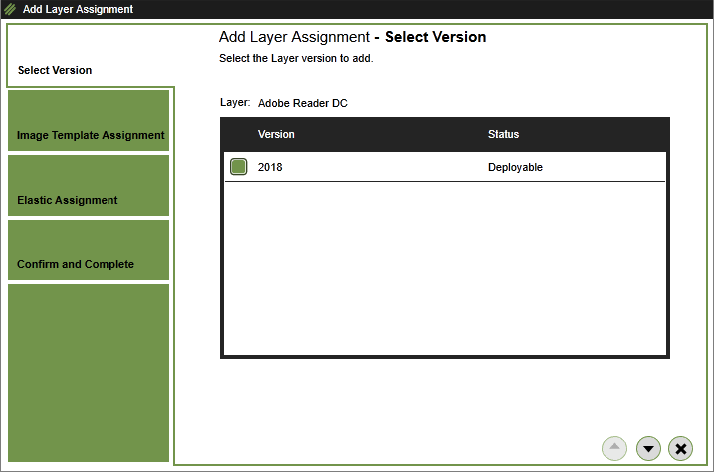
Click on the Arrow

Select the Advertisement User or Group to assign the awarding to.
I'll use the Group Other Apps
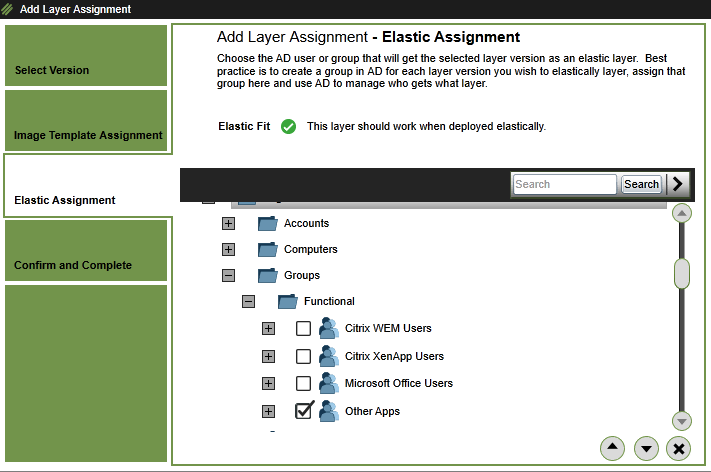
Finalize the process – Click on Assign Layer
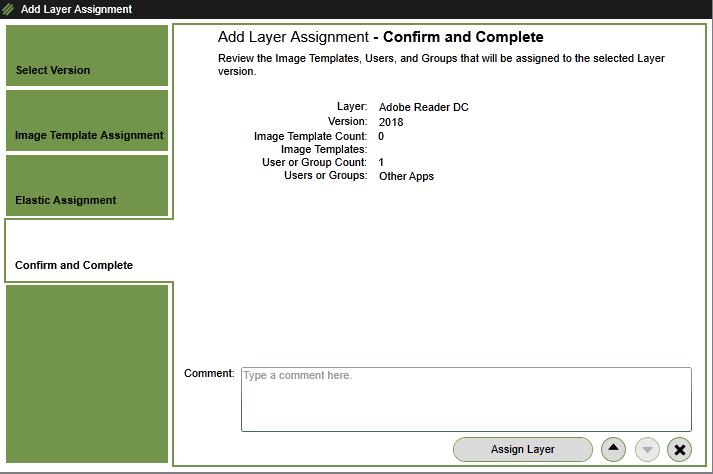
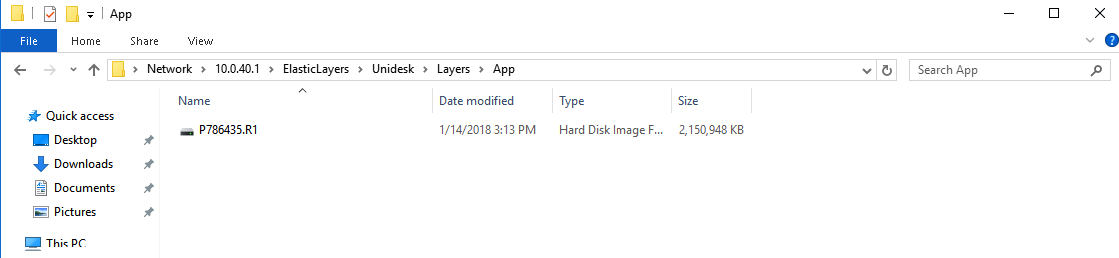
The elastic layer is now copying to the SMB share location . Always use a fast share location to speed up this process!

The files are placed in the following location
Actress: Enable Labs Features
Want to experiment with cool new features that are under development? Through the Management Panel, yous tin can at present run into which features are available in Unidesk Labs in whatsoever given release. You can enable features yous're interested in, endeavour them out, and permit us know what you recall. The only caveat? Best not use Labs features in your production environment, every bit they are likely to evolve with the feedback we receive from users like you lot!
Throughout this documentation, features that are available through App Layering Labs are marked (Labs) in the title. Most Labs features require enabling.
To find out which Labs features are available in this release, come acrossWhat'south New.
Go to System > Settings and Configuration

Select the Labs that u want to examination / activate. Click on Salve

More on Digital Workspaces in Azure?
This blog is part of a Citrix Cloud blog series about the unlike Citrix Deject Digital Workspaces possibilities. Previous articles that I wrote around the Citrix Cloud, that you might notice interesting to read:
- How to configure the Citrix Cloud XenApp and XenDesktop Service using Azure Managed Disks and Citrix Optimizer
- How to configure Citrix XenApp Essentials in Microsoft Azure, including Azure Active Directory hallmark to Citrix Cloud
- How to employ Citrix Smart Tools – Smart Scale to reduce your XenApp and XenDesktop on Azure Cloud resource costs
- How to configure a Bring-your-Ain NetScaler VPX in Azure for XenDesktop Essentials and XenApp and XenDesktop Service from the Citrix Cloud
- How to configure Azure Active Directory Domain Services for Citrix Cloud Workspaces with the everyman Total-Cost-of-Ownership in Azure Infrastructure-as-a-Service
That'south it for at present. I'll hope to see you back soon.
Cheers,
Christiaan Brinkhoff
Source: https://www.christiaanbrinkhoff.com/2018/01/19/how-to-configure-citrix-cloud-app-layering-4-8-to-deliver-virtualized-apps-and-office-365-caching-user-layers-for-xenapp-and-xendesktop-service-cloud-workspaces-in-microsoft-azure/
0 Response to "Xenserver Has Terminated the Upload of the Virtual Disk Unidesk Applayering"
Postar um comentário