How Do I Feed the Trees in Scream Collector
This particular Wiki page for Scream Collector has some tidbits on some aspects of the game, but is mainly dedicated to the achievements. Technical problems are usually tended to quickly enough and once fixed, are not worth mentioning anymore.
For future reference, rooms or "scenes" can be upgraded in time (as the developers update it to be so) to give and use different color Gems. This is NOT Resetting (which you'll do frequently), from the Spirit tab, but from the Map tab, between the tabs for achievements and Gem converting. When you do upgrade a scene, convert all Gems it currently uses to the next highest color. If you don't, you'll lose all Gems currently owned for that scene upon upgrade. This comes at a great cost; it can all be built up again, but this is really for those who are in this for the long run. Same for all future Scenes when they become available for upgrading.
It's still a good idea to keep accumulating lower grade Gems, as they add up quicker than you think and can be converted for higher grade Gems. I personally recommend against buying the four Gem upgrades at the end of the Gem tab that cost 1,500 - 3,000 Gems until you'll never upgrade that room again, you don't mind accumulating the 9,000+ Gems per room, or all locations are made by the developers. Since they seem to add one room a year, this may take another decade; I'm not kidding. There can potentially be a dozen rooms when you look at the house from the outside.
"SCENES"/LOCATIONS
Entry Hall
In the Dark
Sticky Situation
Burn the Rainbow
Bashing Skulls
Snap
What Time Is It?
Behind Closed Doors
I Fall To Pieces
Very Good Sir
Stop Touching Me!/Poof!/Roar!
Spelling
Other Notables
Dungeon
Exterminator
Tiny Invaders!
Pour the Rainbow
Imprisoned!
Miracle Grow
Brilliant!
Safe Cracker!
Frozen Solid?
Strange Harvest
Super Smasher!
I'm Not Ticklish!
Bouncy
On Target
Overgrown Plant
It's Alive!
Bunker
Seeker
Surfer!
~~1st area: Front Yard~~
"Screams" are the currency here, blue Gems are the Special currency and Spins are the chance prize currency.
After buying the Moon in the yellow arrow tab, every so often, a giant, black Boogie Man silhouette will appear on the Moon. Click it, and 5 Bats (separate from the "Squeak" achievement) will fly in different directions, each giving a random little reward when clicked.
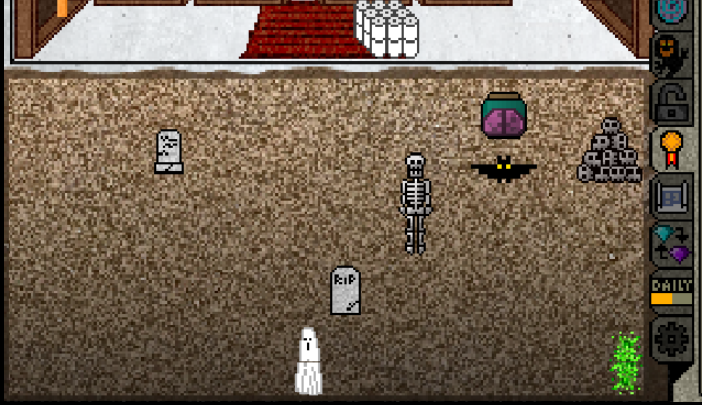
Complete Front Yard; picture on the right has the 10 things, outlined in light blue, that appear upon reaching each 2,000 unit quota. Most are an extra thing of itself; the unique ones are: Spooky Tree - bigger tree, Ghost - tall Ghost wanders back and forth behind the graveyard, Zombie - a third dirt pile near the tentacle monster, Mad Scientist - Satellite Dish.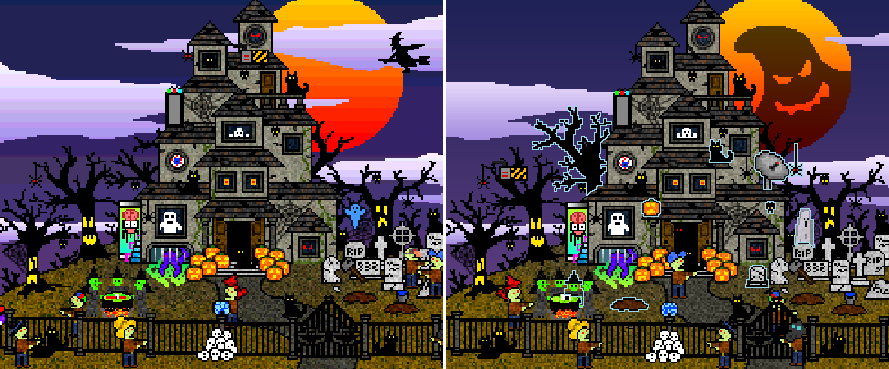
Achievements - Some of the more difficult ones.
"Squeak" - Explode Bats by clicking them. More come out from behind the house the more Bat quotas reached, for a maximum of 5 per "wave", and you get a Gem every time you manage to click all 5.
1 Bat per wave at 50 bats owned
2 at 200
3 at 500
4 at 800
5 Bats per wave at 950 Bats owned.
This is what the Ghost Trap looks like.
(Back To Top)
"Ghostbusters" and "Capture the Rainbow" - Buy at least 25 Tombstones and 250 Ghosts. At this point, the Ghost Trap will start appearing and colored Ghosts will randomly replace some regular Ghosts. More Tombstones will have Ghosts rising from them the more of both quotas you reach. Also, each color always gives a specific reward.
Red = 2 Spins
Orange = Click Bonus
Yellow = Speed Bonus
Green = Income Bonus
Purple = Screams/Income; 100 times your current income per click
Blue = 1 Gem
"Smashing Pumpkins" - Buy at least 100 Jack-O-Lanterns; soon a Hammer will appear. Click it, then click again to swing it down on a Jack-O-Lantern. It will always swing to the left, and will disappear early if it misses 5 times. After 3 Jack-O-Lanterns are smashed, they will reset to normal when the Hammer spawns again. Also, upon smashing the 3rd one, you get a Gem.
(Back To Top)
"I'm Melting" - Buy at least 50 Witches and 100 Zombies for a bucket of water to appear on one of the mounds of dirt on the ground on the right side of the screen. Click the bucket and click it again over a Witch on the ground by the cauldron, or soaring through the air, if your timing is good. If your timing and placement are just right, you can nail two Witches with one bucket, one in the air and then one below that.
"Yummy" - Buy at least 750 trees for the first one to get a face, at least 25 Zombies and at least 200 Witches to get the cauldron making apples and eyeballs. Feeding either "food' to either creature will count as "fed" for the achievement, but they have their preference, and will make a "gyuuck!" sound if they don't like it. Only feeding eyeballs to Zombies and apples to Trees will get you a Gem/Spin/Bonus.
"Watching Windows" - After building up the house to where all the windows are present, in time, a random window will start to flash red. Click that to play Simon. You don't have to play to a certain score; losing anytime, even right away, will count as played.
(Back To Top)
(These next three are different levels of the same achievement square)
"AWOOOOOO!" - Buy the Moon in the yellow arrow tab.
"Eye Scream" - Buy the giant eyeball in the yellow arrow tab and click it.
"Electrifying" - After building the house to where the lightning rod appears on the very top, you have to click the lightning rod to make lightning strike it. This is useless after the first time you do it, for the achievement.
"The End?" - Save up 150 Gems and buy the Front Door Key in the Tools tab (tab with the hammer), reach all quotas in the padlock tab and buy every house and other upgrade in the yellow arrow tab, then click on the front door.
"Chills" are the currency here, purple Gems are the special currency and Scratch Tickets are the chance Prize currency.
Achievements
"In the Dark" - click lit candlesticks; every 10 you click gives you a purple Gem. The more you own, the quicker the achievement and getting a Gem.
(Back To Top)
"Sticky Situation" - Meet Black Widow quotas for red spiders and webs to start appearing. There are the maximum of 5 of each around the room. A Broom will start appearing from the first quota met, but rewards upon sweeping all Spiders/Webs present at the time will be better the more there are.
Click the Broom and swipe Spiders/Webs with the brush end. You can do it in a way that the brush sweeps across whatever you're trying to get, but it's easier to just place the end of the bristles on the target and click. Sometimes this glitches in a way that makes a spider or web uncleanable, usually the one hanging from the chandelier. This fixes/resets itself next time the Broom appears; below is the general hitbox sweep range.
Sweep range for Spiders and Webs.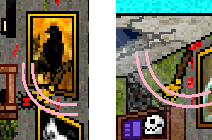
(Back To Top)
This is a Wisp.
"Burn the Rainbow" - Buy the Fireplace and Fireplace Fire from the yellow arrow tab and at least 600 Ghouls. When a Wisp appears, click and drag it to the fireplace. To get the different colors, wait; the wisp keeps randomly changing after a moment. Also, each color always gives a specific reward.
Red = Scratch Ticket
Orange = Click Bonus
Yellow = Speed Bonus
Green = Income Bonus
Blue = Chills/Income; 100 times your current income per click
Purple = Gem
Sword striking a Skull.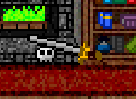
"Bashing Skulls" - Buy the Swords and Shield from the Haunted House Upgrades in the yellow arrow tab and at least 25 Skulls. Best to buy 50 to use both Swords at once for faster achievement fulfillment. Swords will randomly appear in the Shield. Click them and hit any of the Skulls around the room.
Only the ending 1/3 of the blade will count as hitting it, and it will disappear early if you miss 5 total times before hitting anything, just like the Broom and the outside Hammer. Smashed Skulls give rewards, but not nearly as often as doing other things, and they're nothing special. (If you're accurate enough with it, smack a mouse 2 or 3 times before hitting a Skull; funny stuff)
(Back To Top)
Zombie hand giving a mouse trap.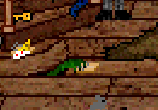
"Snap" - Buy at least 25 Rats and 500 Ghouls and a Zombie hand will appear intermittently under any of 5 or so floorboards, sometimes giving a mouse trap. Make sure to move the trap after it does, because if it comes from that same spot and a trap is there, the hand will take it back under.
Wait for Cheese to appear on the Butler's tray, click the Cheese and click a mouse trap to put the Cheese on it. Then click the trap with Cheese on it and place it in the path of a Mouse. You can also just place it right on top of a moving mouse and it will snap right away; snapped mice always give a purple Gem.
After all four bits are clicked. Click them again here.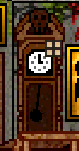
"What Time is it?" - Buy at least 100 Clocks; when 4 bits of paper appear on the floor, click them to get hints and click on the four bits now on the face of the Clock on the wall in front of the stairs on the 2nd floor to set the time. You don't have to pick up ALL 4 pieces to try setting the time. Sometimes, a piece will appear behind the Butler or somewhere you can't see or click.
(Back To Top)
"Behind Closed Doors" - Buy at least 25 Doors; wait for a gold key to appear and use it on any door(s). Rewards will be better the more Doors present for a total of 5. One of the 5 is always a monster, making you lose all you've won for that key if you don't click "Claim" before you find it. However, if you guess all four other doors without it, you will get double all you've won with that key.
Skeleton Building Order; "Easier Skeleton Assembly" will combine 4th and 5th steps.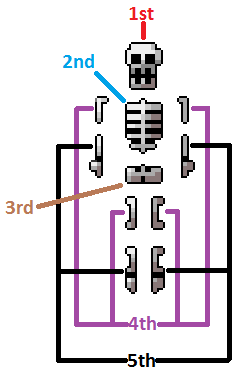
"I fall to Pieces" - Buy the Swords and Shield from the yellow arrow tab and at least 300 Ghouls and use the Swords on the Skeleton hanging from the chandelier 3 times. This will make it fall apart. Reassemble it; click and place the Skull first, then ribs, then hip, then upper arms or legs, then lower arms or legs. The "Easier Skeleton Assembly" will keep the normally eight pieces of the upper/lower arms/legs together in four whole limbs.
The leg bones have to be together like this. ][ You'll notice the arm and leg bones for the right side are a bit darker than the ones for the left side. This gives 1 purple gem, but if you're Gem hunting, it's more beneficial to Break the purple fireplace Urn for 4 Gems using 10 swords.
(Back To Top)
"Very Good Sir" - Buy at least 400 Ghouls and use the treats that appear on the Butler's tray. Like the apples and eyeballs with Trees and Zombies outside, using most treats on most things will count as used for the achievement, but each creature has their preference for giving Gems/Tickets/Bonuses.
![]()
Steak = Bear Rug
![]()
Eyeball = Skeletons or Skulls (Yes, they give BLUE Gems)
![]()
Cupcake = Ghost (100 Ghouls) going back and forth on the 1st floor or Ghoul (900 Ghouls) on the stairs.
![]()
Fly = Spiders
![]()
Garlic = Vampire

Cheese = Mouse (although, trapping them yields better)
(These next three are different levels of the same achievement square)
"Stop Touching Me!" - Buy at least 25 Ghouls and click all four tentacles at the bottom of the stairs to make them recede for a second. They all have to be off at once before any come back, so you have to be a bit quick.
"Poof!" - Buy at least 400 Ghouls, wait for Garlic to appear on the Butler's tray, then drag it to the Vampire's face when he comes out; this will not work when he's in Bat form.
"Roar!" - Buy the Bear Rug and at least 400 Ghouls, wait for Steak to appear on the Butler's tray, then drag it to the Bear Rug's head.
(Back To Top)
"Spelling" - Buy at least all of the following from the green $ tab: 25 Books, 25 Candles, 25 Paintings, 100 Clocks, 400 Pianos, 25 Rats, and 400 Ghouls; and from the yellow arrow tab: "Fireplace", "Fireplace Fire" and "Bear Rug" (costs 1 Nonillion; it's quite a ways up there if you're new enough to the room).
In time (10 minutes between spawns), one book on the shelf will start to glow. Click the glowing book and a scroll will appear with a list. These hint at what to click, which can be both in the Entry Hall and outside in the Front Yard. The list will follow you going back and forth to either of these rooms until you complete the list or click "GIVE UP" at the bottom of the scroll.
Complete Entry Hall.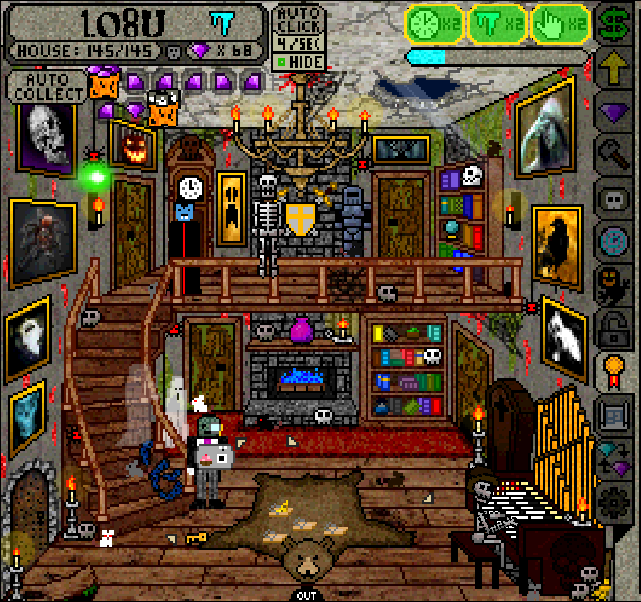
Some of these are difficult to figure out, so here is a more detailed list. Refer to the image above and at the top of the page. It's a long list, so it's in alphabetical order.
@ ENTRY HALL
"Dark Soot" - Fireplace.
"Dripping Wax" - Any Candlestick.
"Dry Paint" - Any Paintings on the walls.
"Fur of the Bear" - The Bear Rug.
"Hands of Time" - The Clock on the wall in front of the stairs, on the 2nd floor.
"Old Paper" - Any Books on the shelves.
"Optic Lens" - The Butler's Monocle.
"Rusty Shavings" - Suit of Armor on the 2nd floor.
"Silver of Ivory" - Gold pipes of the organ.
"Whiskers of the Rat" - Any of the many Mice wandering the floors.
@ FRONT YARD
"Brain Matter" - The Brain creature floating in a specimen tube next to the left side of the house.
"Bubbly Brew" - Green liquid in the Witch Cauldron.
"Catgut" - Any Cat.
"Cloud Mist" - Clouds.
"Dark Bark" - Any Tree.
"Drool of the Beast" - Green goo oozing from the tentacle monster coming out of the basement window.
"Electric Current" - (1) Orb on a pole in the pile of skulls by the fence, (2) The object on the left side of the roof that looks like some kind of standing mirror, (3) Lightning Rod at the top of the house.
"Eye of the House" - Giant Eyeball at middle-left of the house.
"Fresh Turned Dirt" - Either of the two mounds of dirt where zombie hands with the water bucket come up from.
"Seed of Pumpkin" - Any Jack-O-Lantern.
"Squeaky Hinge" - Front Gate.
"Stone of Remembrance" - Any Gravestone.
"Witch Wart" - The face of any Witch standing around the cauldron.
INSIDE: in the Entry Hall or OUTSIDE: in the Front Yard
"Bone Marrow" - INSIDE: Any Skeletons or Skulls / OUTSIDE: The pile of Skulls by the fence.
"Ectoplasm" - EITHER LOCATION: Any Ghost.
"Moon Beams" - INSIDE: Moonlight coming through the hole in the ceiling / OUTSIDE: The Moon.
"Rotting Flesh" - INSIDE: the Zombie hand that comes out from under the floor / OUTSIDE: Any Zombie.
"Spider Venom" - EITHER LOCATION: Any Spider.
"Web of the Spider" - EITHER LOCATION: Any Spider Web.
(Back To Top)
Other Things of Note
Reward Codes
There are codes you can enter in the gear tab (options) for various rewards.
All previous codes are invalidated as of November 21, 2017; these are the new ones. Since there haven't been any in years, it's unclear if these are even registered anymore, but it won't hurt to try them.
plymouthrock
butterball
felixthecat
ontheirfeet
frostbite
saintnickelless
silentnight
puddle
fleecenavidad
stinkstankstunk
Hunting Gems & Scratch Tickets
Tasks to do achievements will always give some kind of reward of Gems, Bonuses or Scratch Tickets, even after fully completing every one of them in the "achievements" tab.
Some only ever give purple Gems, like trapping Mice, clicking 10 lit Candlesticks, completing the list of click hints on scrolls from glowing Books, burning a purple Wisp, reassembling the hanging skeleton or breaking the purple Fireplace urn.
A couple only give Scratch Tickets, like Sweeping all 5 red Spiders/Webs and burning a red Wisp.
"Urn-ing Income" - The Will
Buy Haunted Urn (for 100 Nonillion; even further up there than the Bear Rug) in Haunted House Upgrades in the yellow arrow tab, and there will be a purple Urn on top of the Fireplace containing The Will, which increases click income x20 and gives you 100 purple Gems. It takes 10 hits from Swords, and after the first time, it gives 4 purple gems each break.
Book Income Speed - This is not a glitch
You may have noticed the orange meter for Book income is way slower than all the rest. However, the income is the second highest of all the income units (it's slower speed makes it yield 3rd or 4th highest). Additionally, you'll win the reward of whatever the random symbol it has in its orange gauge every time it fills.
(Back To Top)
~~3rd area: Dungeon~~
"Dread" is the currency here, green Gems are the special currency and Potion Tokens (for smashing potions) are the chance Prize currency.
Complete Dungeon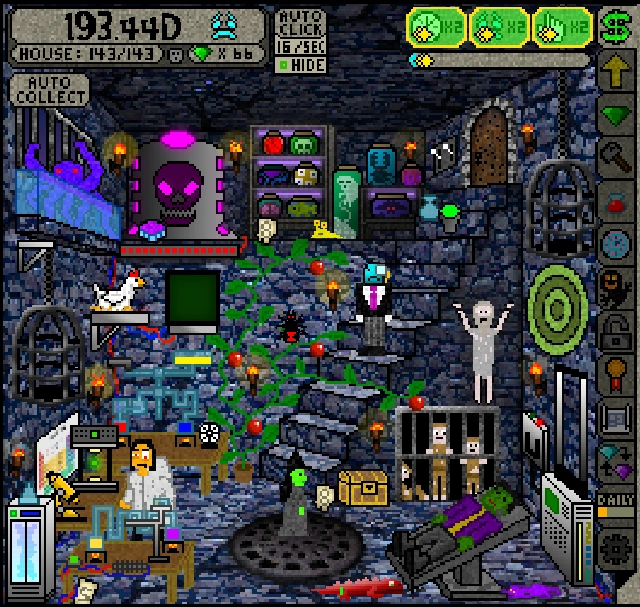
(Back To Top)
Achievements
"Exterminator" - Buy at least 25 Torches and 25 Creepy Crawlies. The more quotas of each, the faster the achievement will go. Click on a wall torch (the handle, not the flame), then click on a Critter wandering about (or on the wall). The hitboxes are right around their faces or eyes.
Creatures are listed in order of appearance per quota. Note: the Beetle and Centipede are a bit hard to see since their all black bodies blend them into the background after buying enough Bricks.
![]()
Beetle = 1 blue Gem (Yes, they're still giving them out)

Slug = 5 blue Gems

Queen Spider (on the wall) = 1 purple Gem
![]()
Cockroach = 1 purple Gem

Green Slime = 5 purple Gems
![]()
Striped Snake = cannot be torched
![]()
Centipede = 1 green Gem

Cobra = cannot be torched
![]()
Purple Goo = 2 green Gems
![]()
Salamander = cannot be torched
Petri Dish
"Tiny Invaders!" - Buy at least 300 Lab Equipment and soon a Petri Dish will spawn. Click the Petri Dish, then the now-glowing gold Microscope. You will now be in control of a syringe, although you can only move along the edge of the Petri Dish. Click to fire needles; you can only fire another when the first needle is gone from the screen.
The goal here is to "blast away" the purple Microbes (similar to the "Asteroids" game), and you will fail if any of them come into contact with the Syringe. Success will give you a green Gem. Buying at least the first Faster Firing upgrade in the Gem tab will make this a lot less frustrating. Its final Gem upgrade Triple Shot fires in a "V"
shape and will make it very easy; you'd have to try to lose then.
(Back To Top)
Bottle
"Pour the Rainbow" - Buy at least 500 Lab Equipment and 25 Experiments. When a Bottle spawns, click it, then click two colors on the potion table or the same color twice. Yes, several of these color combinations aren't real-life accurate. The six colors for the achievement are:
Red + Blue = Magenta
Blue (twice) = Blue
Blue + Yellow = Green
Yellow (twice) = Yellow
Yellow + Red = Orange
Red (twice) = Red
There is also:
Black (twice) = Black
Black + Red = Pink
Black + Blue = Indigo
Black + Yellow = Pearl
Color Wheel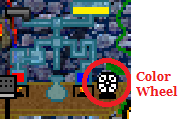
Potion Rewards and the Color Wheel
Each color will yield a result unique for that color every time until the Color Wheel resets, upon which each color's result will be randomized for another 8 brews, though it may be the same again for some colors sometimes.
The possible results are:
Dread
Income Bonus
Speed Bonus
Click Bonus
Blue Gem (Yes, they're still giving them out)
Purple Gem
Green Gem
2 Potion Tokens
1 of Everything (Speed/Income/Click bonus, 1 Potion Token and 1 of each Gem)
As for the Color Wheel, its 8 segments will keep filling with the color potion you just brewed. This is only meaningful if you fill it with 8 of the same color potion. Upon brewing the 8th segment, you will get x10 of whatever reward you've been getting from the previous 7 brewed segments, as long as they are all the same color.
Cage-lowering Levers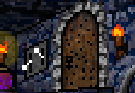
"Imprisoned!" - Buy at least 200 Prisoners, and a white lever will appear just to the left of the entrance door. At 700 Prisoners, it will be a pair of levers. You'll also notice two ceiling-chained cages from previous Prisoner quotas. Click a lever to lower a cage on their respective sides onto a wandering creature when one gets close enough to it. The best time to lower a cage is when their heads are right below the outside of it.
While captured, the left side of the orange income gauge for Prisoners will have a box showing a + 5% income increase for each Prisoner held at once; more with Gem upgrades, up to +25% for each (still not worth it for income after getting the max achievement, IMHO). Any creature captured will wither or fade from existence in a short time. They will live longer if you feed them fruit from the Vines, but a green Gem (to feed Prisoners or creatures) is worth more than the temporary and low level Prisoner income increase.
The creatures wandering around to capture are:

Ghost

Vampire
Witch

Zombie

Butler
(Back To Top)
Flask
"Miracle Grow" - Buy at least 850 Experiments; soon, a Flask will spawn. Click it, then click the flashing green/yellow light on the bottom-left-most table with the yellow and magenta potions. This table needs 3 Generator energy for every mix. Click the resulting potion, then you can click:
Critters (the same as you would do with a Torch or Ice Bucket)
The Chicken
Wandering creatures
Caged Prisoners
The Assistant
Sorry though, this will NOT work on the Tentacle Monster.
Anything enlarged gives a Potion Token upon returning to normal size after about 10 seconds. Torching and freezing rewards are also doubled if you strike while enlarged; frozen critters will stay enlarged. :) Enlarging the Striped Snake, Cobra or Salamander will NOT allow them to be torched. :(
"Brilliant!" - Buy at least 250 Experiments and 25 Generators, and click the black box that appears near the Chicken to start Tic-Tac-Toe. Depletes 3 units (little red boxes of the generator gauge) per game. You'll get a Feather and a green Gem for every win, which is usually pretty easy. The Chicken seems to place its "O" randomly most of the time. The Feather is for another achievement, and only one will ever be present at a time.
(Back To Top)
Random Lock Numbers for the Chest
"Safe Cracker!" - Buy Treasure Chest in the yellow arrow tab (1.1 SX). In time, three pieces of paper will appear with numbers on them. This is, of course, the combination to the Chest, and will give you a green Gem each time. Just match the numbers in the same order as the lined up pieces of paper by clicking the arrows above and below the number reels, then click the button to their right.
NOTE: (likely a bug) While you're doing this, dripping water will drop past the Bucket as though it's not there, even if it IS right underneath.
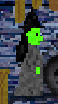
Water being Frozen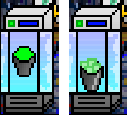
"Frozen Solid?" - Buy "Dripping Water" (11 T) and "Water Bucket" (11 QA) in the yellow arrow tab and at least 1,200 Lab Equipment (the maximum quota) and 1,150 Experiments (the maximum quota). The Freezer will appear in the very bottom-left corner of the game screen. Fill the Bucket with water, but don't water the Vine. Click the Freezer to open it, then put the full Bucket inside. Click the yellow square on its top-left (I know, it's very small) and the gauge on its right will fill from green to blue; this requires 3 Generator energy. When it's done, click the Freezer, then the Bucket, then click right above a Critter's head to freeze it, then click the Critter to shatter it.
Cobra Being Frozen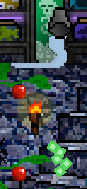
There doesn't seem to be a limit to how long they stay frozen. However, you can only have one of each Critter frozen onscreen at a time. The same ones will come out like they always do, the Ice Bucket just won't do anything to them if one of their kind is still frozen. Just like the bucket of water with the Witches outside, the ice cubes keep falling all the way to the bottom of the screen, allowing you to freeze more than one Critter if they happen to be below the ice cubes when they fall down the screen.
The rewards are as follows:
Salamander - 5 green Gems
Cobra - 3 green Gems
Striped Snake - 2 green Gems
every other Critter - 1 green Gem
(Back To Top)
Bucket
"Strange Harvest" - In the yellow arrow tab, buy "Dripping Water" (11 T) to make water drip from the ceiling, "Water Bucket" (11 QA) to make the Bucket spawn every so often and "Vines" (11 QI) to make a plant pot appear near the bottom of the stairs. Place the bucket below the drip from the ceiling. You can set it down on a surface if you click with the bottom of the Bucket level with the surface you want to set it on.
Full Bucket
Wait until it fills all the way (as shown to the right), click the Bucket, then click on the potted plant pot to water it. Don't worry if you misclick, the bucket will appear in another random spot right after disappearing below the screen, with all accumulated water still there. Every time you water the plant, the size of it will increase a gradual amount. In time, red fruits will spawn on the vines. Click a fruit and feed them to caged prisoners or creatures wandering around for 1 green Gem, or the Lab Assistant for a Potion Token. Interestingly, you can still feed fruit to the hanging prisoner for a green Gem even when he's a skeleton. :D
"Super Smasher!" - This isn't saying to smash every kind of bottle there is, as far as shape/color, but to smash all 9 bottles in the 9x9 case (so it's empty) in the red potion tab without Refreshing. This means you'll have to wait until you have at least 55 Potion Tokens at once, as it takes 2 Tokens to smash a 2nd consecutive time, 3 Tokens to smash a 3rd consecutive time, and so on up to 9.
(These next five are different levels of the same achievement square)
"I'm Not Ticklish!" - Buy at least 250 Experiments and 50 Prisoners. Win at TIC-TAC-TOE to make a Feather spawn with the Chicken. Click it, then click the hanging prisoner. Repeat this 3 times; you'll also get a green Gem.
(Back To Top)
Goo Maker Making Goo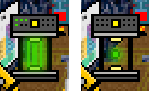
"Bouncy" - Buy at least 500 Experiments for the Goo maker to appear. When Generator has at least 3 energy, click the little square on the top to of the Goo maker to start filling the twelve smaller squares. When they are filled, click the little green sphere that is now floating in the Goo maker, then click anywhere onscreen. It doesn't matter where, because it's not something that's predictable. Its trajectory and destination are randomly generated every Goo throw, but it's also programmed to make sure certain targets are hit every so often.
These include:
The Big Green Target - Gems (shown below)
Generator - one unit of energy
Chicken - spawns Feather; it's a bit hard to click on with the goo splat, but it can be.
Tentacle Monster - Massive 5-second Generator boost; gives at least 1 energy.
Any other surface - 1 green Gem
Target Rewards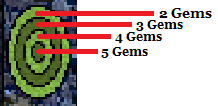
"On Target" - This is done the same as this square's previous achievement: "Bouncy", except now it's to hit the green Target on the right-side wall. The target must be the final place it splats. Just keep throwing Goo until it happens. :\
If you get lucky and it hits the target, it will give 2 - 5 green Gems, more the closer to the center it hits.
Fully Grown Vines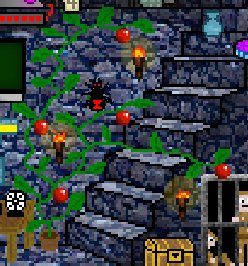
"Overgrown Plant" - Same as "Strange harvest"; simply continue watering until the plant looks like the picture to the right. Every Bucketfull after that will yield 1 green Gem.
"It's Alive!" - Buy at least 1,100 Generators (the maximum quota), 750 Lab Equipments and 900 Monsters (the maximum quota). Click the throw lever on the wall just behind the Frankenstein monster's head to make it come alive. Monster income will be increased by 10% during this duration.
NOTE: The energy of the Generator must be completely full, which will all be consumed for this. (thanks to "hofdiddy" for this one)
(Back To Top)
"Preparedness" is the currency here, TP (Toilet Paper; not the 3x3 double stack you click for income) the special currency and Scratch Tickets are the chance Prize currency.
This seems to be an improvised "filler" area made off the appearance of Covid-19, so there isn't much to it.
Complete Bunker.
Achievements
"Seeker" - This will likely be the best and fastest consistant source of Scratch Tickets, TP and boosts for a good while early on. Buy at least 25 Water, and a Water Bottle will appear every so often near the ladder. This achievement will go faster the more Water Bottles at a time there are, +1 for every Water quota met. Click a Water Bottle, then click anywhere on the dirt ground below to reveal a "tile". Water Bottle will be lost if you click on anything except uncleared soil 5 times. There are always eight total of the same "discoveries" to uncover with various Boost/Scratch Ticket/TP rewards. Uncovering all eight of these will rebury the entire soil and discoveries will be randomly placed in new spots. Refreshing web page/closing browser (but NOT going to other rooms) will also reset the whole thing.
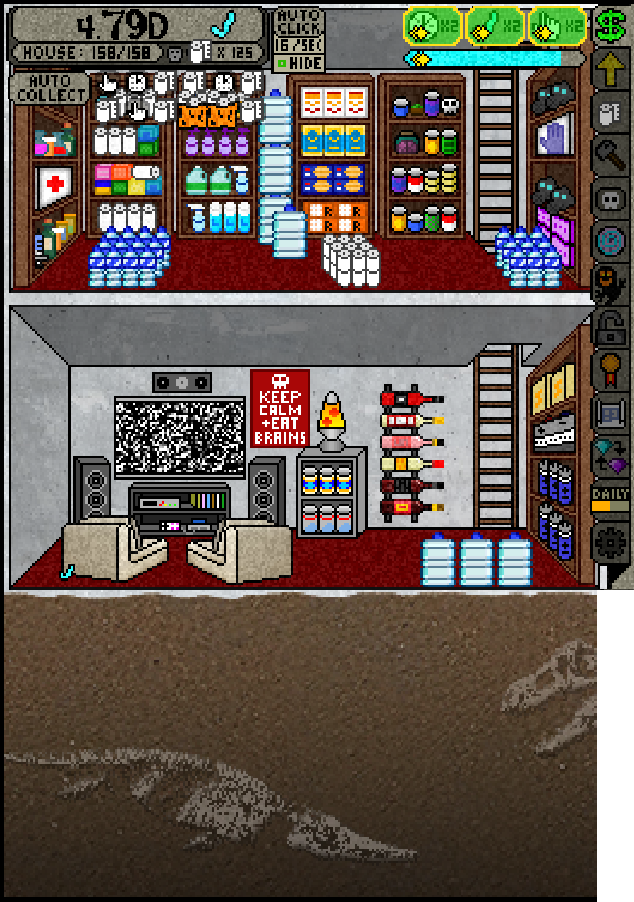
Cleared excavation dirt.
When you buy "2nd Level" from the Yellow Arrow tab, to add a 2nd lower Bunker room, it will be where the dirt is, and the dirt will be moved down below that. At that point, when you click on a Water Bottle, it will automatically move the screen down to the dirt, then automatically move back up one second after clicking the dirt to use currently selected Water Bottle.
"Surfer!" - Buy "2nd Level" from the Yellow Arrow tab and at least 25 Entertainment, and a big, wall-mounted T.V. will appear. Every so often, it will go snowy with static. (Note below) Click it; the number of times you can click it before it goes black for a while varies randomly from 1 - 10.
(Note) This is actually an anachronism, as only older televisions did this, when not on a particular broadcast channel. Interestingly, that is the T.V. antenna's visual and audio translation of the background radiation of the Universe.
(Back To Top)
THIS AND MANY MORE ROOMS TO COME...(Hopefully)
Source: https://scream-collector.fandom.com/wiki/Scream_Collector_Wiki
0 Response to "How Do I Feed the Trees in Scream Collector"
Postar um comentário